Starting with the release of Strategy ONE (March 2024), dossiers are also known as dashboards.
New Features & Functionality
Add row and column level security to your data directly from Strategy Workstation
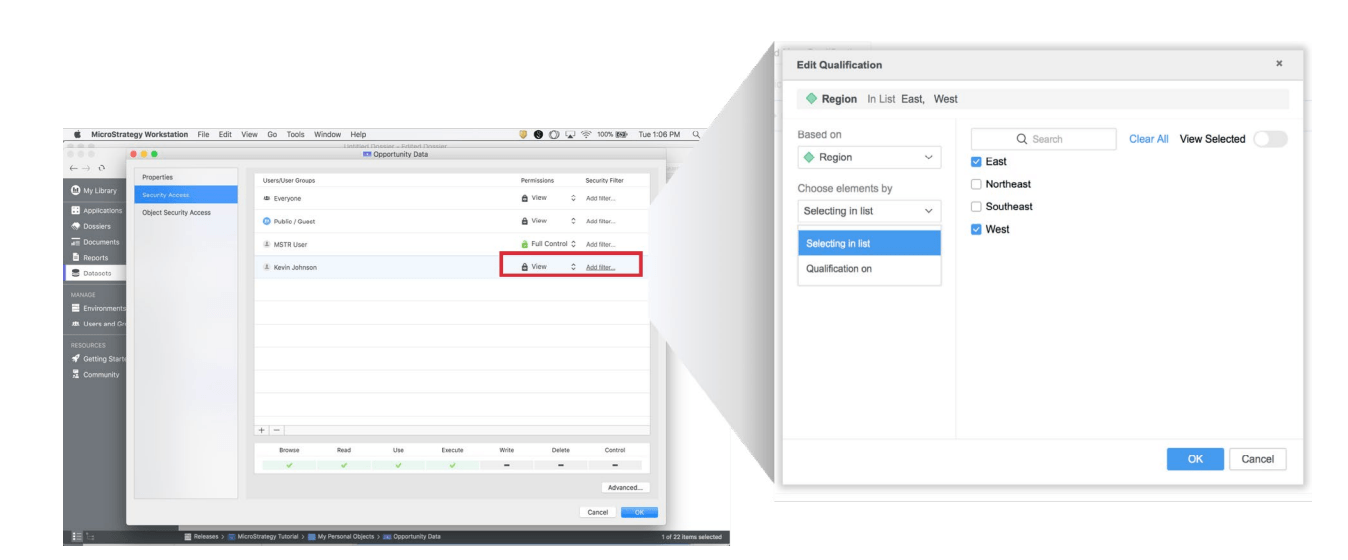
Administrators can create and apply security filters directly from Workstation that limit the data that users can see when accessing a dossier or dataset. Administrators and developers who use Workstation to create and publish datasets or dossiers on a server can now personalize the content for a specific end user. With a simple interface, administrators can now not only create users on Workstation, but can also assign and control security access to every user. Security can be assigned at the row level via security filters to control what row-level entries the end user can access.
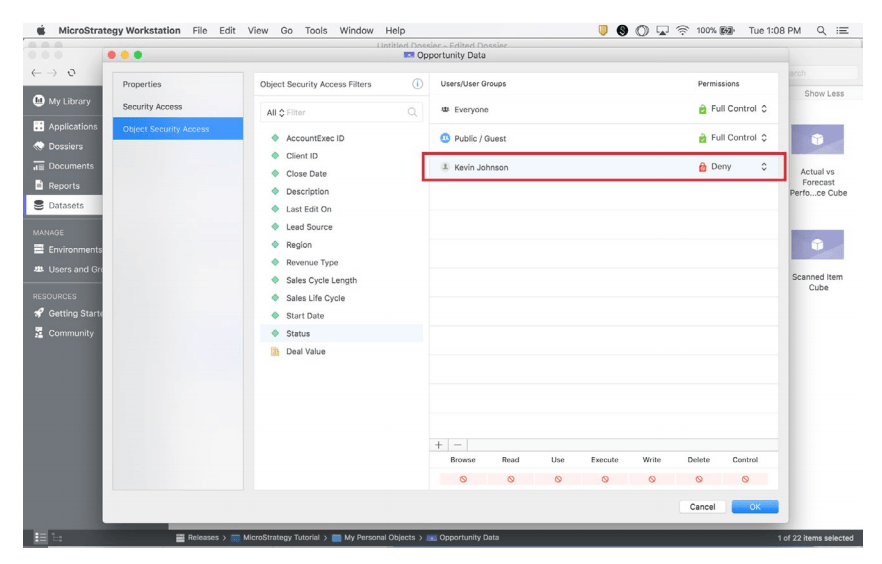
Additionally, administrators can also assign “Object Security Access” to any user. This filter allows administrators to add security at the column level and control which attributes and metrics users are able to see.
Get started with these next few steps
1. Open Workstation (and connect to your environment)
2. Find the dataset you want to edit access
3. Right click the dataset and choose Get Info
4. Select Security Access on the left bar
5. Find the user or group you want to restrict access for
6. Click Add Filter under Security Filter
7. Choose the attribute and choose the filter criteria
8. Test by logging in as that user and ensure they are seeing the limited data
For detailed step-by-step instructions, read the Product Documentation on protecting confidential data through row level security. Watch this video to see the steps in action.