EducationSoftwareStrategy.com
StrategyCommunity

Knowledge Base

Product

Community

Knowledge Base

TopicsBrowse ArticlesDeveloper Zone

Product

Download SoftwareProduct DocumentationSecurity Hub

Education

Tutorial VideosSolution GalleryEducation courses

Community

GuidelinesGrandmastersEvents
x_social-icon_white.svglinkedin_social-icon_white.svg
Strategy logoCommunity

© Strategy Inc. All Rights Reserved.

LegalTerms of UsePrivacy Policy
  1. Home
  2. Topics

KB484197: Connect MicroStrategy to a Yellowbrick database


Rambo Qian

Quality Engineer, Principal • MicroStrategy


This article explains how to easily connect to a Yellowbrick database and use it as your data warehouse.

Starting with the release of Strategy ONE (March 2024), dossiers are also known as dashboards.

Description

In Strategy 2020 Update 2, the Yellowbrick connector was introduced. This out-of-the-box connector allows users to easily connect to the Yellowbrick database and use it as your data warehouse.
Note: If you are using a Strategy version prior to 2020 Update 2, see this article. 
Create a DSN in Windows

  • If you are running Intelligence server on a Windows platform, using Workstation for Windows, you can create a DSN to point to the Yellowbrick database. Strategy uses the PostgreSQL native driver to connect Yellowbrick. The driver is shipped along with Strategy.
    Prior to the 2019 release, users had to install version 10 or 11 of the PostgreSQL native driver themselves in the Intelligence server host or the machine running Workstation.
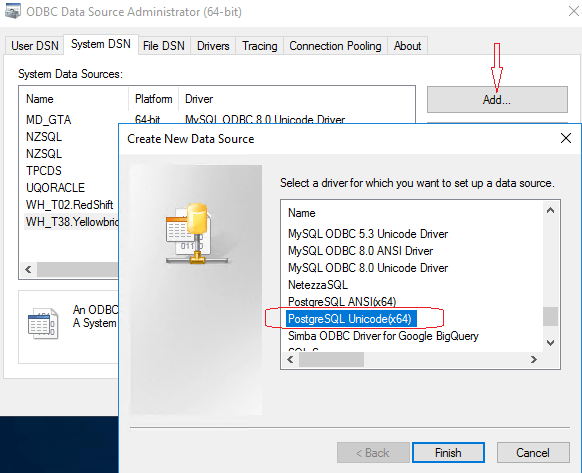
  • In Windows, open the ODBC Data Source Administrator (64-bit).
  • Open the System DSN tab.
  • Click Add.
ka0PW0000001JcyYAE_0EM2R0000019do2.jpeg
  • Choose PostgreSQL Unicode(x64) and click Finish.
  • Enter the Data Source, Database, Server, and Port.
ka0PW0000001JcyYAE_0EM2R0000019do7.jpeg
  • Data Source A name for the data source you are going to create. Choose a simple and user-friendly name.
    Database The name of the database you are connecting to.
    Server The name of the server you are connecting to.
    SSL Mode Choose require if SSL encryption is required by the server.
  • Enter the User Name and Password and click Test to test connectivity to the target Yellowbrick instance.
ka0PW0000001JcyYAE_0EM2R0000019doC.jpeg

Create a DSN in Linux

  • If you are running Intelligence server on a Linux platform, you need to manually add the DSN information to the odbc.ini file that is located in the home path of the Intelligence server installation. See an example DSN in odbc.ini below.
    
    [ODBC Data Sources]
    WH_T38.Yellowbrick=PostgreSQL Unicode(x64)
    
    [WH_T38.Yellowbrick]
    Driver=/usr/pgsql-11/lib/psqlodbcw.so
    Description=PostgreSQL Unicode(x64)
    Database=xxxxx
    Servername=xxxxxxxxxxxxxx
    Port=5432
    Protocol=9.3
    ReadOnly=No
    RowVersioning=No
    ShowSystemTables=No
    ConnSettings=
    DriverUnicodeType=1
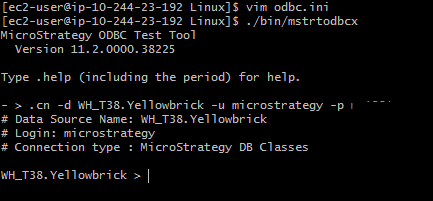
    

  • When the DSN is ready in odbc.ini, run mstrtodbcx to test connectivity.
ka0PW0000001JcyYAE_0EM2R0000019doH.jpeg

Connect to Yellowbrick from Web or Workstation Using the DSN Connection

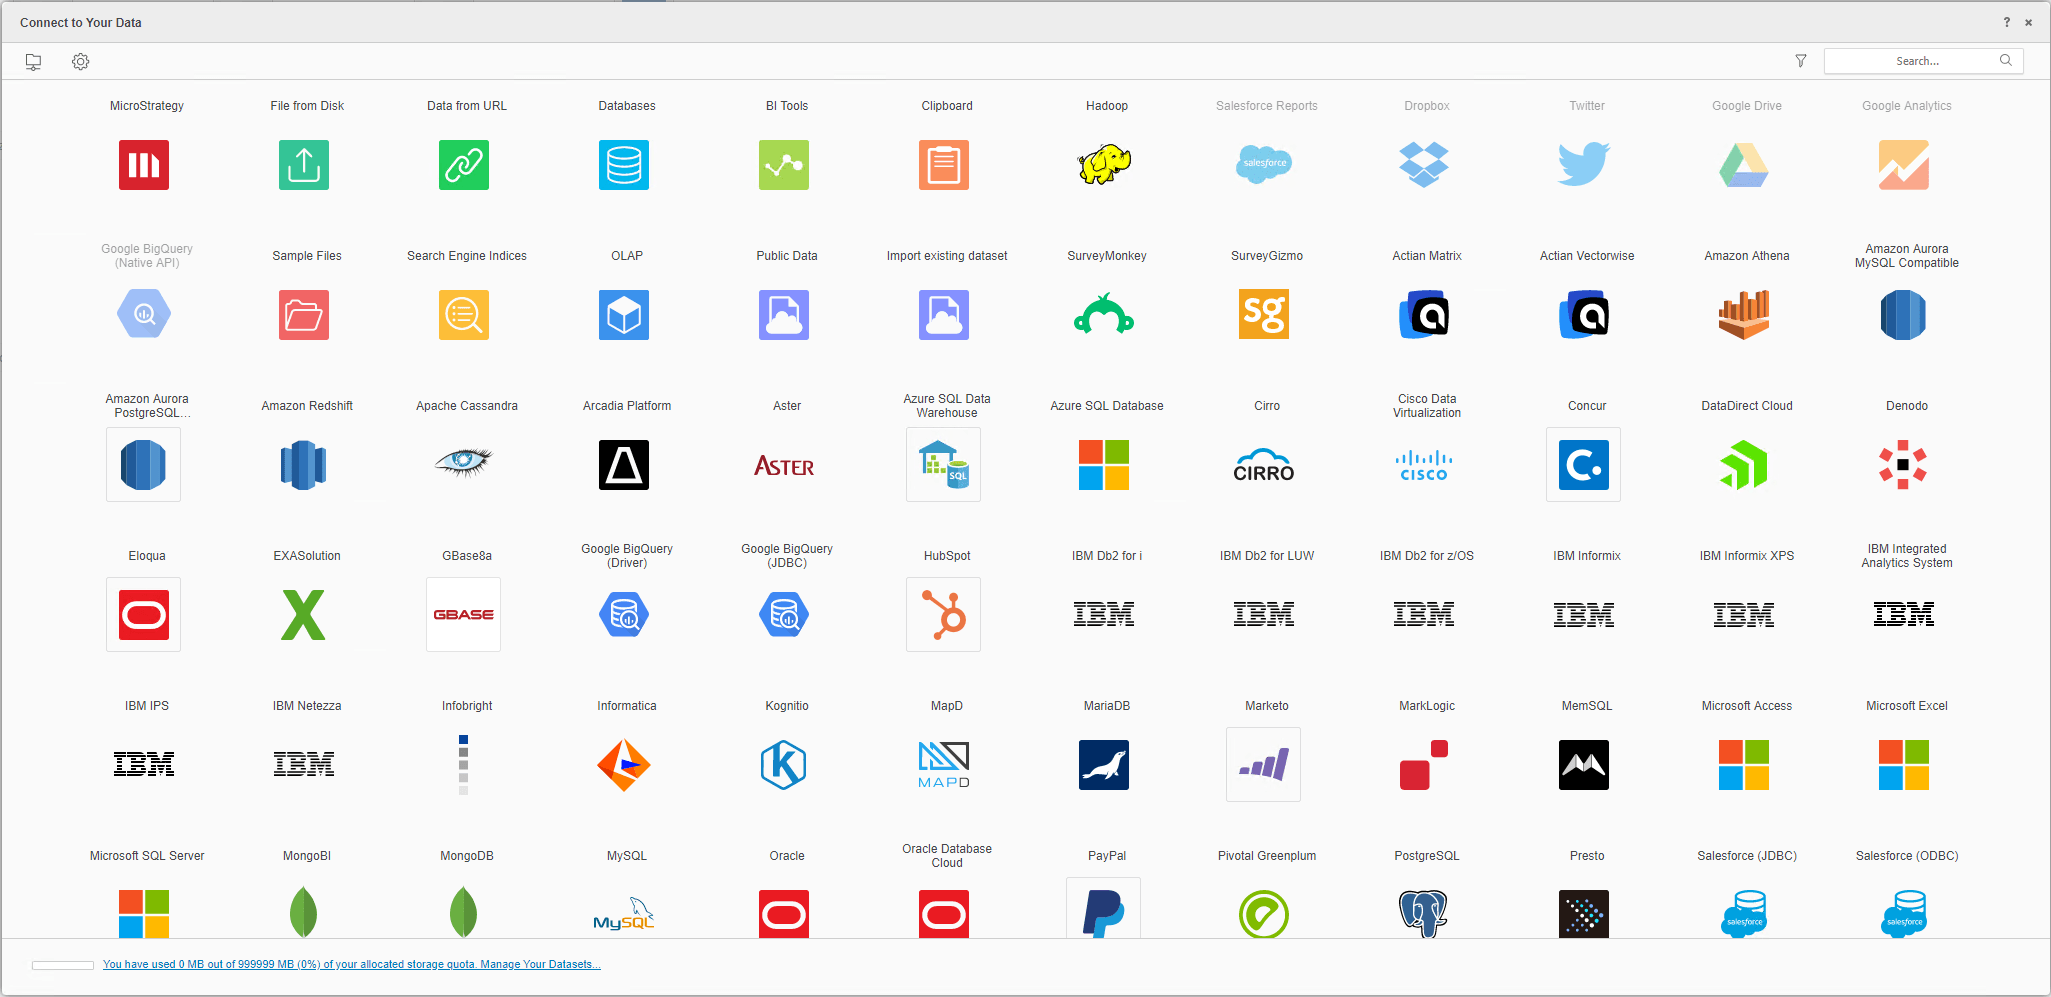
  • Choose Add Data
ka0PW0000001JcyYAE_0EM2R0000019doq.jpeg
  • > Add New Data.
ka0PW0000001JcyYAE_0EM2R0000019drG.jpeg
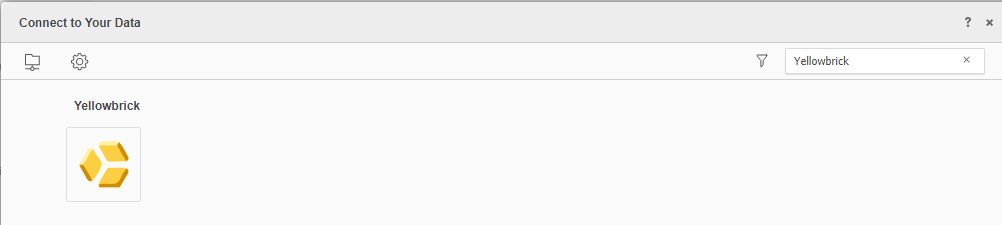
  • Search for Yellowbrick.
ka0PW0000001JcyYAE_0EM2R0000019drQ.jpeg
  • On the Import from Table dialog, click the plus icon to add a new data source.
  • Choose DSN Data Sources.
ka0PW0000001JcyYAE_0EM2R0000019ePr.jpeg
  • In DSN, select the DSN you created.
  • Enter the user name and password to log into the Yellowbrick instance.
  • Enter the new data source name in Data Source Name and click Save.
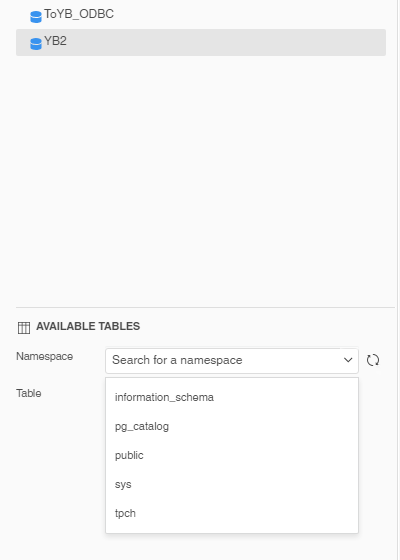
  • Click on the newly created data source to check connectivity.
ka0PW0000001JcyYAE_0EM2R0000019ePw.jpeg
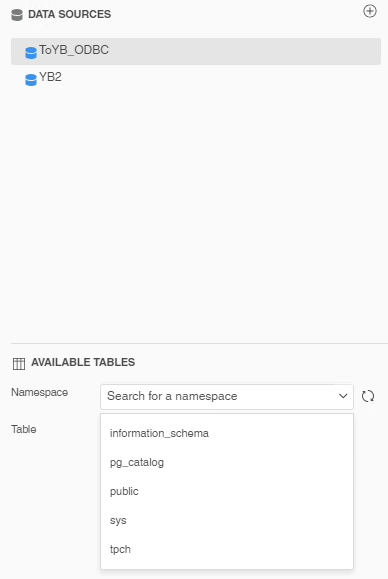
  • If the data source works properly—the catalog information for namespace and table are listed correctly—you can use the data source to create a dossier in Web or Workstation.

Connect to Yellowbrick from Web or Workstation Using a DSN-less Connection

  • Choose Add Data
ka0PW0000001JcyYAE_0EM2R0000019doq.jpeg
  • > Add New Data.
ka0PW0000001JcyYAE_0EM2R0000019drG.jpeg
  • Search for Yellowbrick.
ka0PW0000001JcyYAE_0EM2R0000019drQ.jpeg
  • On the Import from Table dialog, click the plus icon to add a new data source.
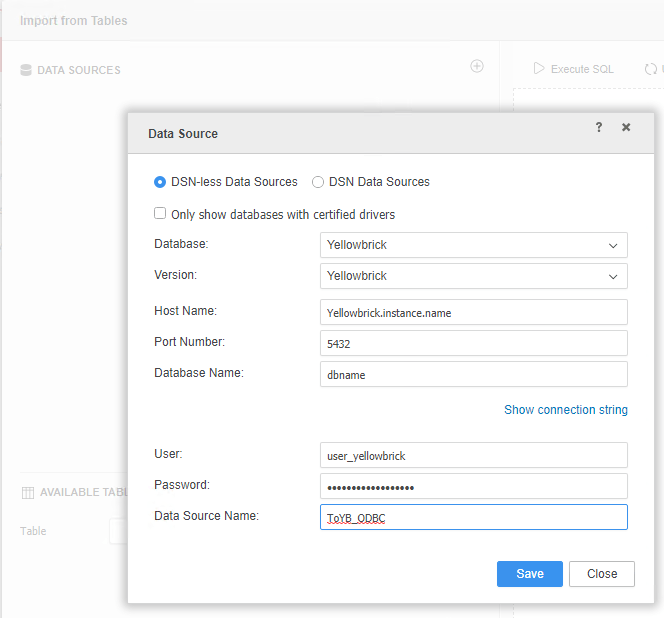
  • Choose DSN-less Data Sources.
ka0PW0000001JcyYAE_0EM2R0000019eQQ.jpeg
  • In Database and Version, enter Yellowbrick.
  • Enter the Host Name, Post Number, and Database Name.
  • Enter the User, Passsword, and Data Source Name and click Save.
  • Click on the newly created data source to check connectiivity.
ka0PW0000001JcyYAE_0EM2R0000019eSb.jpeg
  • You can also directly input a DSN-less connection string to create a new data source. In Connection String, enter the ODBC or JDBC connection string to the Yellowbrick database.
    ODBC Connection String:
    
    DRIVER={PostgreSQL Unicode(x64)};Servername=Yellowbrick_Instance_NAME_OR_IP_ADDRESS;Port=Yellowbrick_Instance_Port;Database=dbname;DriverUnicodeType=1;UseDeclareFetch=1;Fetch=10000;

    JDBC Connection String
    
    JDBC;DRIVER={org.postgresql.Driver};URL={jdbc:postgresql:// Yellowbrick_Instance_NAME_OR_IP_ADDRESS: Yellowbrick_Instance_Port /DATABASE_NAME};

ka0PW0000001JcyYAE_0EM2R0000019eTe.jpeg

Connect to Yellowbrick from Developer

In Developer, use the DSN you previously created to create a new data instance. This process consists of three steps: creating the database instance, creating a database connection, and configuring and storing credentials. You can also create a DSN-less database instance in Developer, using a JDBC or DSN-less ODBC connection.

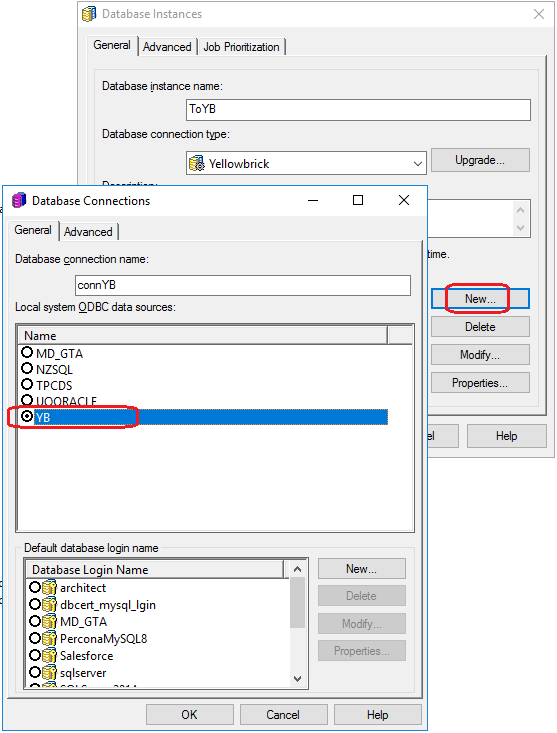
  • Create a new database instance and select Yellowbrick as the Database connection type.
ka0PW0000001JcyYAE_0EM2R0000019edZ.jpeg
  • Create a database connection that points to the DSN that was previously created in the Windows ODBC Admin tool or in the odbc.ini file on the Linux platform.
ka0PW0000001JcyYAE_0EM2R0000019ede.jpeg
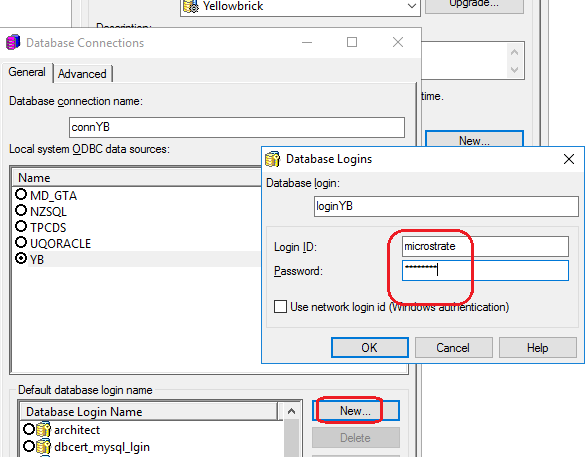
  • Configure and store credentials for the login that has privileges to access the target Yellowbrick database.
ka0PW0000001JcyYAE_0EM2R0000019edj.jpeg
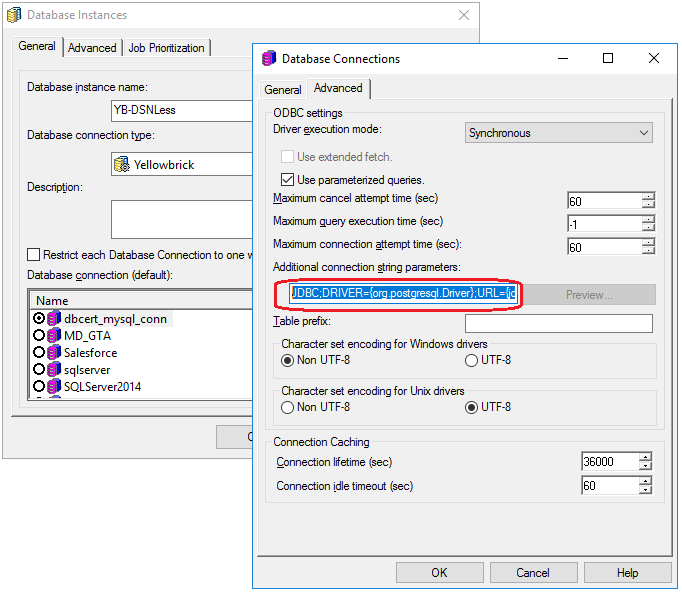
  • Configure the DSN-less connection to use the JDBC driver or ODBC DSN-less connection. Open the Advanced tab. In Additional connection string parameters, enter the JDBC or ODBC DSN-less connection string. Then configure the remaining settings as necessary.
ka0PW0000001JcyYAE_0EM2R0000019edo.jpeg

Comment

0 comments

Details

Knowledge Article

Published:

April 22, 2020

Last Updated:

March 21, 2024