EducationSoftwareStrategy.com
StrategyCommunity

Knowledge Base

Product

Community

Knowledge Base

TopicsBrowse ArticlesDeveloper Zone

Product

Download SoftwareProduct DocumentationSecurity Hub

Education

Tutorial VideosSolution GalleryEducation courses

Community

GuidelinesGrandmastersEvents
x_social-icon_white.svglinkedin_social-icon_white.svg
Strategy logoCommunity

© Strategy Inc. All Rights Reserved.

LegalTerms of UsePrivacy Policy
  1. Home
  2. Topics

How to Connect to Presto


Community Admin

• Strategy


Description

This knowledge base article will review Presto, an open source distributed SQL query engine for running interactive analytic queries against data sources of all sizes ranging from gigabytes to petabytes. Presto was designed and written from the ground up for interactive analytics and approaches the speed of commercial data warehouses while scaling to the size of large organizations. To put this in perspective, imagine companies like Apple or Facebook.
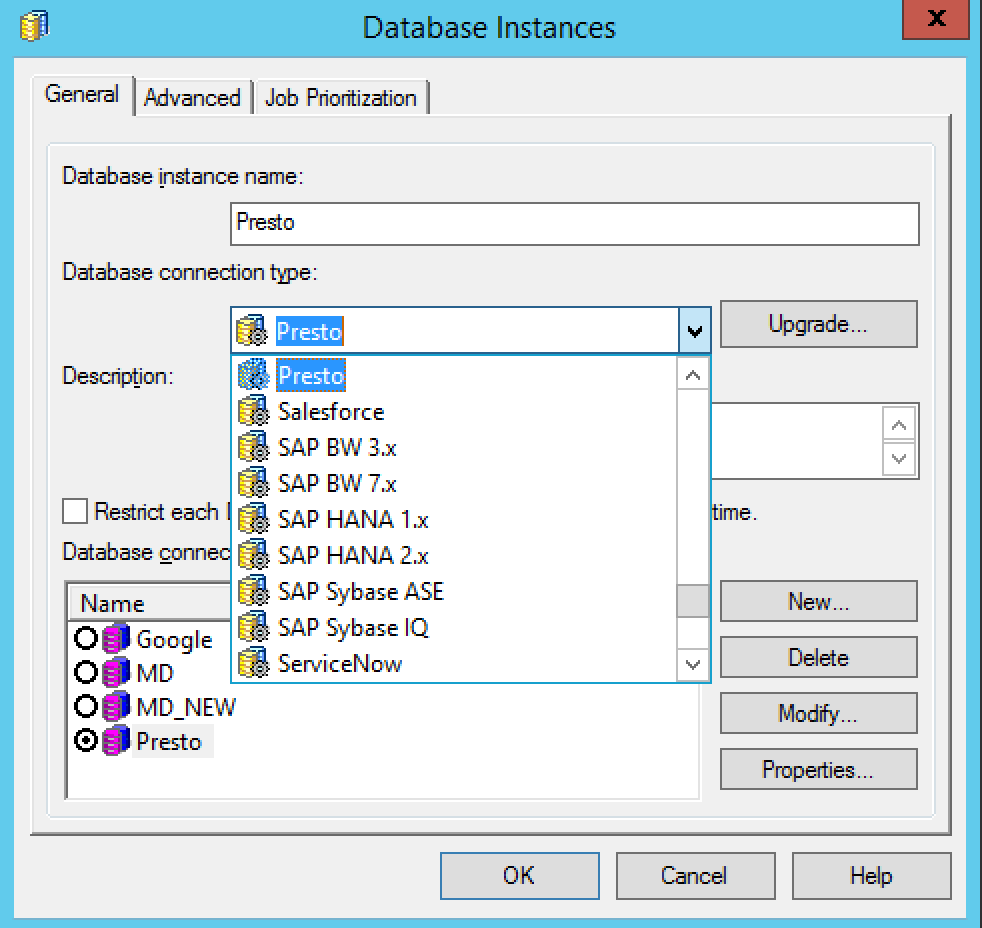
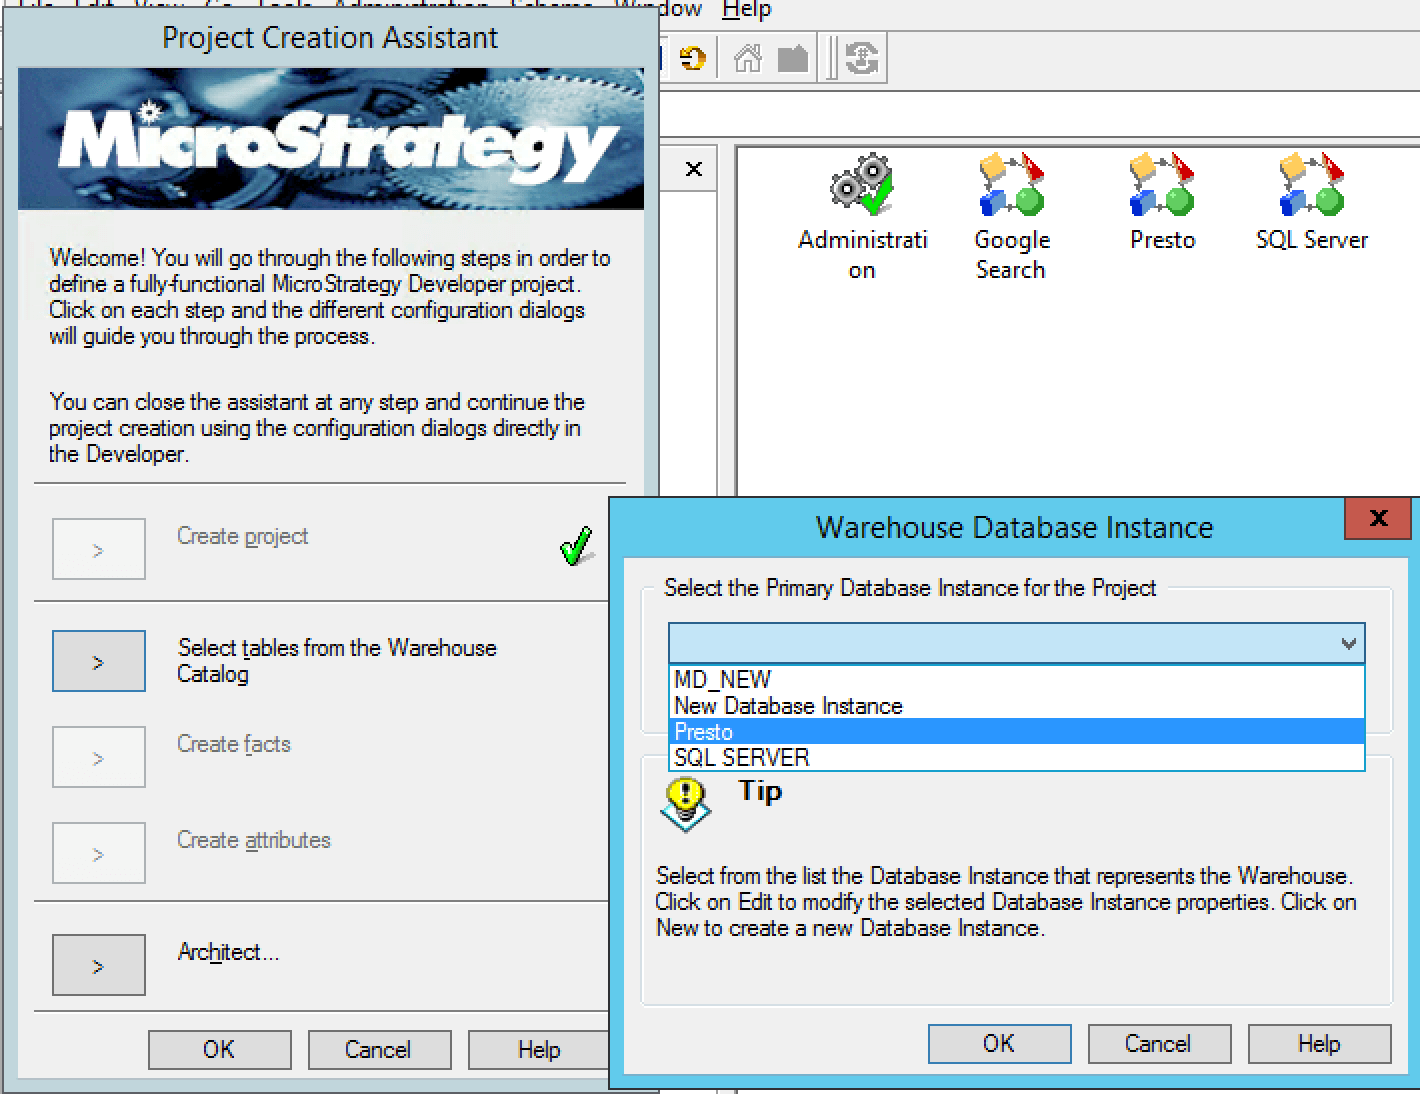
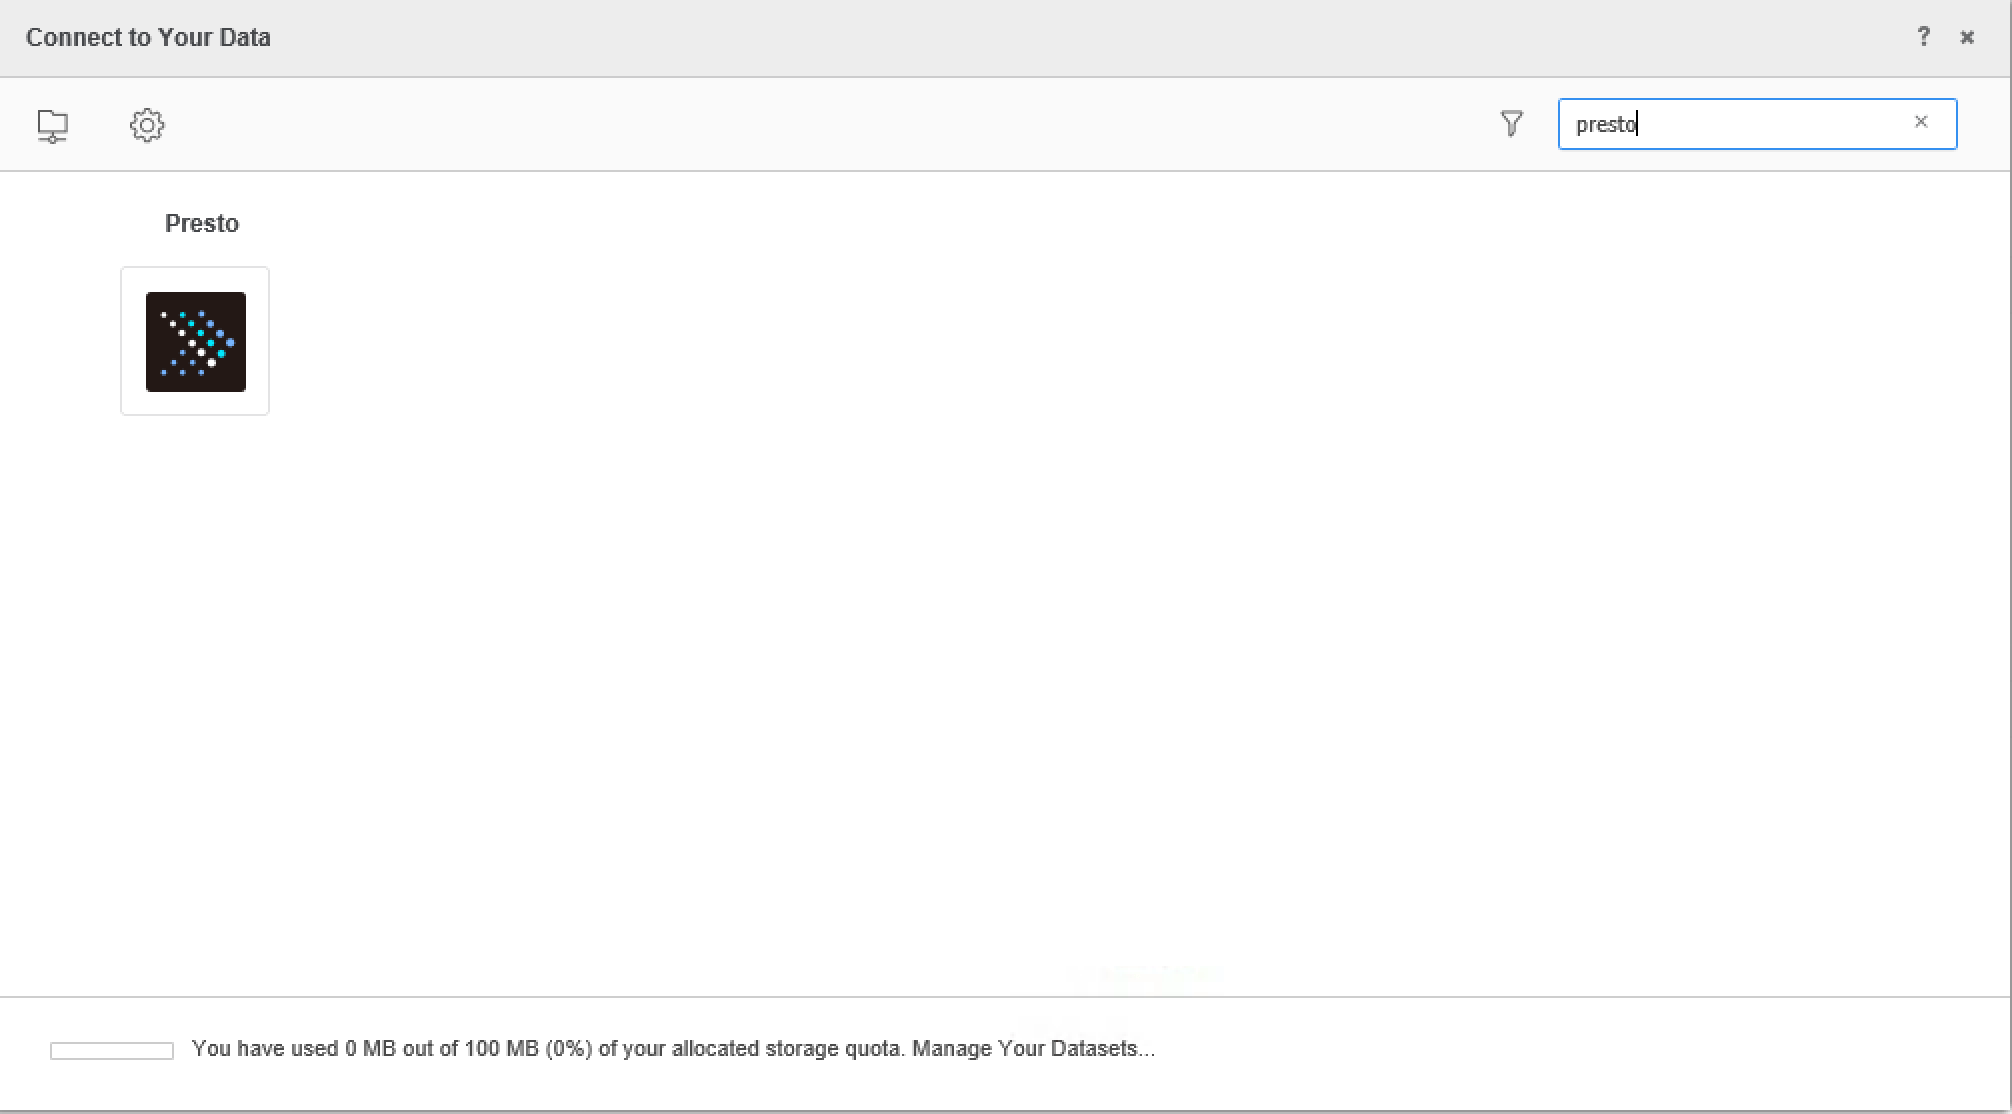
The following steps cover how to connect to Presto via SSL in Strategy.

  • How to connect to Developer
  • How to connect to Web
     

Things to do before setting up the connection

  1. Copy over the KEYS from the presto server onto the following location:


  1. For Windows:   C:/keys
  2. For Linux:         /opt/mstr/MicroStrategy/keys (default Strategy install location)


  1. Copy over the Presto JDBC driver to the default Strategy JDBC folder:

(presto-jdbc-0.189.jar rename it to presto-jdbc.jar)
 

  1. For Windows:   C:\Program Files (x86)\Common Files\Strategy\JDBC
  2. For Linux:         /opt/mstr/MicroStrategy/install/JDBC


Note: Please avoid placing multiple driver files for different versions in the folder. Ensure to leave only the one driver which should be used. Others could be moved to other folders.  You can obtain the driver here .
 

  1. Take note of the following Connection Strings (applying to both Developer and Web):


  1. For Windows: JDBC;DRIVER=com.facebook.presto.jdbc.PrestoDriver;URL={jdbc:presto://host:port/catalog/schema?SSL=true&SSLTrustStorePath=C:/keys/truststore.jks&SSLTrustStorePassword=xxxx};
  2. For Linux:       JDBC;DRIVER=com.facebook.presto.jdbc.PrestoDriver;URL={jdbc:presto://host:port/catalog/schema?SSL=true&SSLTrustStorePath=/opt/mstr/MicroStrategy/keys/truststore.jks&SSLTrustStorePassword=xxxx};
  3. If you want to specify the JDBC driver location: JDBC;MSTR_JDBC_JAR_FOLDER=C:\Program Files (x86)\Common Files\MicroStrategy\JDBC;DRIVER=com.facebook.presto.jdbc.PrestoDriver;URL={jdbc:presto://host:port/catalog/schema?SSL=true&SSLTrustStorePath=C:/keys/truststore.jks&SSLTrustStorePassword=xxxx};


Sample Connection String


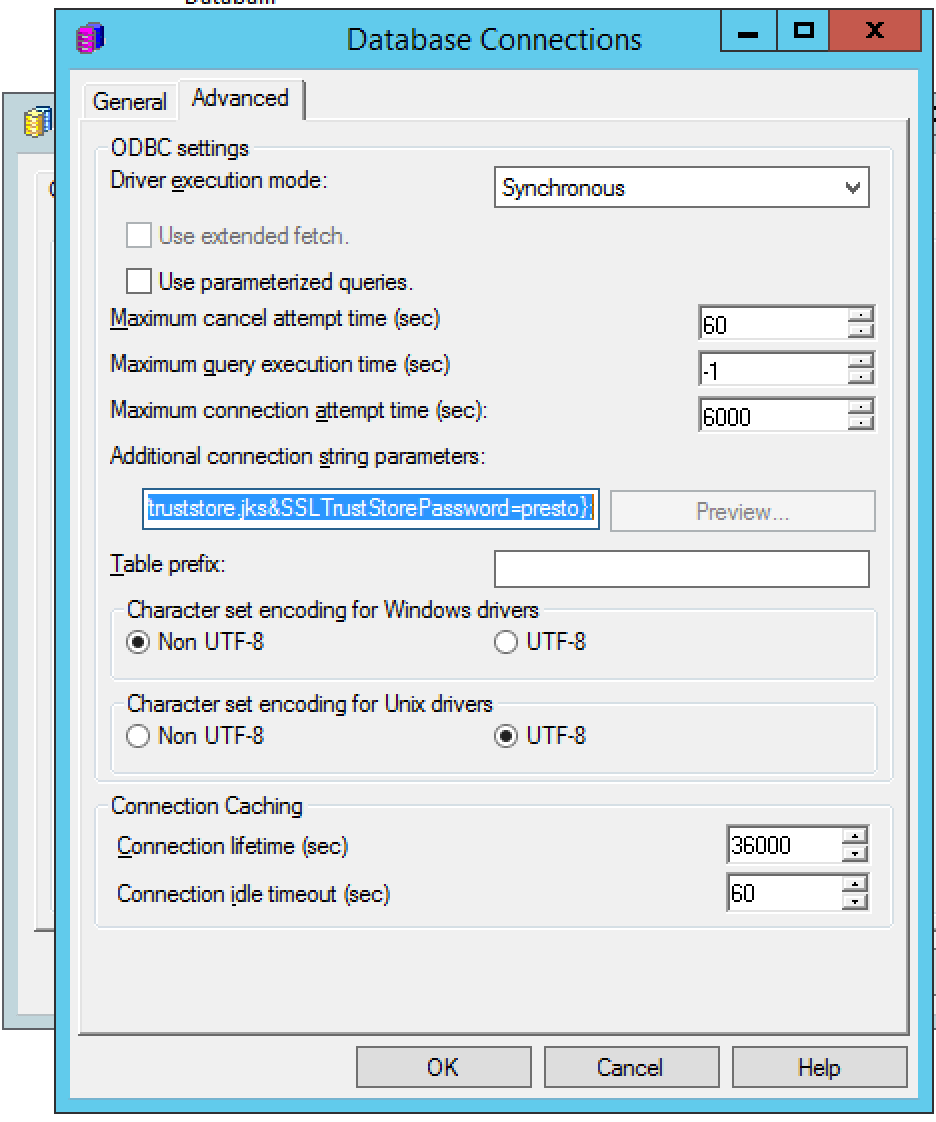
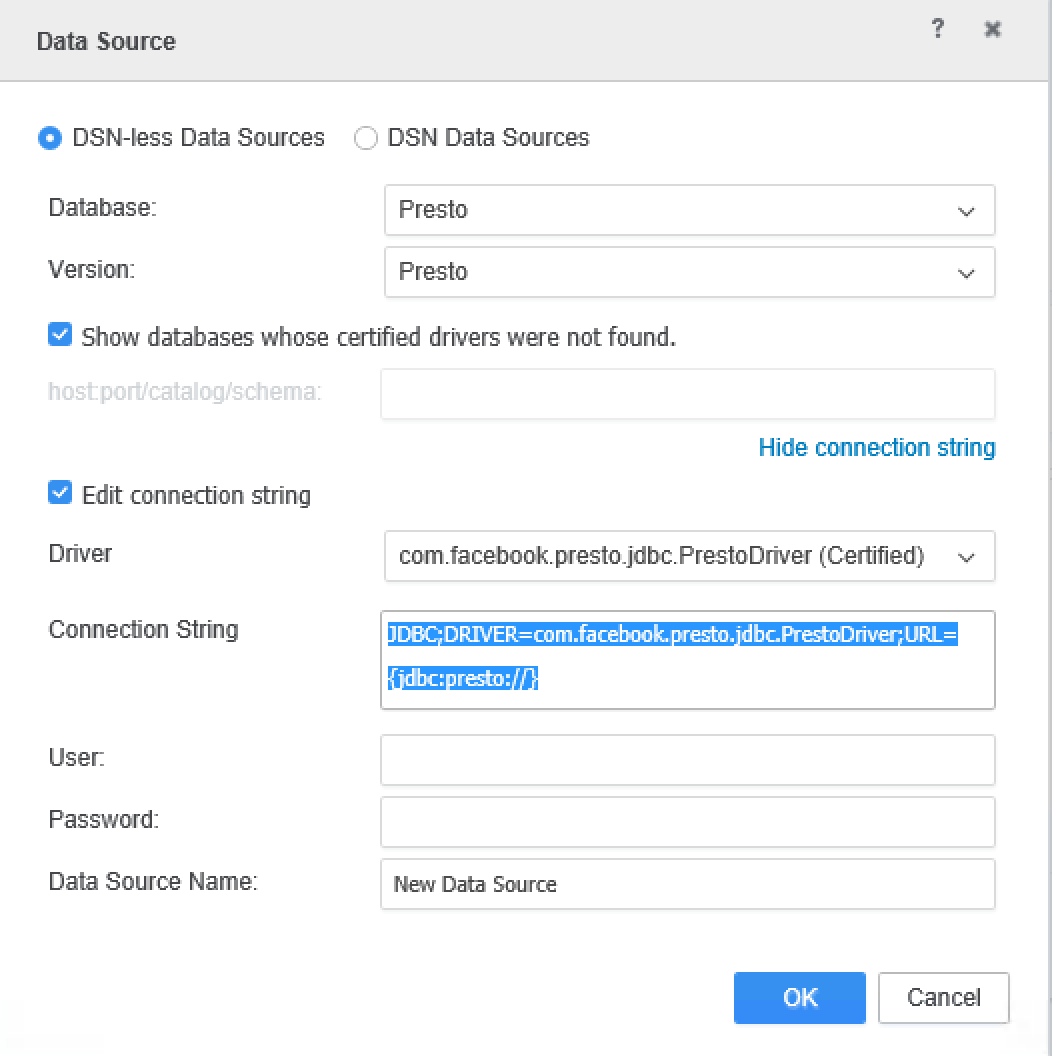
JDBC;DRIVER=com.facebook.presto.jdbc.PrestoDriver;URL={jdbc:presto://ec2-184-72-119-27.compute-1.amazonaws.com:7443/hive/labstuto?SSL=true&SSLTrustStorePath=C:/keys/truststore.jks&SSLTrustStorePassword=presto};

How to connect to Developer

The following example shows how to connect to Presto using JDBC via SSL in Developer:

  1. Go to Developer.
  2. Add a new database instance:
    1. Developer > Administration > Configuration Managers > Database Instances.
    2. Add new Database Instance.

      (If the Database connection type isn't listed, use Generic DBMS).
    3. Click 'New" to add a new database connection.
       
ka04W000001Ix1bQAC_0EM44000000WTyr.png


  1. Click on the Advance Tab to add the JDBC connection string for Presto.


ka04W000001Ix1bQAC_0EM44000000WTyw.png


  1. Click 'New' again to add a new Database login.

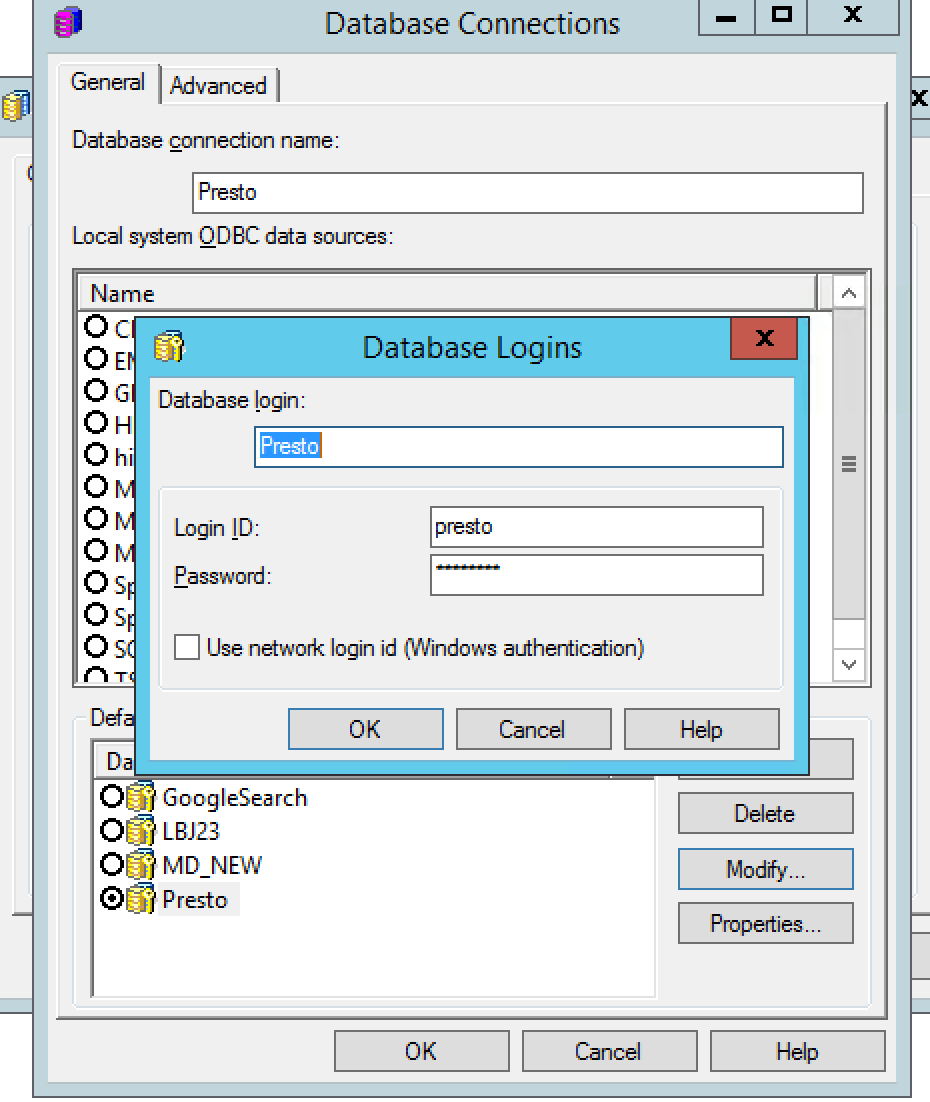
(This won't be necessary as we will be using SSL. Use the SSL configured password for the credentials here.)
 

ka04W000001Ix1bQAC_0EM44000000WTz1.png


  1. Click OK to complete the process of creating the new database instance.


  1. Right-click the project source and click create new project.


ka04W000001Ix1bQAC_0EM44000000WTz6.png


  1. Select the DB instance you created.


ka04W000001Ix1bQAC_0EM44000000WTzB.png


  1. Select options in the Warehouse Catalog.
  • Click Read Settings.
  • Select "use one or more SQL statements that query directly the database catalog tables".
  • Then click on Settings > Change the above SQL to include the database name.
  • (Change '#Database_Name#' to corresponding database 'labstuto') and click OK.


ka04W000001Ix1bQAC_0EM44000000WTzG.png


  1. Select the lightning bolt icon on the top to pull all the tables from the Presto Server. Now users can pull tables into their Projects through Warehouse Catalog or Strategy Architect using this Database Instance.

How to connect to Web


  1. Connect to Web and click Add External Data.
ka04W000001Ix1bQAC_0EM44000000WTzL.png


  1. Search Presto data source.


ka04W000001Ix1bQAC_0EM44000000WTzQ.png


  1. Choose Select Tables, Type a Query or Build a Query to import data.


ka04W000001Ix1bQAC_0EM44000000WTzV.png


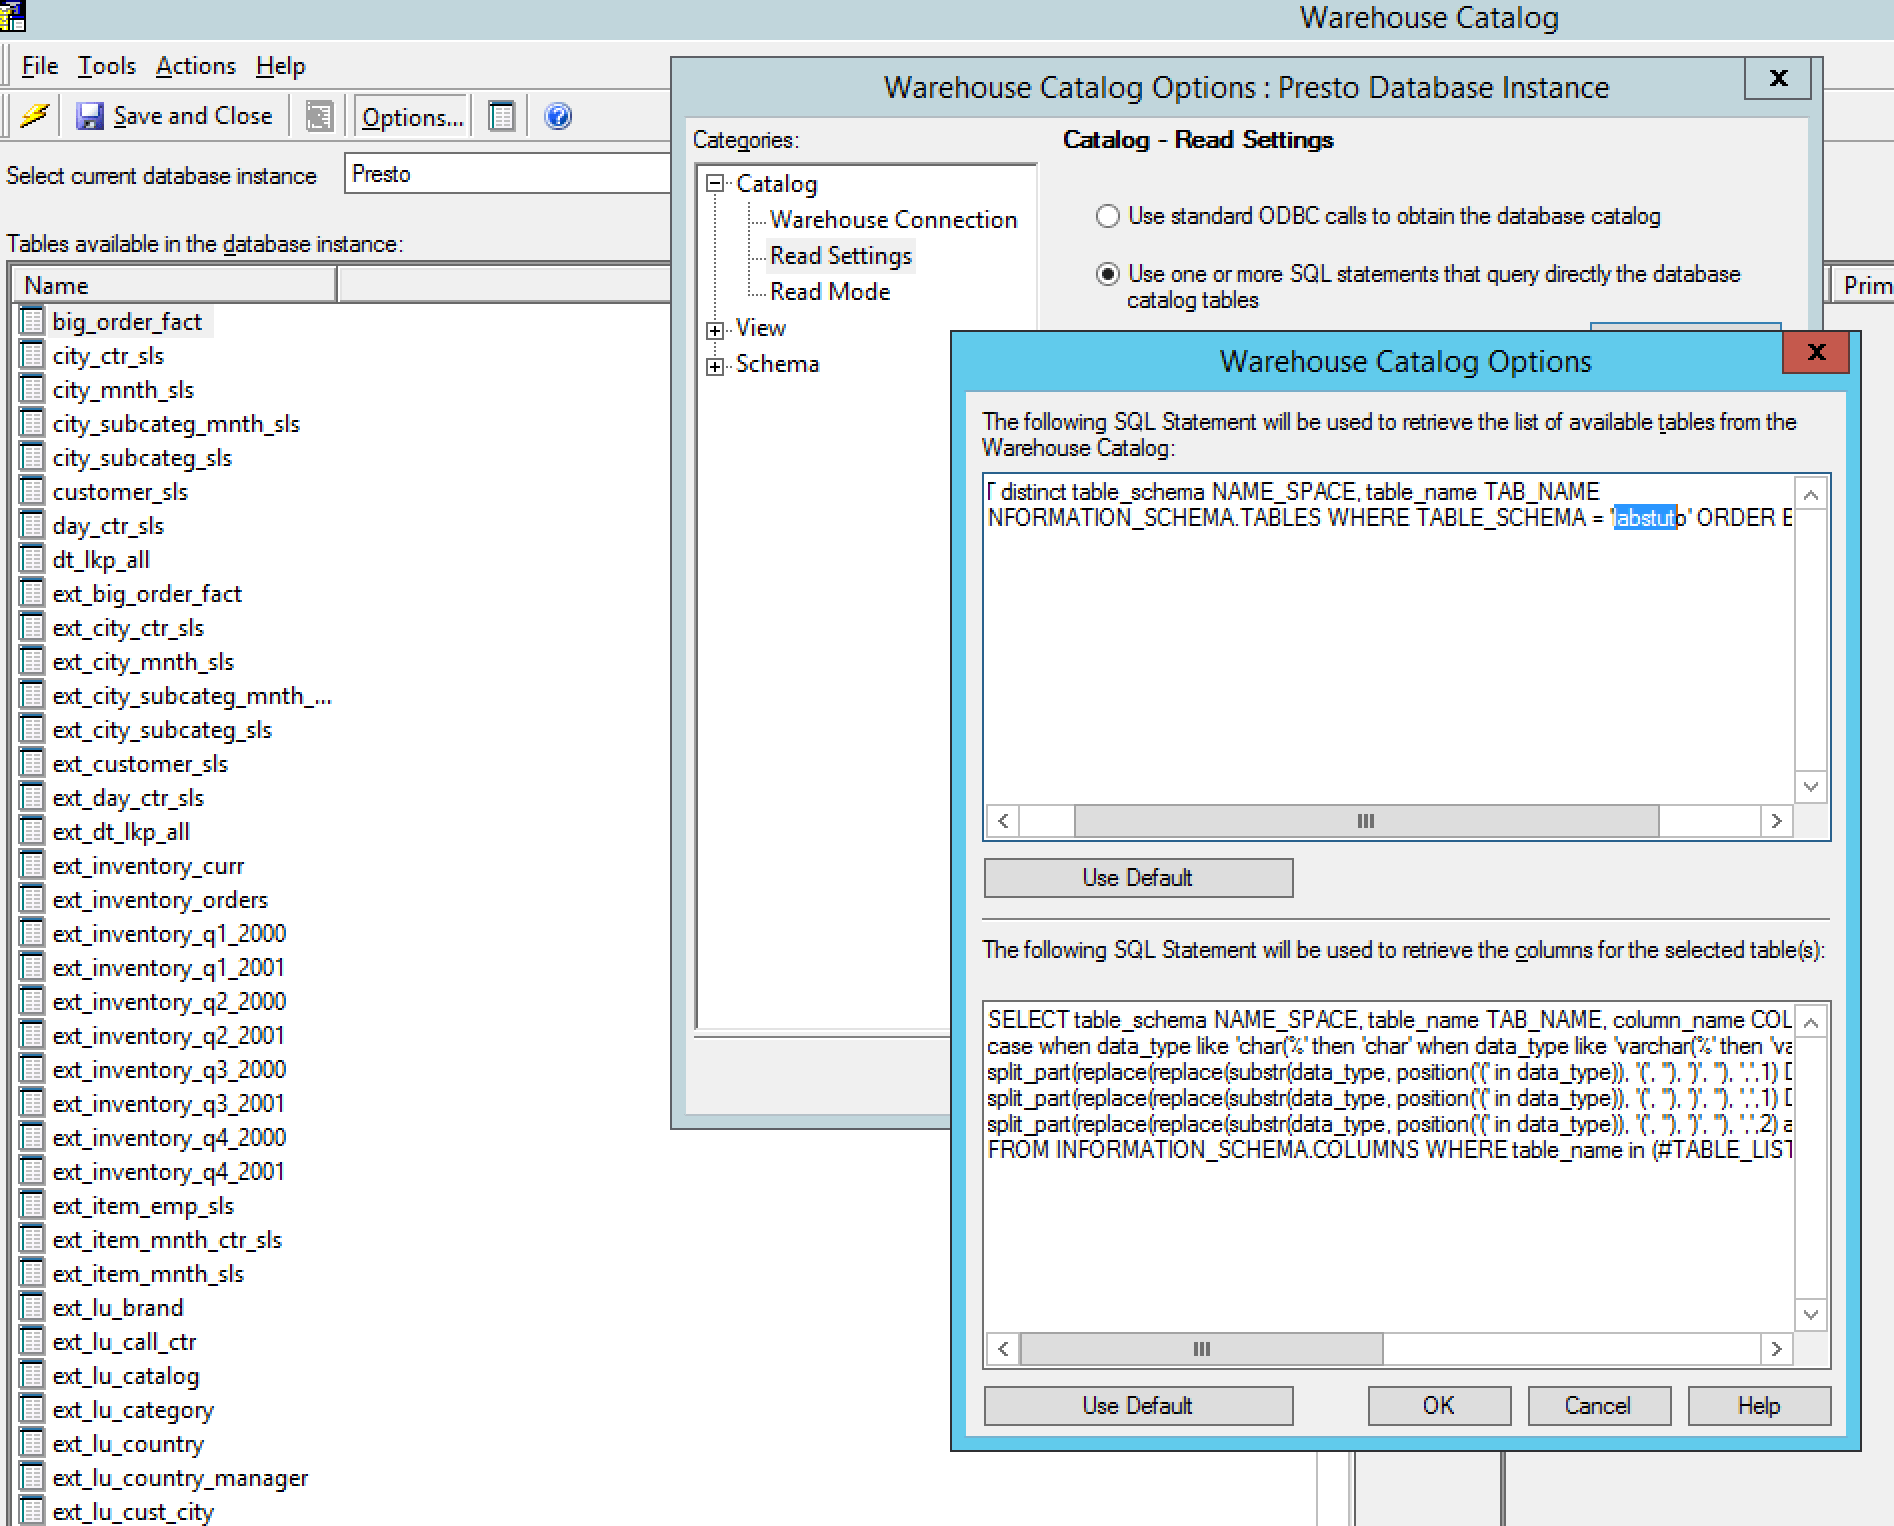
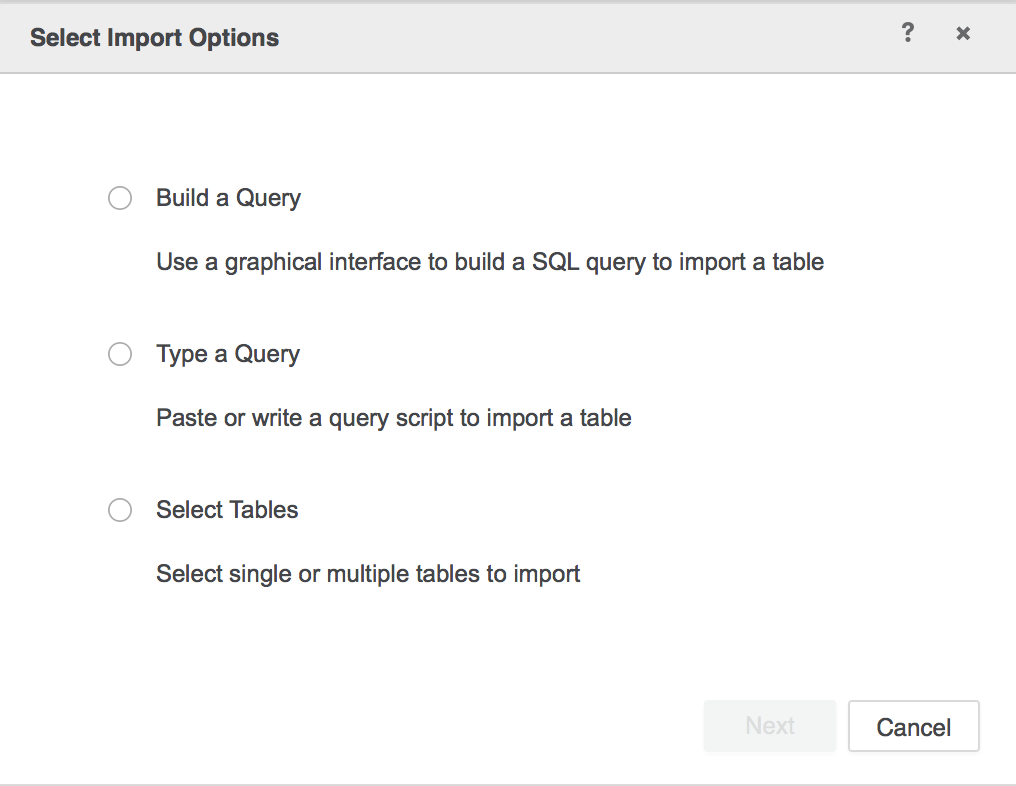
It is recommend to use Select Tables to reduce joins on the driver side for best performance.
 

  1. In the Data Source interface, select DSN-less Data Source.
  2. Choose Presto for Database and choose the Presto Version.
     
ka04W000001Ix1bQAC_0EM44000000WTza.png


  1. Edit the Connection String.
  2. Click Show connection string and select Edit connection string.
  3. Manually fill in the connection information of the Presto JDBC connection string to connect.
  4. Click OK and you will see the DB role created with the name of your Data Source.
  5. Edit the Catalog Options to include the Database name.

(Change '#?DATABASE_NAME?#' to corresponding database .eg. 'labstuto').
 

ka04W000001Ix1bQAC_0EM44000000WTzf.png


  1. Click Apply and close.
  2. Click on the new Data Source to connect.


Comment

0 comments

Details

Knowledge Article

Published:

June 21, 2018

Last Updated:

September 22, 2022