The following tutorial covers the following scenarios:
1. Connectivity via Strategy Web and Strategy Desktop
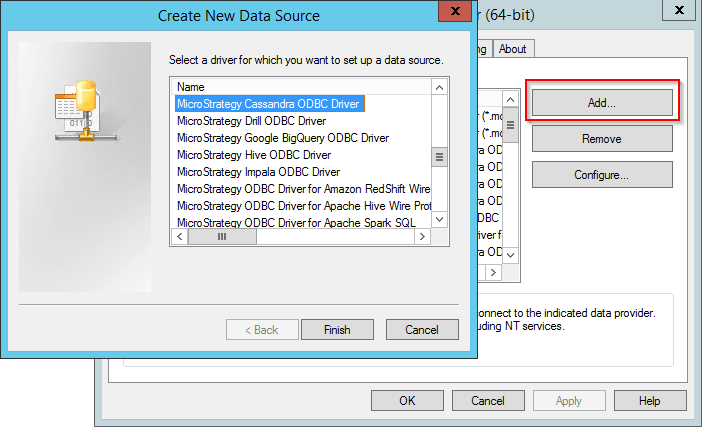
2. Connecivity via DSN in Windows
3. Connectivity via DSN in Linux
4. Connectivity using the Simba JDBC driver
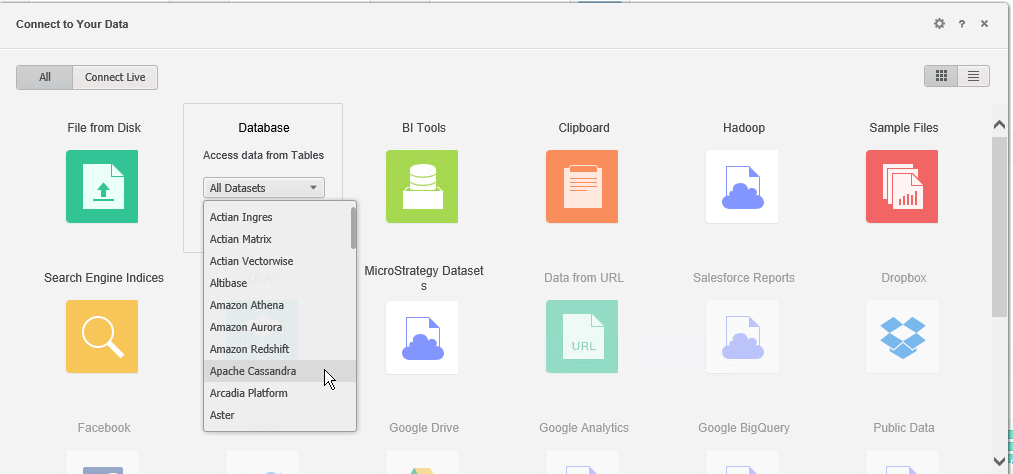
1. Connect to your data by clicking on Cassandra from the Database dropdown list.
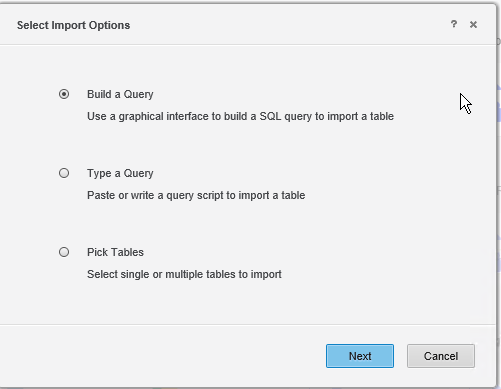
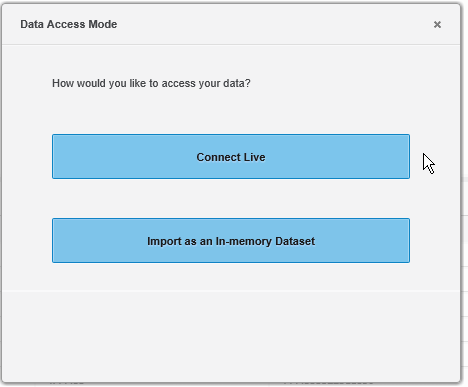
2. Select your import option.
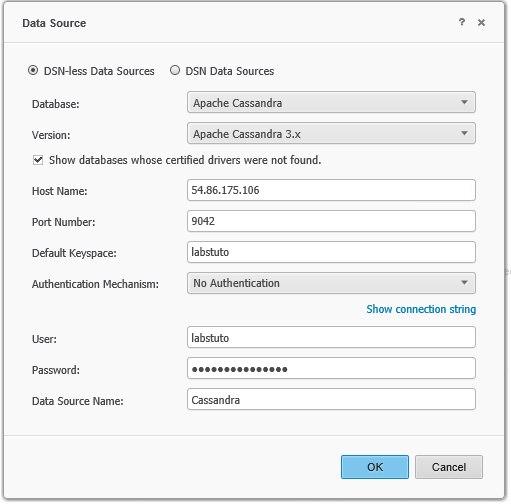
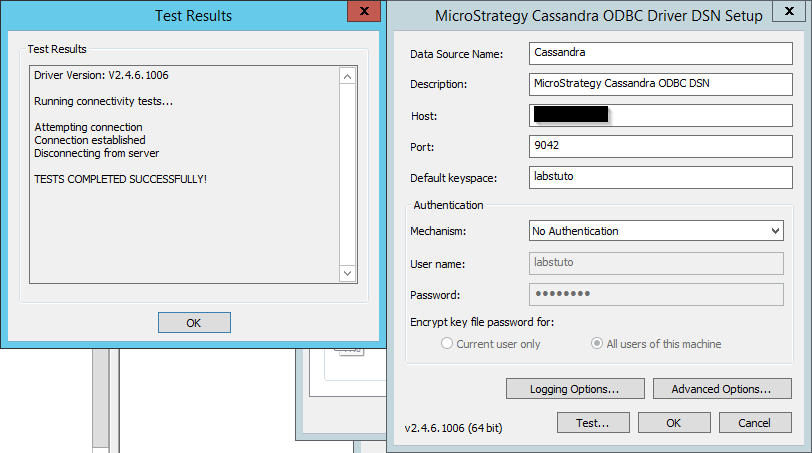
3. Pick a DSN less option, select Apache Cassandra 3.x from the drop down, fill in the correct parameters for host, port, default keyspace and the user/password.
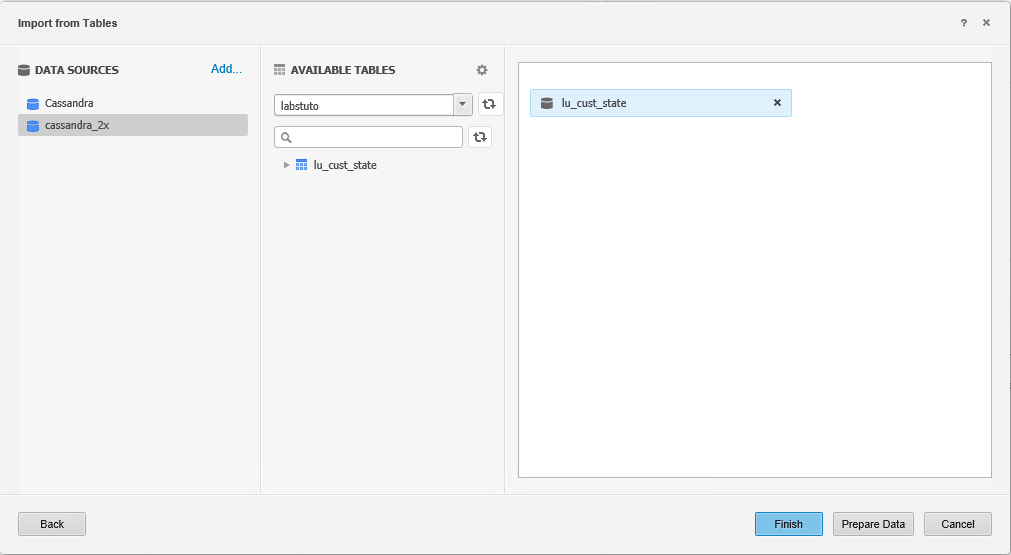
4. The Schemas and tables should then get populated and you should be able to pull tables from left panel onto the right and do analysis using those tables.

5. You can now access this data either directly through a Live connect option or as an in-memory data set in Strategy Web.
Note:
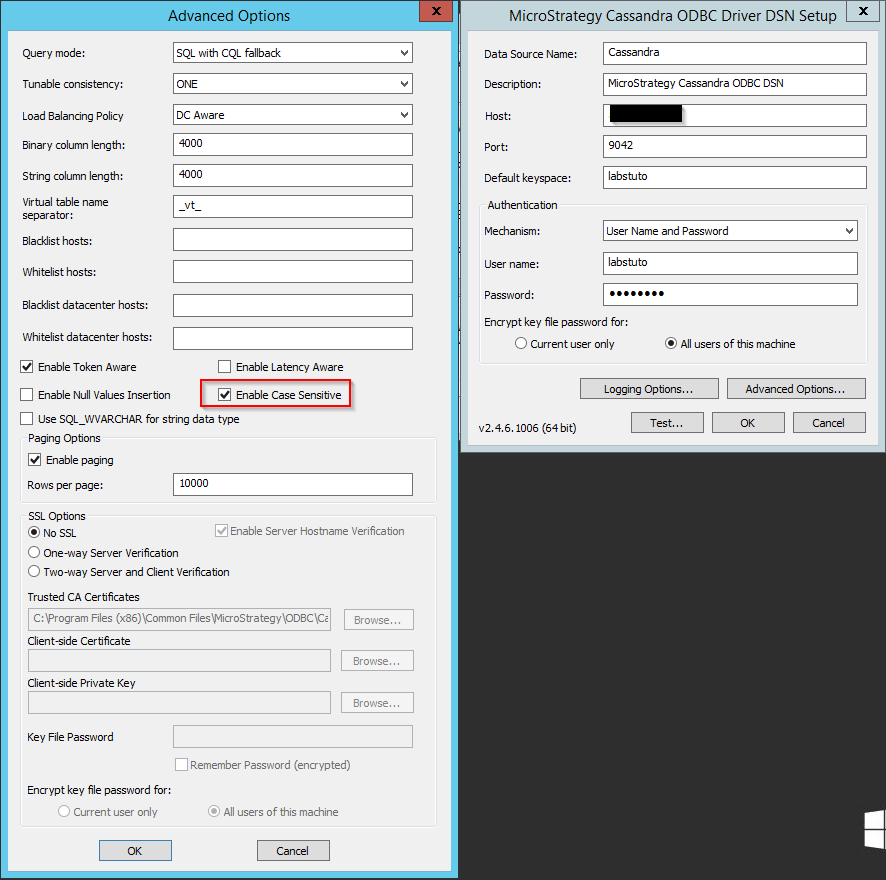
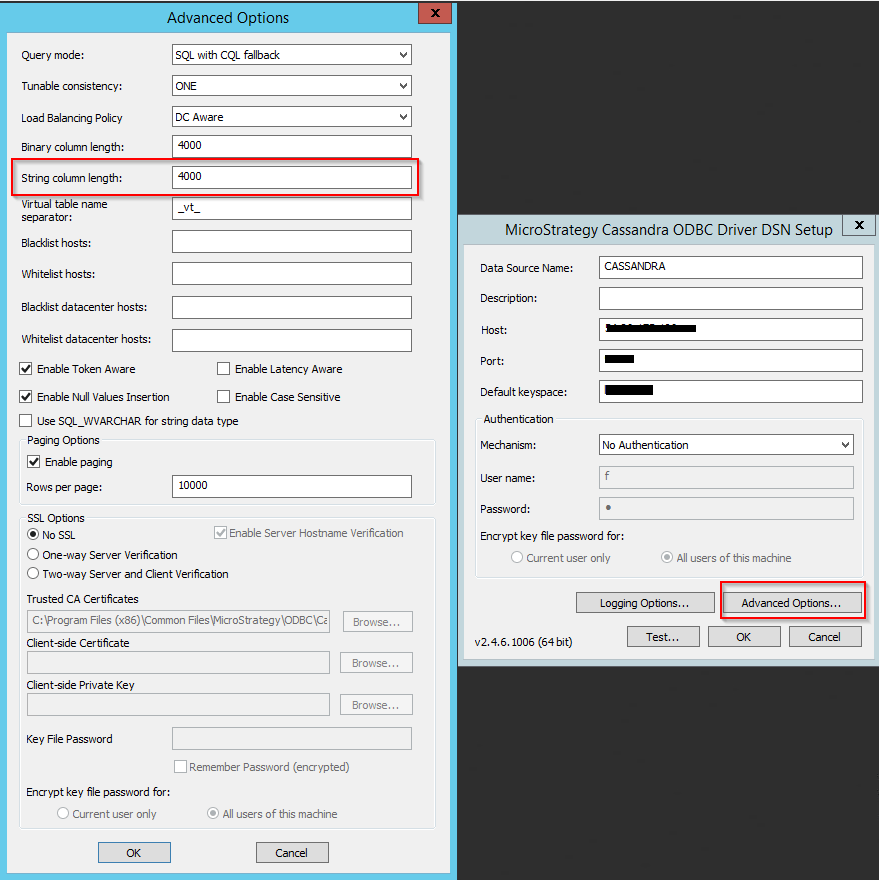
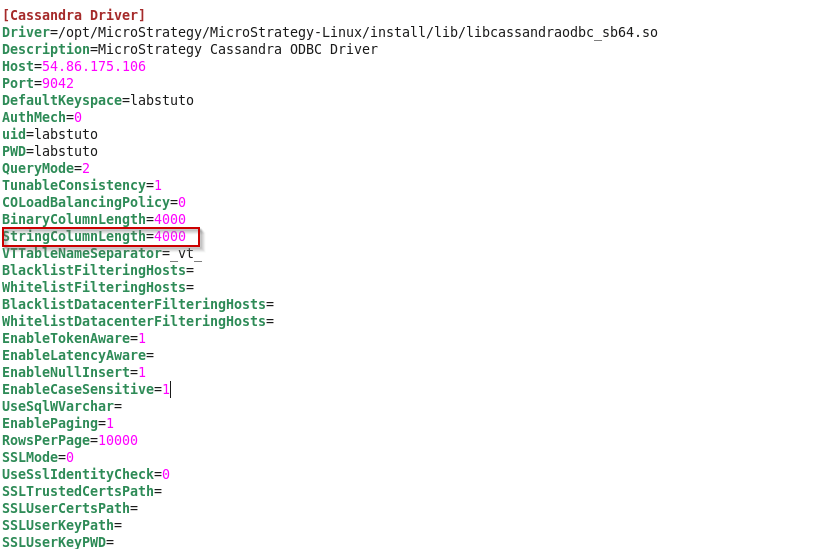
By default, the varchar datatype length is set to 4000 in the Strategy Cassandra ODBC Driver.Strategy Intelligence Server uses an ODBC Call (SQLDescribeCol) to determine the proper resources to allocate for the query results, for varchar columns the default size is 4000 as specified by the “string column length” setting in the ODBC driver. You may either see a degradation in performance if this value is set too high causing a lot of memory to be allocated or you may see truncation of data if this value is set too low. Please consult your DBA to set the values for the string column length field if the defaults don’t meet your requirements.
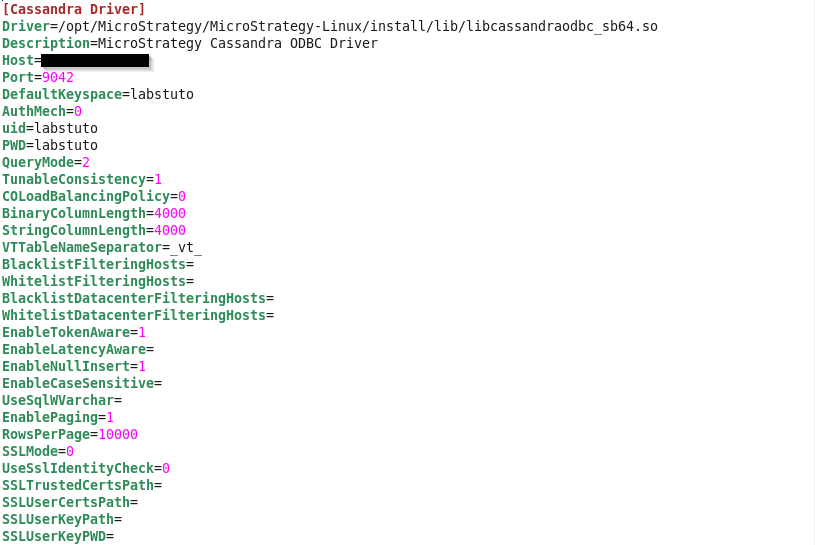
Note: For authentication mechanism to be set to No Authentication the value 0 and for Username and Password the value is 1
Before connecting to Cassandra, the Simba Cassandra JDBC driver(SimbaCassandraJDBC42-1.1.2.1002.zip) musted be downloaded and unzipped on the machine with your Strategy install.
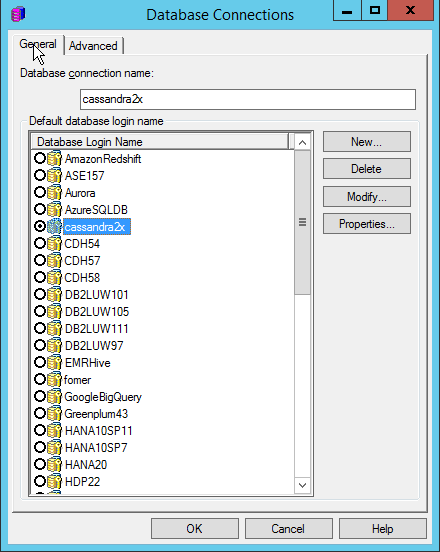
1. Navigate to the AdministrationàConfiguration ManagersàDatabase Instances in the Strategy Developer window and create a new database instance.
2. In the database creation wizard select Apache Cassandra 2.x as the Database Connection type.

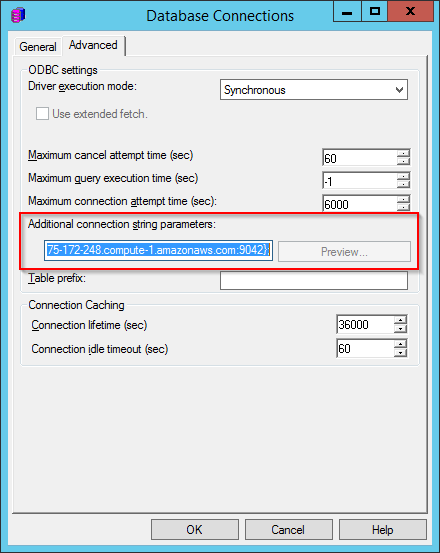
3. Create new database connection, go to the Advanced tab and add the following to the “Additional connection string parameters” field: JDBC;MSTR_JDBC_JAR_FOLDER=<location of unzipped driver folder>;DRIVER=com.simba.cassandra.jdbc42.Driver;URL={jdbc:cassandra://host:port;DefaultKeyspace=};
Note: Refer to the Simba driver documentation for additional parameters to add the URL.

4. Create a DB login and hit OK to save the changes
5. Expand an existing Project or create a new project and navigate to “Warehouse Catalog” under the “Schema” menu. Set the DB instance create above as the current database instance, then hit the execute button (the lightning bolt). You should be able to view the tables in Cassandra database.
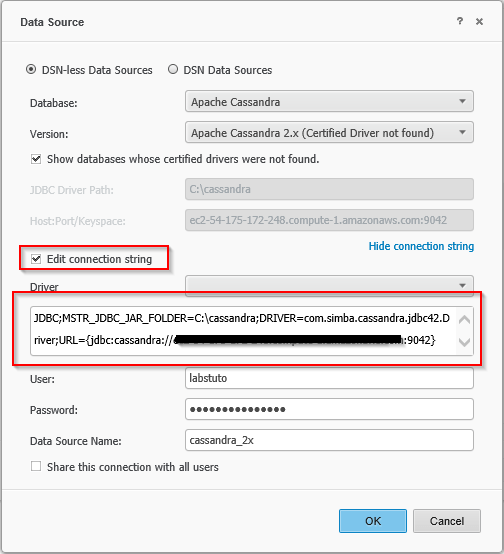
1. Select Add External Data and navigate to Databases à Apache Cassandra. Choose the “Pick tables” option and add a data source
2. Check the edit connection string field and copy the following connection string into the text box JDBC;MSTR_JDBC_JAR_FOLDER==<location of unzipped driver folder>;DRIVER=com.simba.cassandra.jdbc42.Driver;URL={jdbc:cassandra://host:9042}
Note: You can refer the simba documentation for additional connection parameters to add to the URL.
3. You should now successfully be able to connect and view the keyspaces and tables available.