The steps described below explain how to setup a DSN Based Database Instance with Strategy on top of Snowflake. This approach is not suited for DSN-Less connectivity
Prerequisites
Parameters required for creating the DSN :
Parameters required for creating Database Instance (from Developer or Web):
Download and extract Snowflake ODBC driver from Snowflake console
Open your Snowflake console (account.region.snowflakecomputing.com)
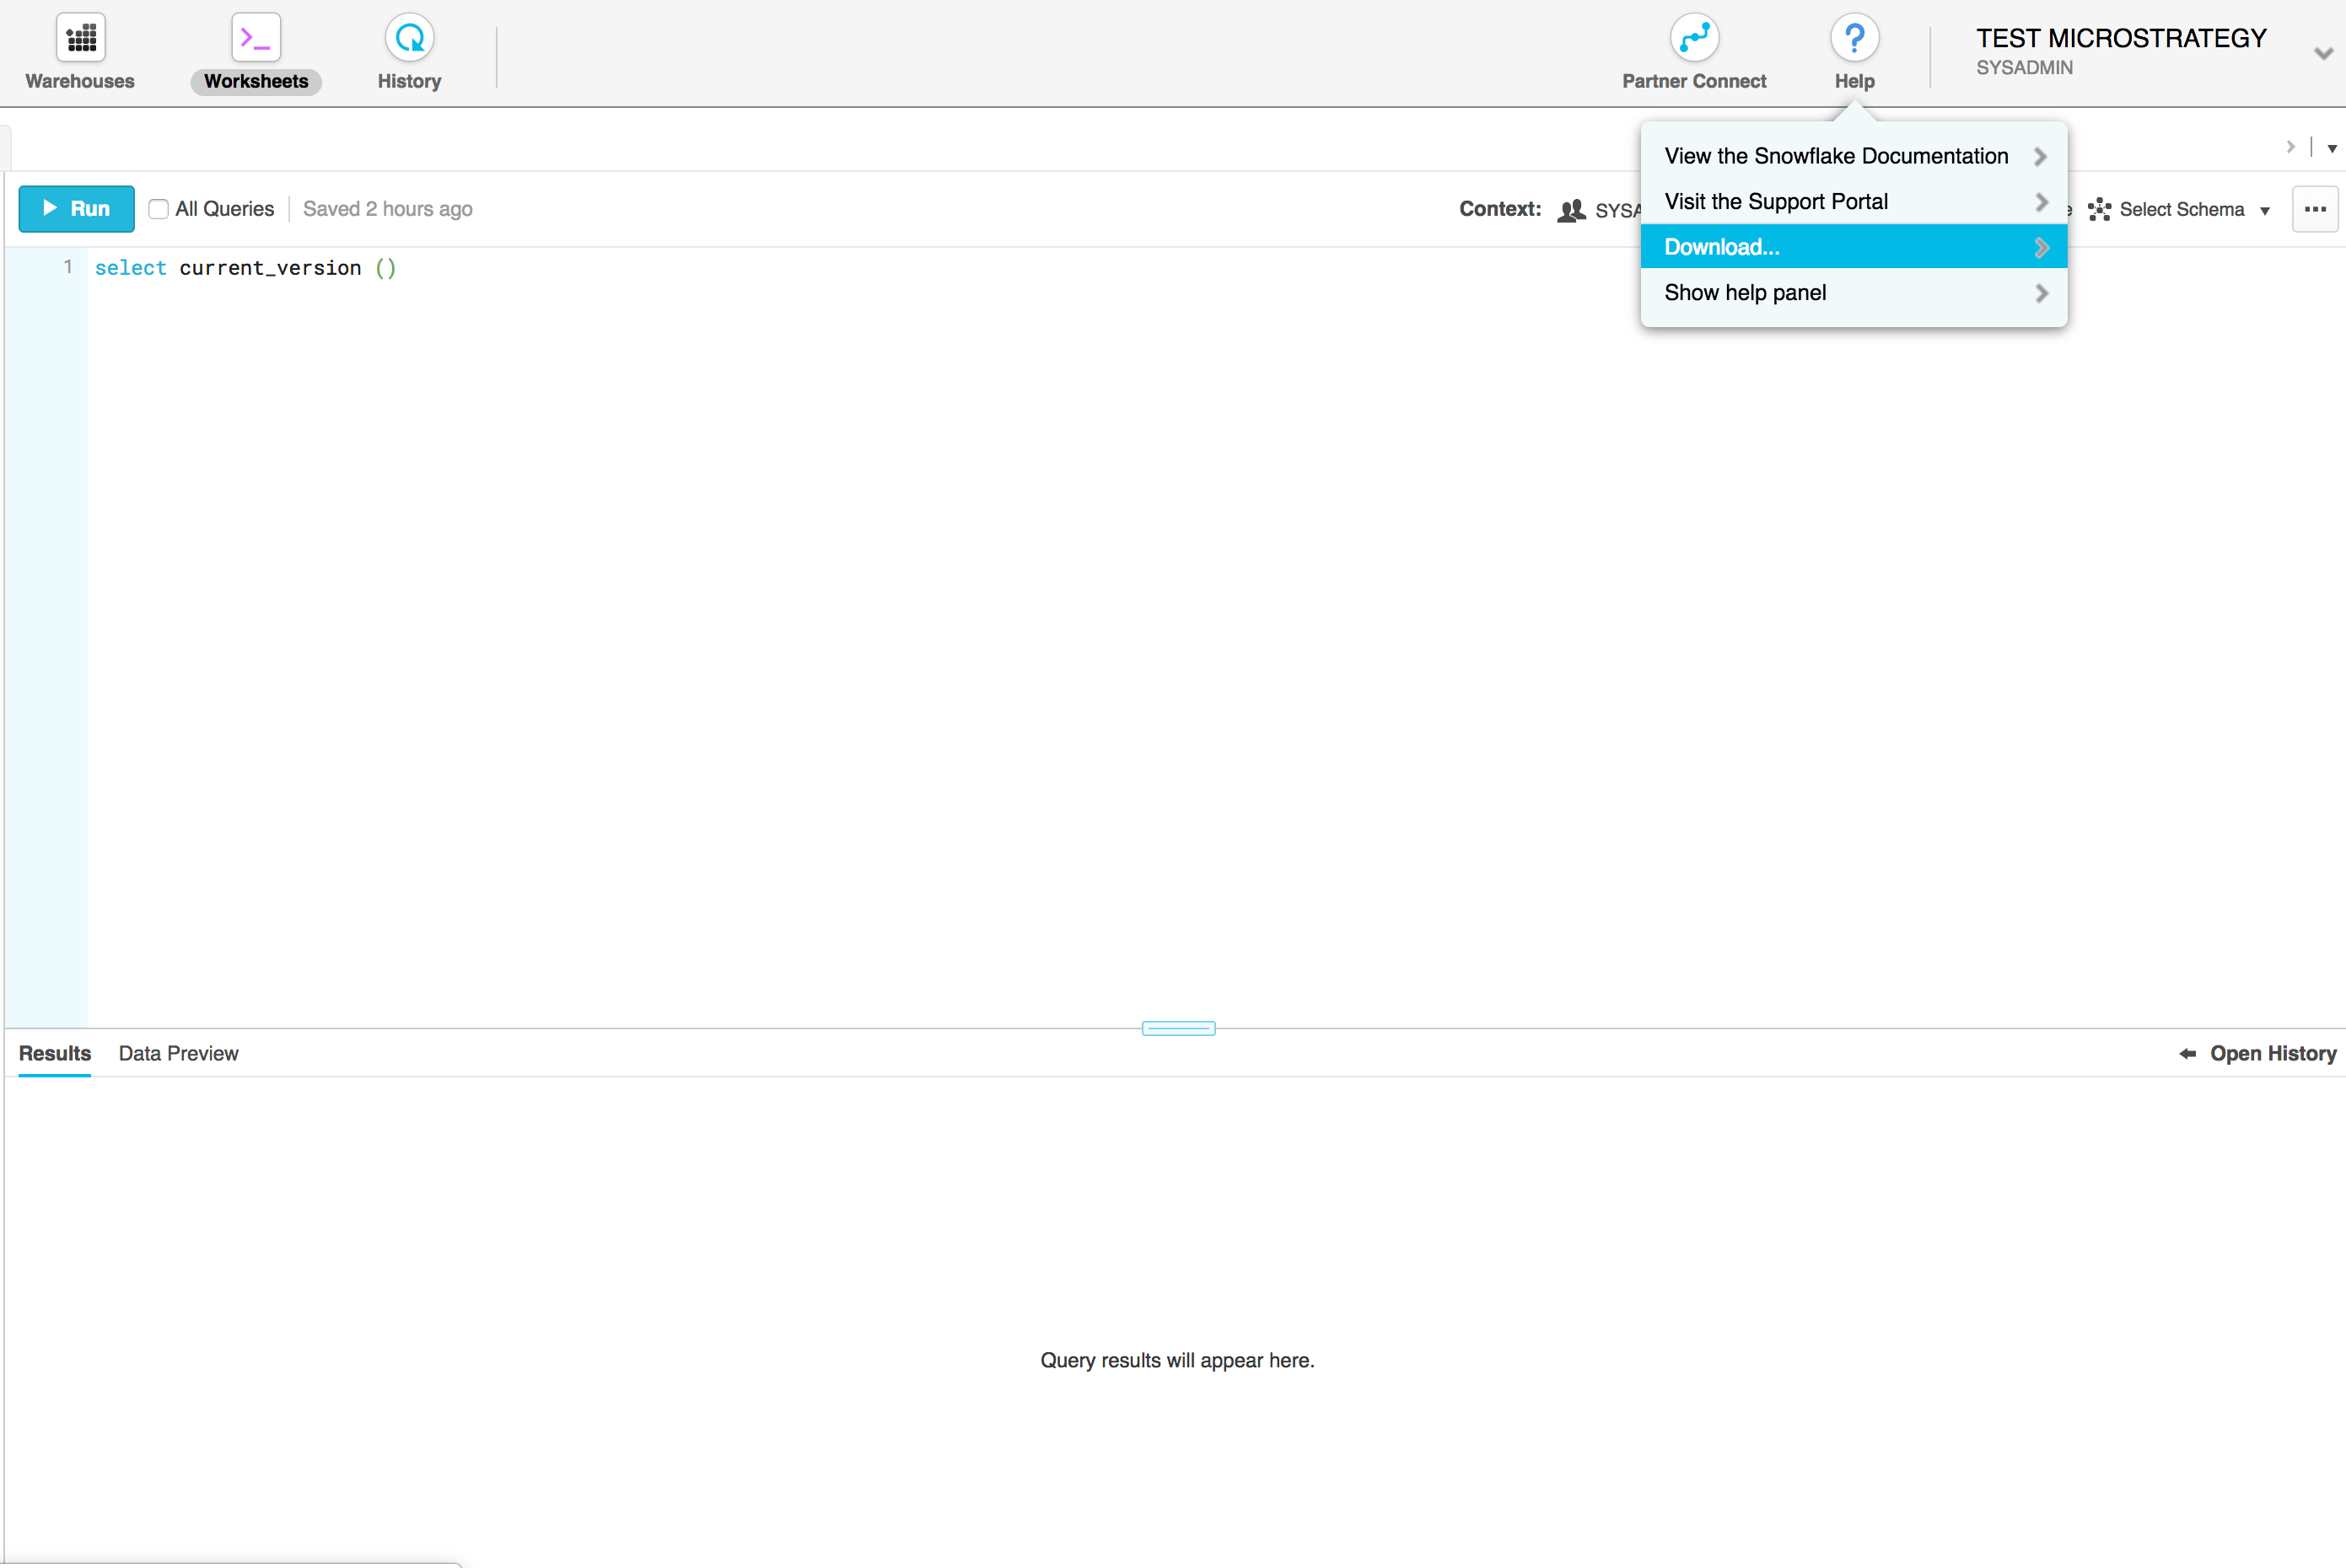
In the popup that opens, select ODBC
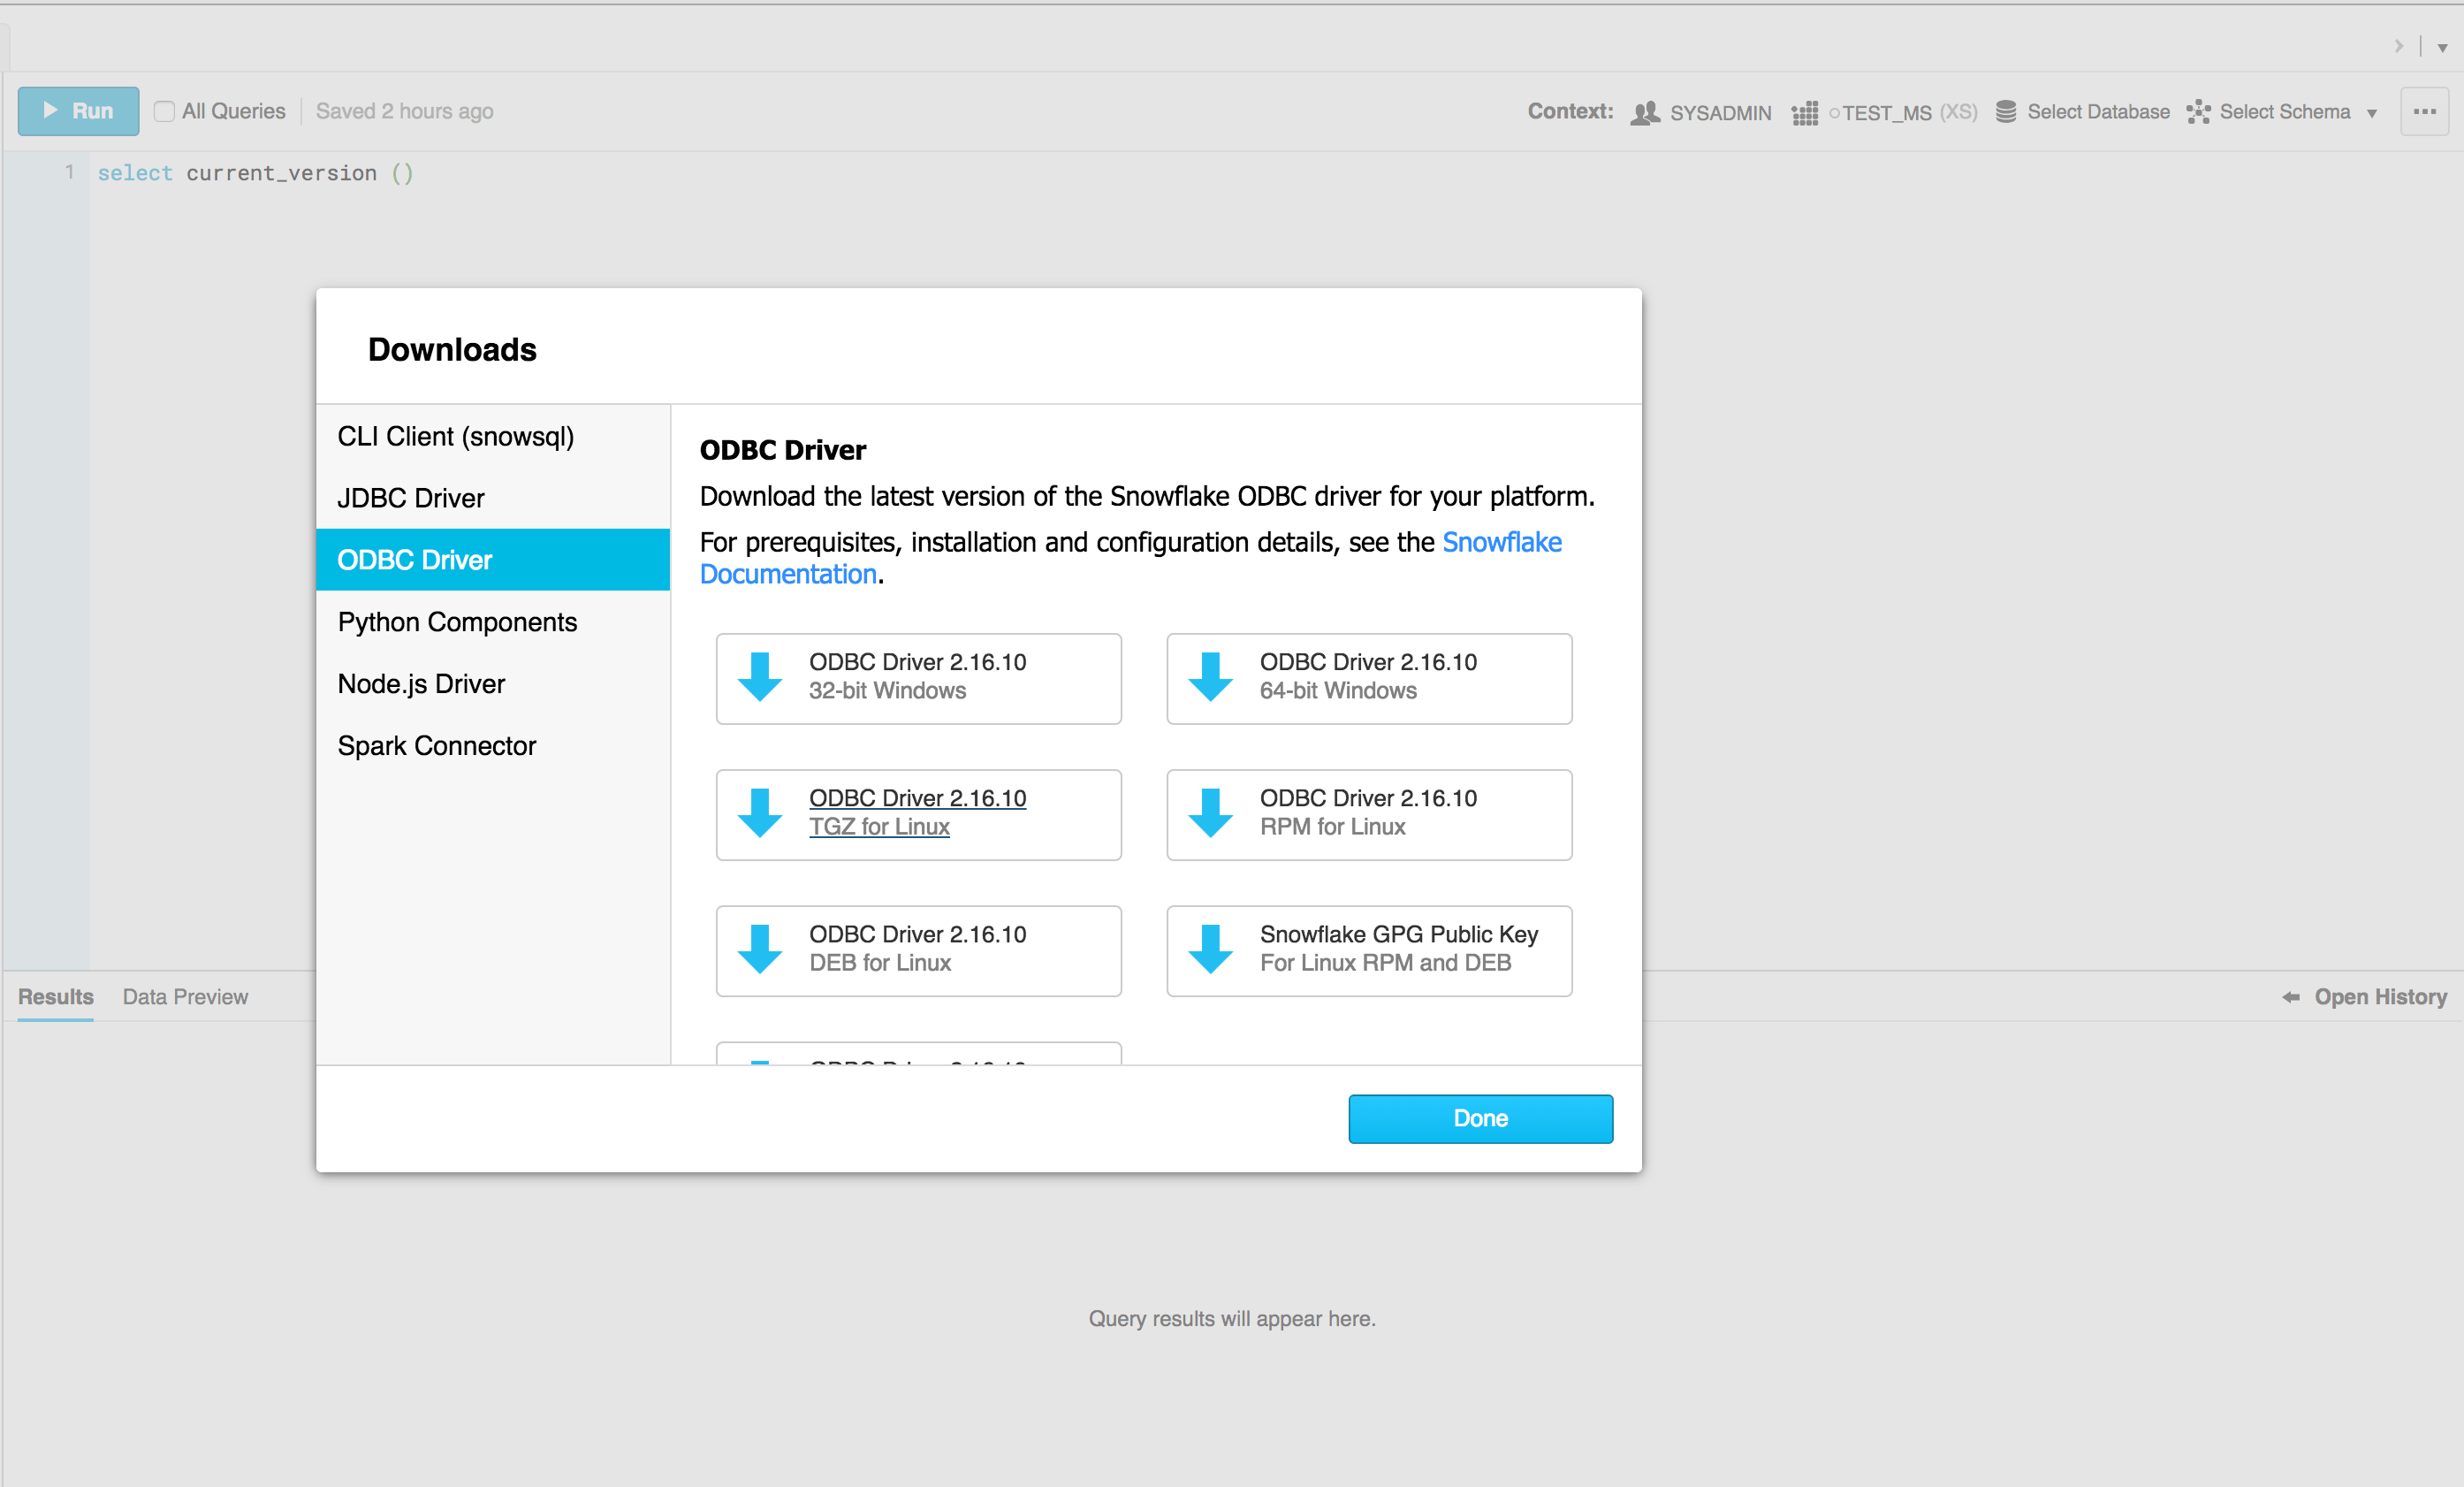
Download the following driver to the server hosting your Intelligence Server: TGZ for Linux
The following of this note assumes the driver was downloaded to /home/mstr/

Extract the driver tarball using the following command line (note: adjust the driver filename based on current version at the time of download)
cd /home/mstr
tar -xvzf snowflake_linux_x8664_odbc-2.16.10.tgz
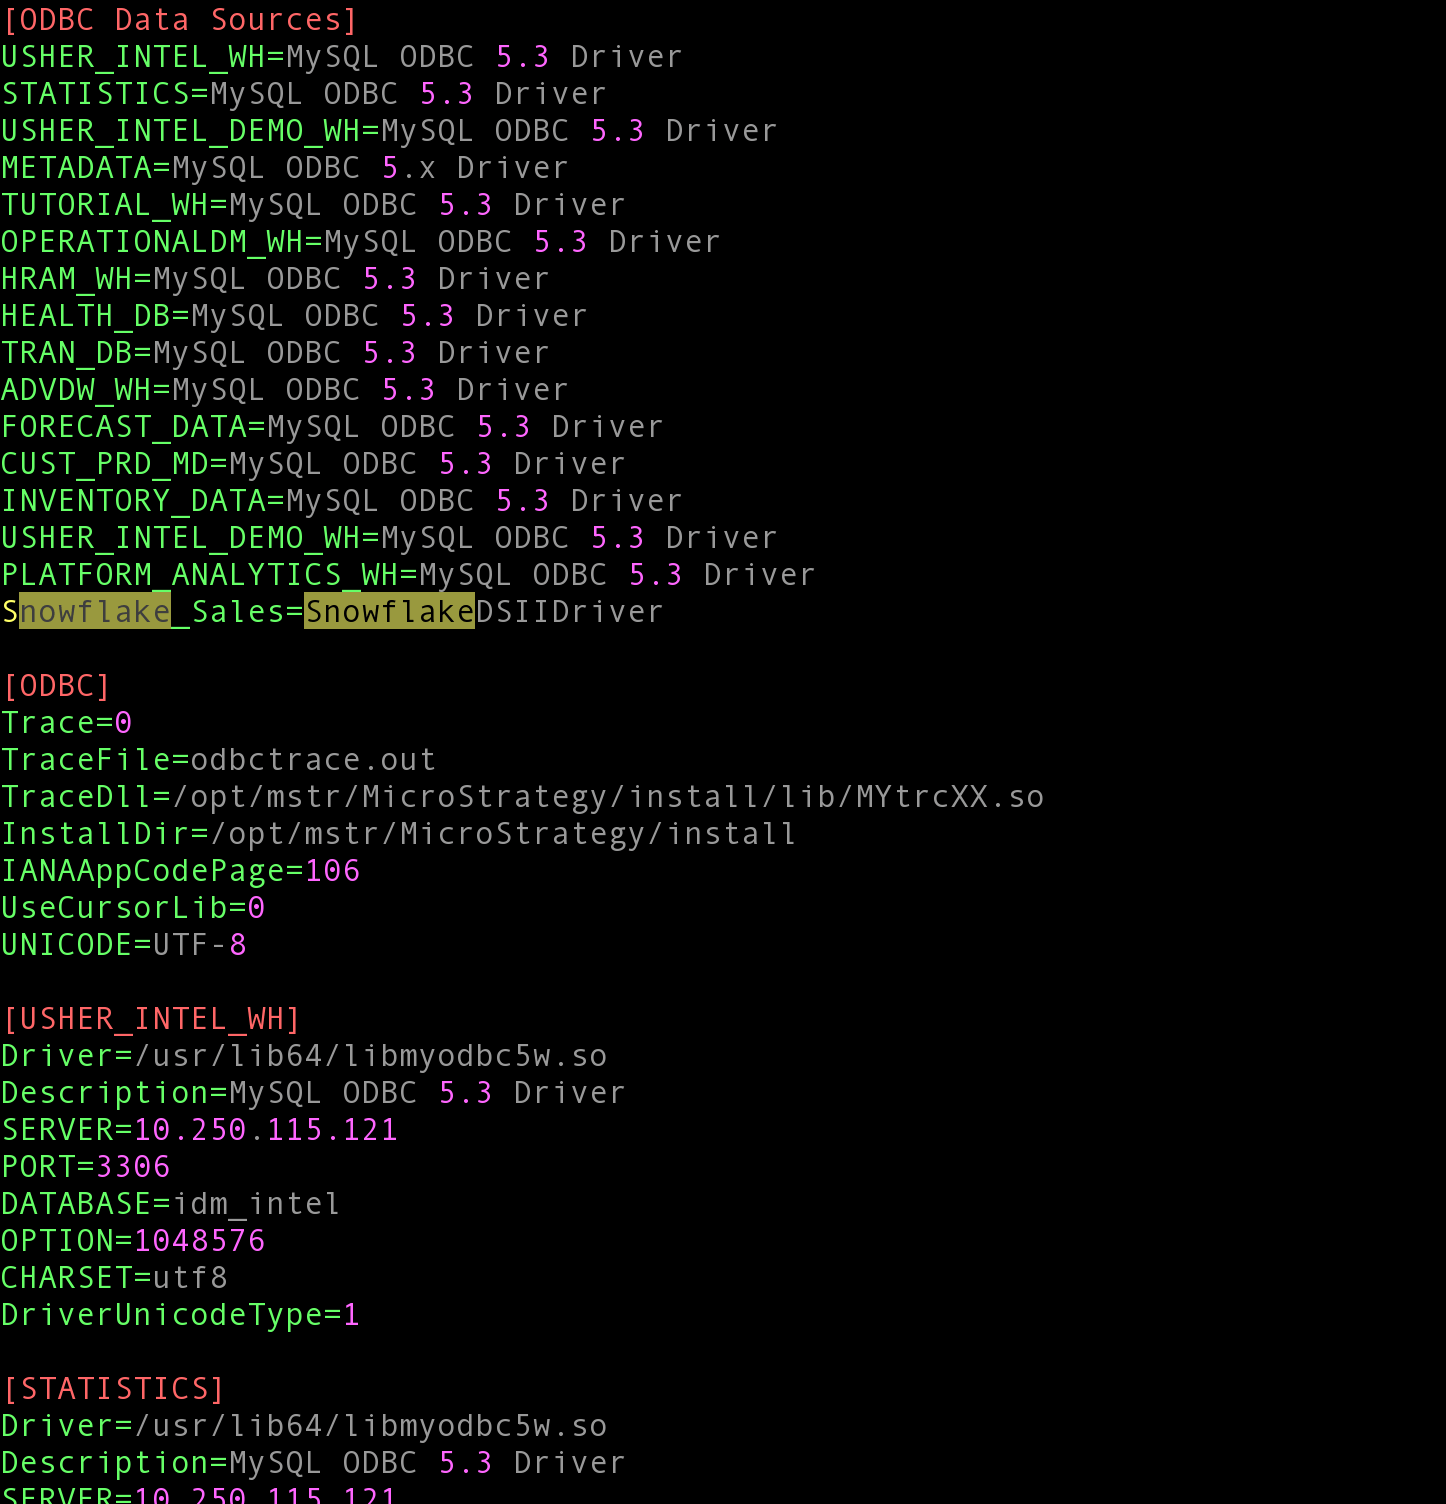
/opt/mstr/MicroStrategy/odbc.ini
[ODBC Data Sources]
Snowflake_Sales=SnowflakeDSIIDriver
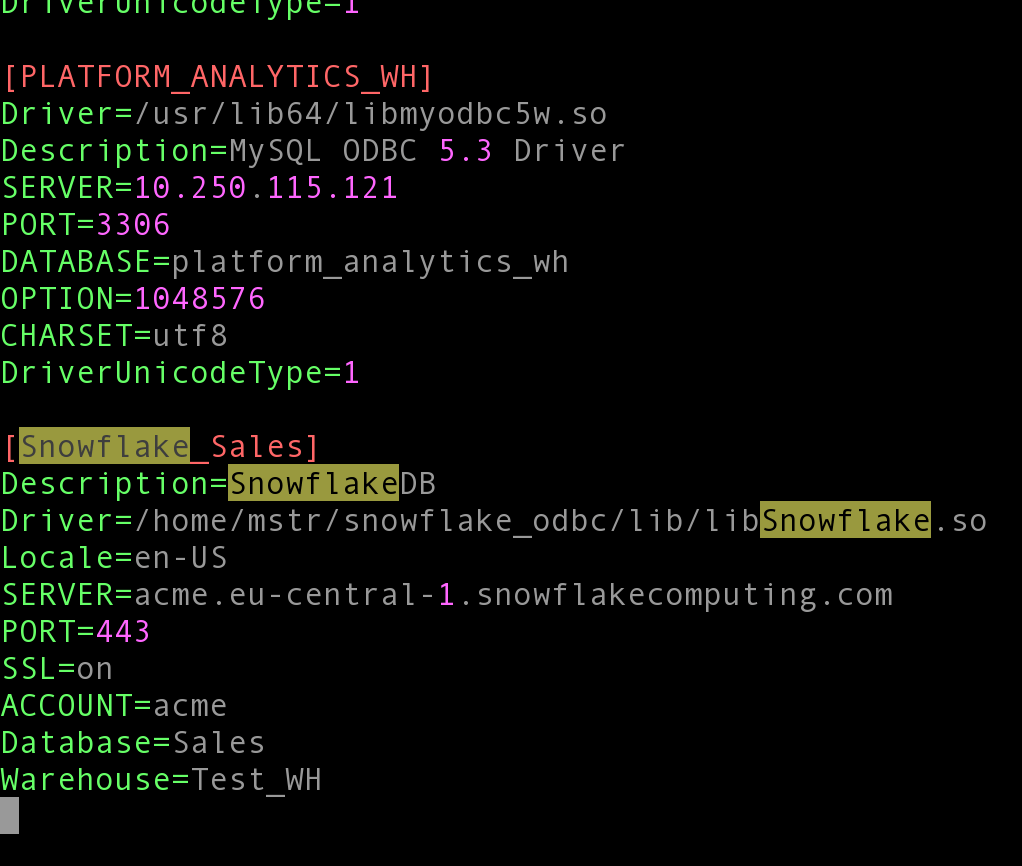
[Snowflake_Sales]
Description=SnowflakeDB
Driver=/home/mstr/snowflake_odbc/lib/libSnowflake.so
Locale=en-US
SERVER=<Snowflake URL>
PORT=443
SSL=on
ACCOUNT=<Snowflake Account>
Database=<Snowflake Database>
Warehouse=<Snowflake Warehouse>
[Snowflake_Sales]
Description=SnowflakeDB
Driver=/home/mstr/snowflake_odbc/lib/libSnowflake.so
Locale=en-US
SERVER=acme.eu-central-1.snowflakecomputing.com
PORT=443
SSL=on
ACCOUNT=acme
Database=Sales
Warehouse=Test_WH

When you are done, the odbc.ini file should look like:
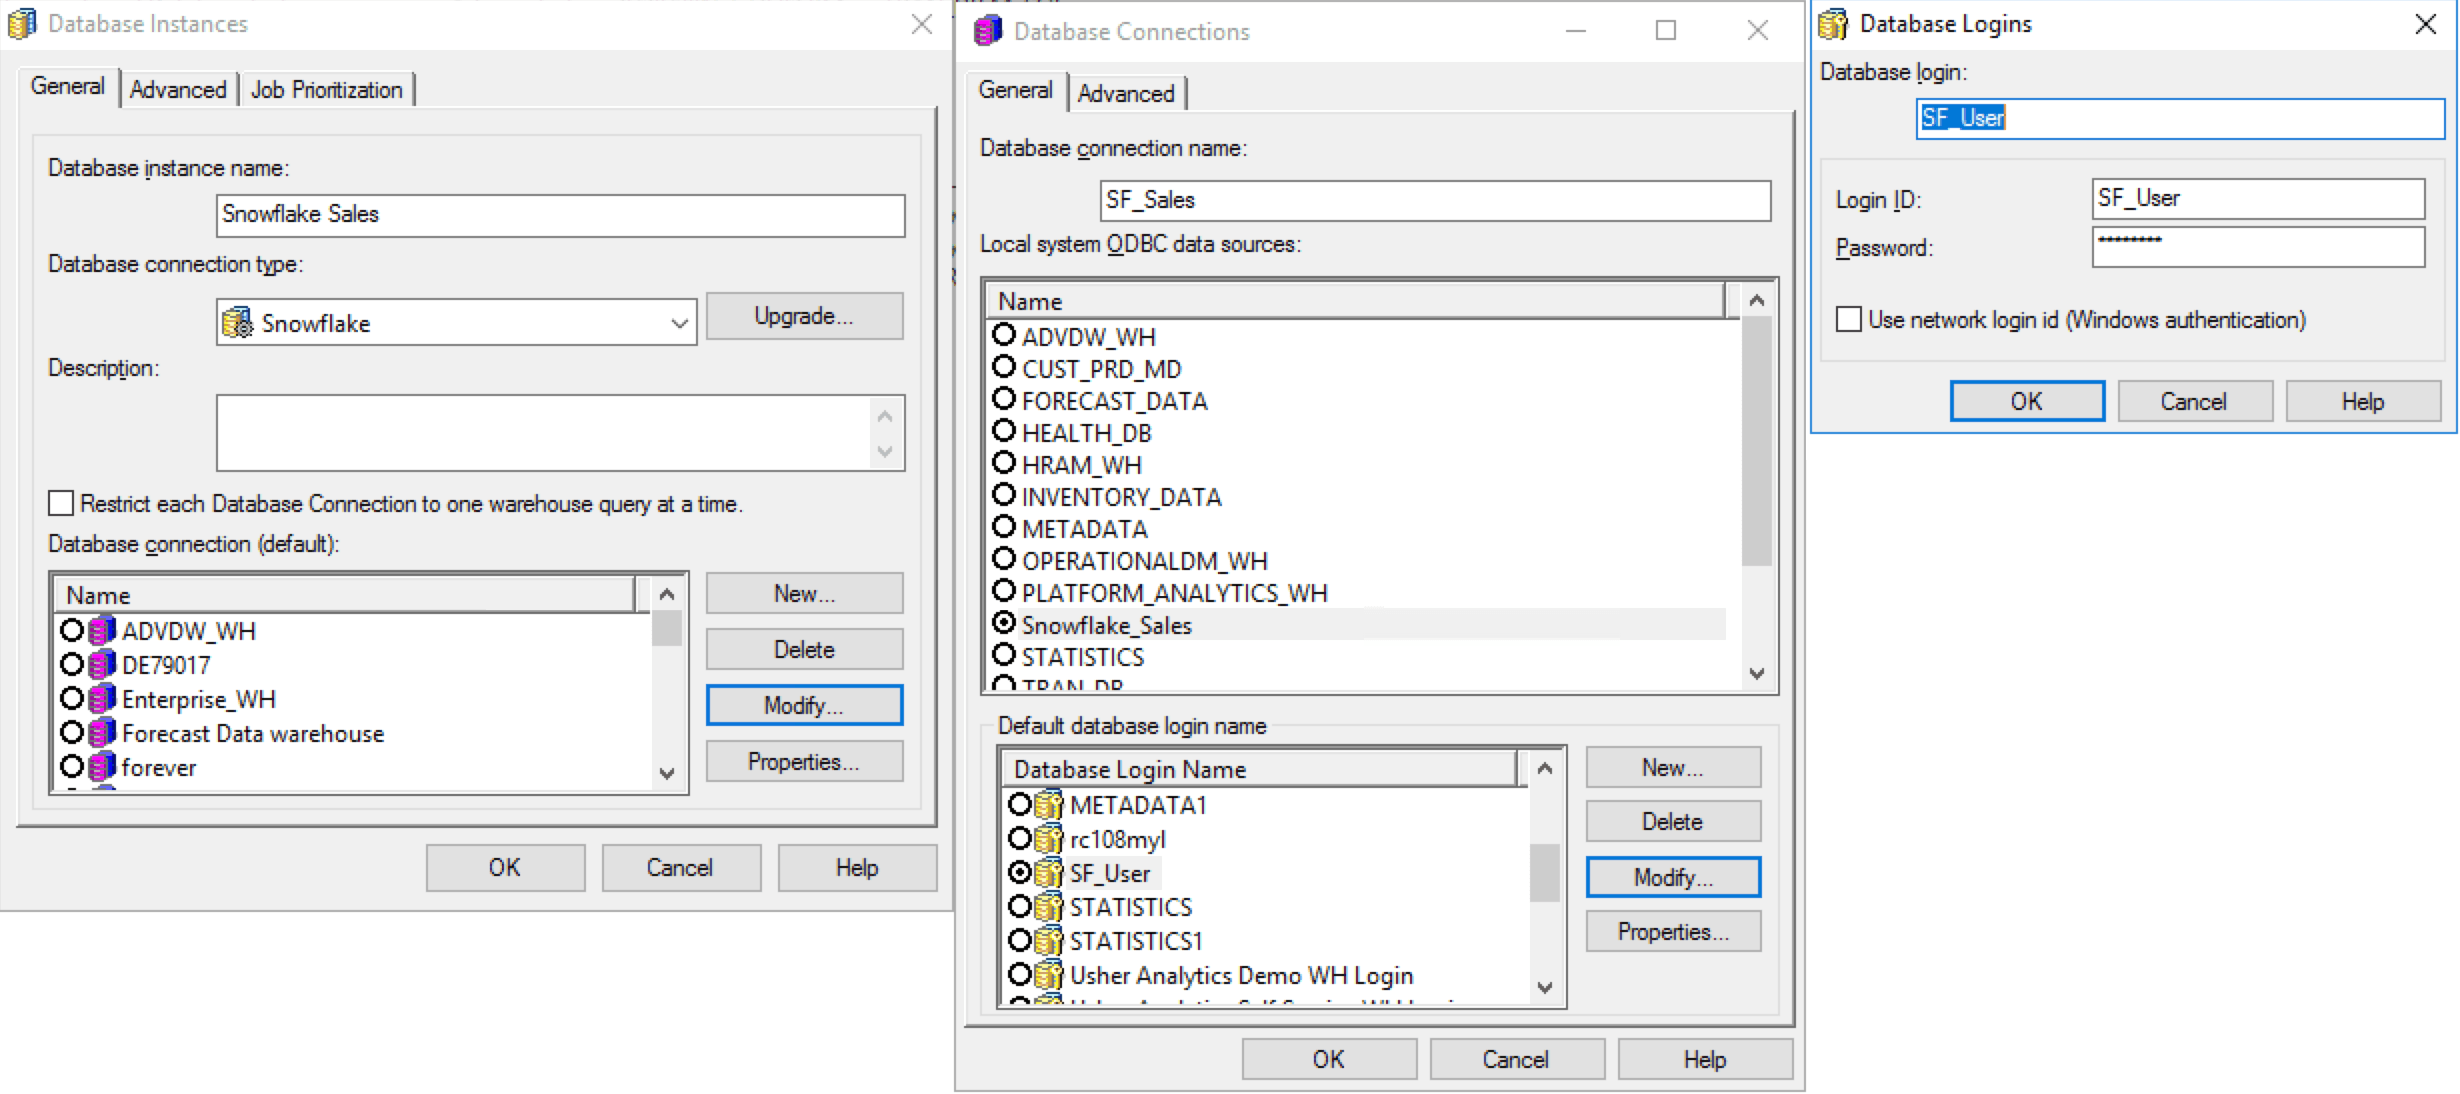
Configuring the Database Connection in Strategy
Assuming Snowflake Username is SF_User, the configuration screen should look like this
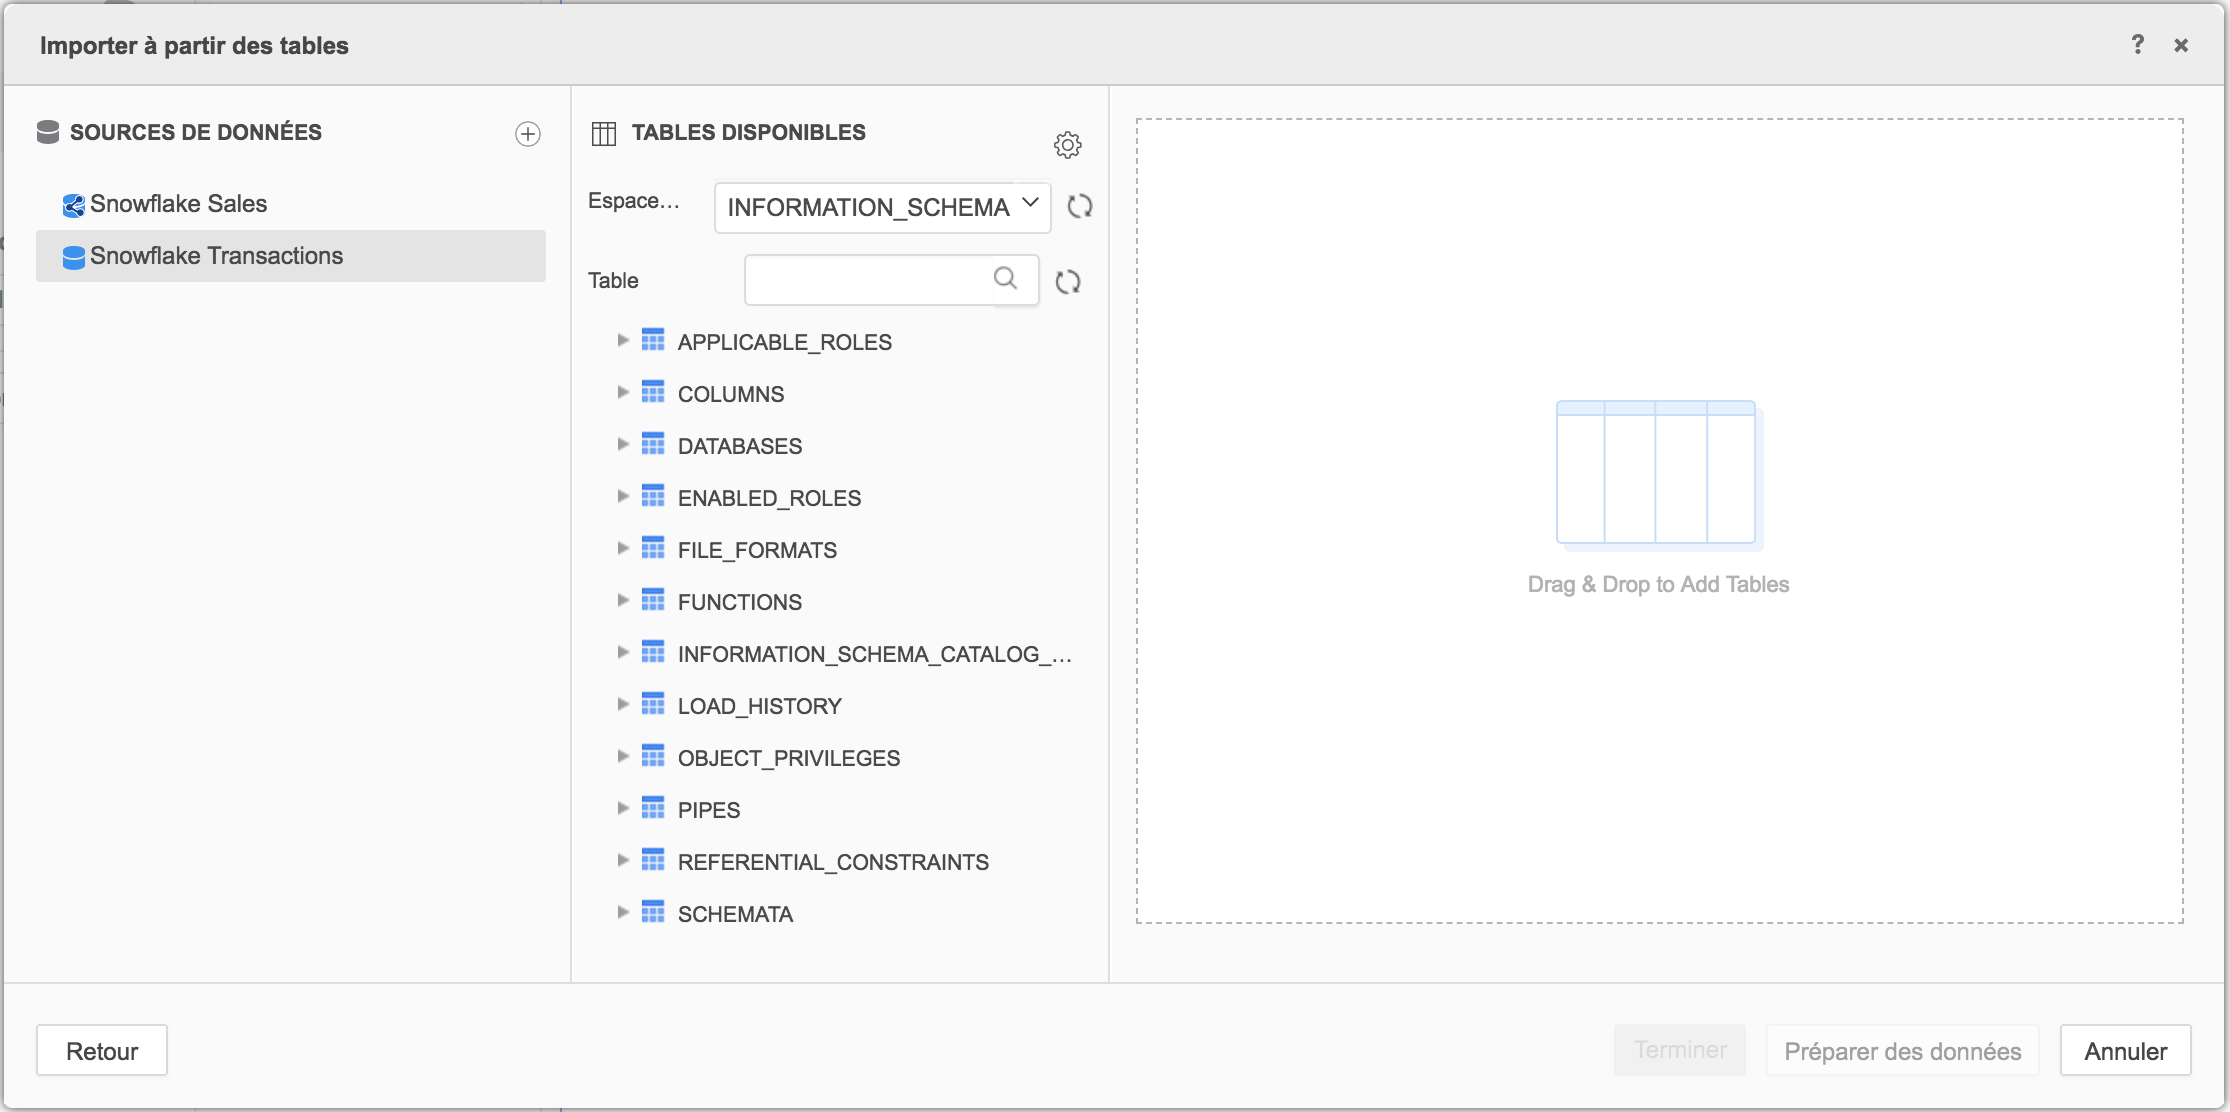
In Strategy Web Data Import
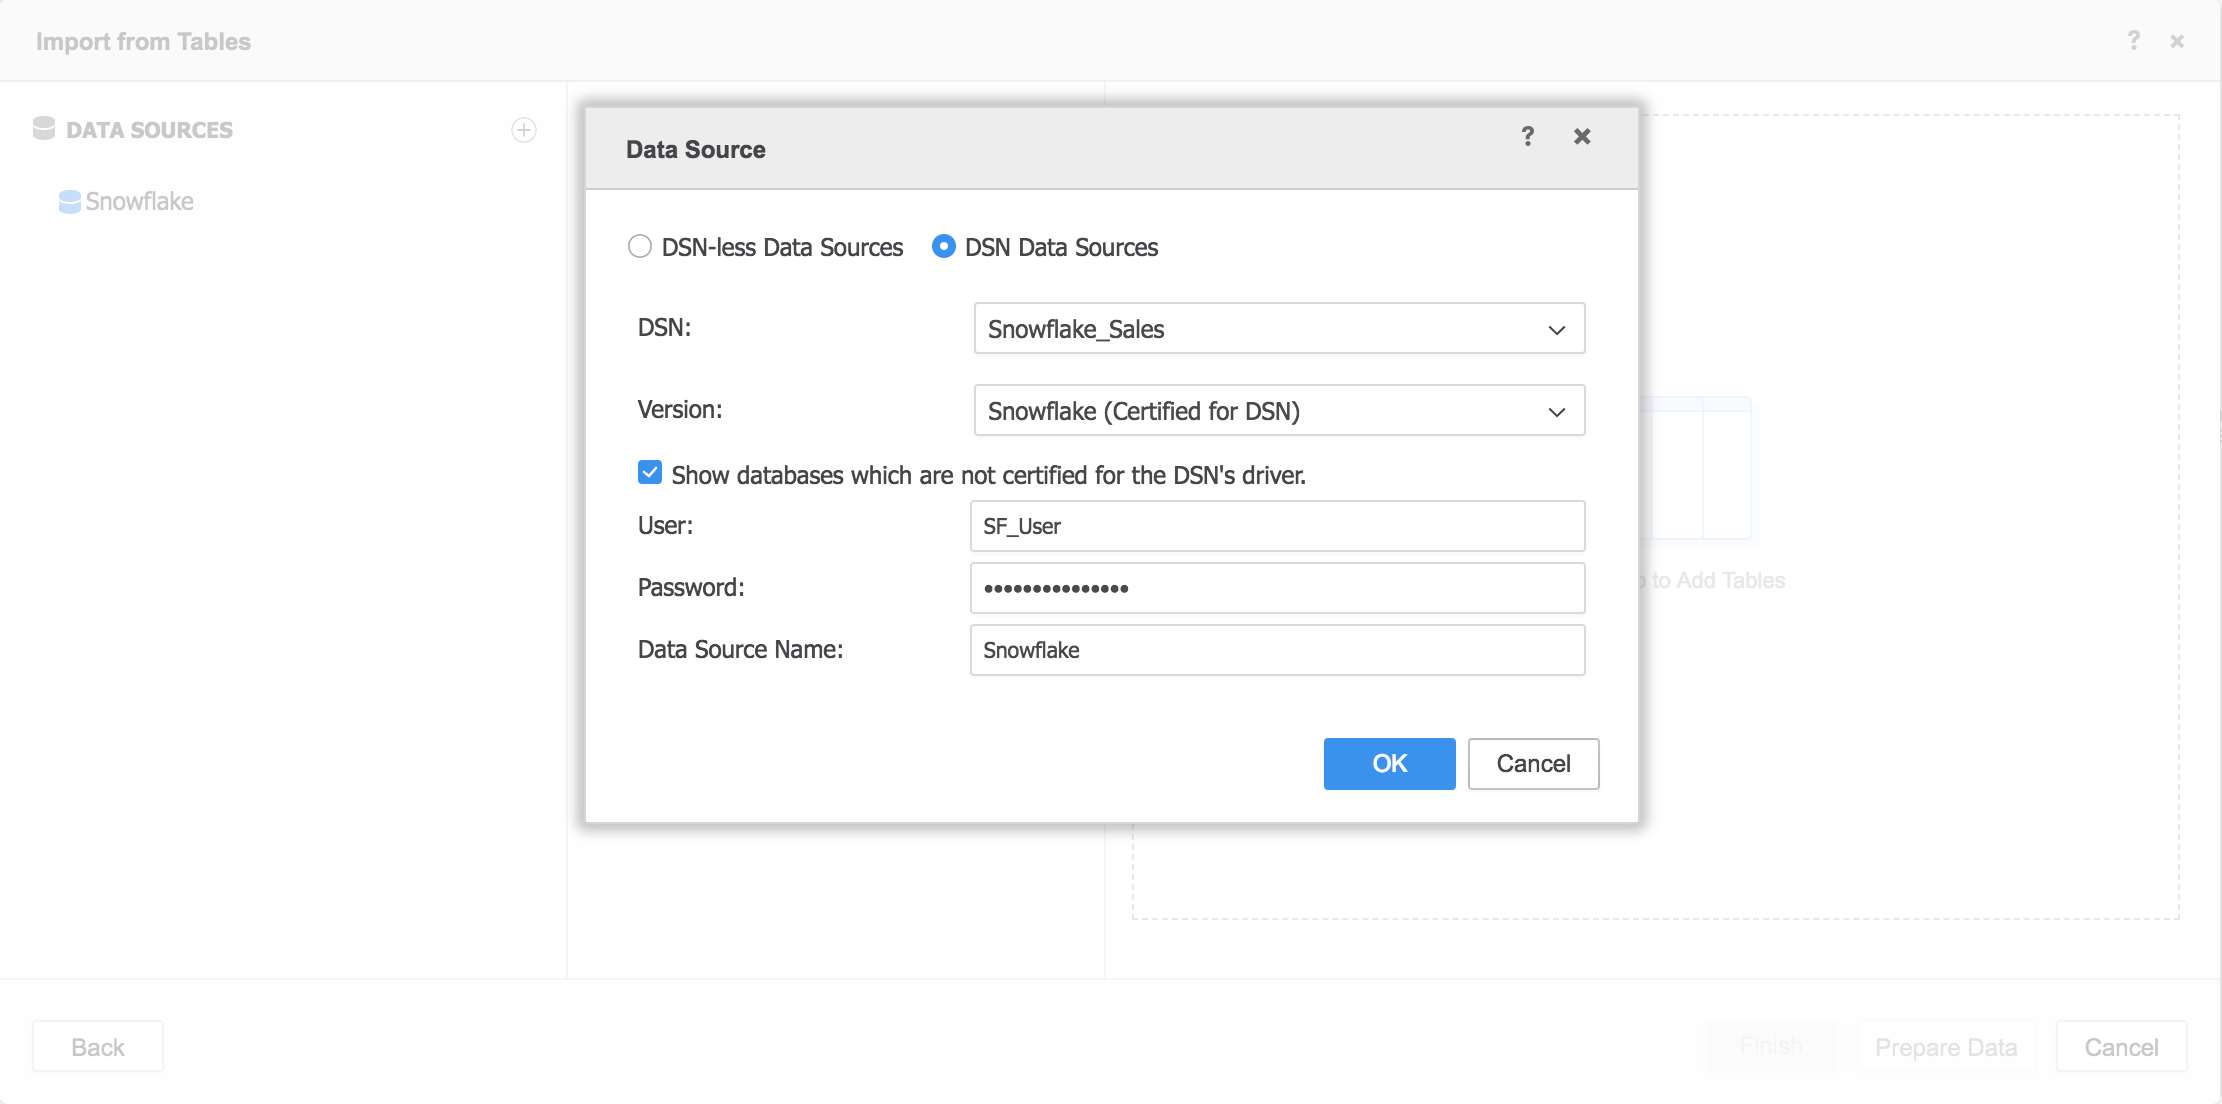
In Strategy Developer
Known issues
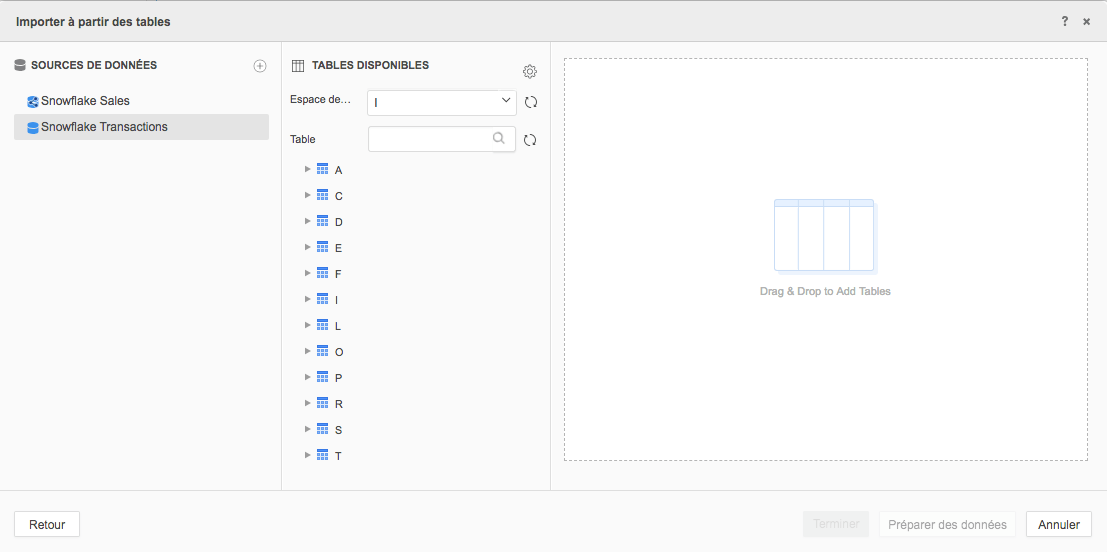
If namespaces and table names only show up as one letter, the Unix charset needs to be changed in the DB Connection
Screenshot of the issue:
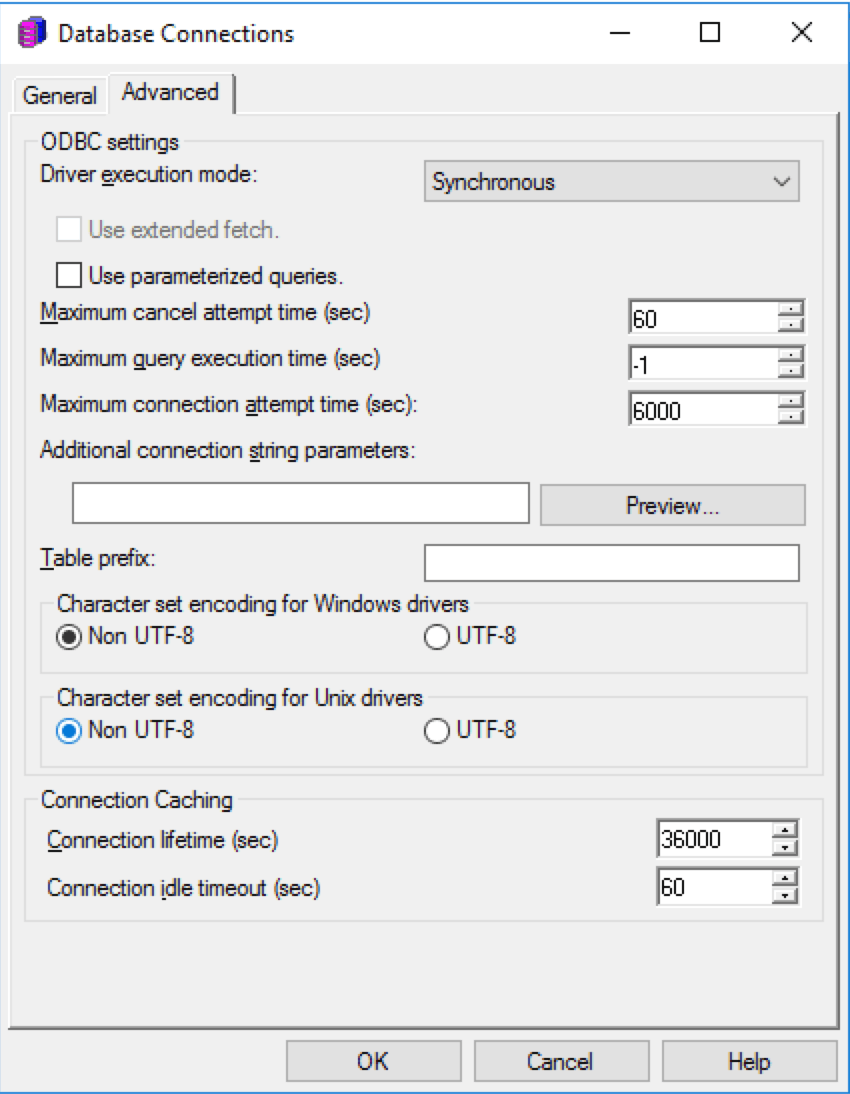
In order to resolve this:
Result :
KB442134