EducationSoftwareStrategy.com
StrategyCommunity

Knowledge Base

Product

Community

Knowledge Base

TopicsBrowse ArticlesDeveloper Zone

Product

Download SoftwareProduct DocumentationSecurity Hub

Education

Tutorial VideosSolution GalleryEducation courses

Community

GuidelinesGrandmastersEvents
x_social-icon_white.svglinkedin_social-icon_white.svg
Strategy logoCommunity

© Strategy Inc. All Rights Reserved.

LegalTerms of UsePrivacy Policy
  1. Home
  2. Topics

KB440543: How to integrate Okta with out of the box MicroStrategy SAML


Hussam Bahia

Senior Manager, Technical Account Management • MicroStrategy


Currently MicroStrategy is not pre-integrated with Okta. One way to leverage Okta login to Microstrategy is to create a custom app in Okta and connect with MicroStrategy through SAML. The document will focus on SAML configuration on Okta side. There is no way to upload a metadata file to Okta, thus it requires manual configuration. Okta works with both SSL and non-SSL encryption. It's always recommended to use secured HTTPS setup on MicroStrategy applications for security purposes. There is also a way to set up Okta login to MicroStrategy with traditional username/password login instead of SAML. It is going to be a custom application on Okta that saves the credentials. Please refer to Okta's guide for how to set it up if interested.

For SAML setup info on MSTR side refer to our documentation.
 
Create new Okta custom app
Note that only an Okta administrator can create and configure custom apps.
 
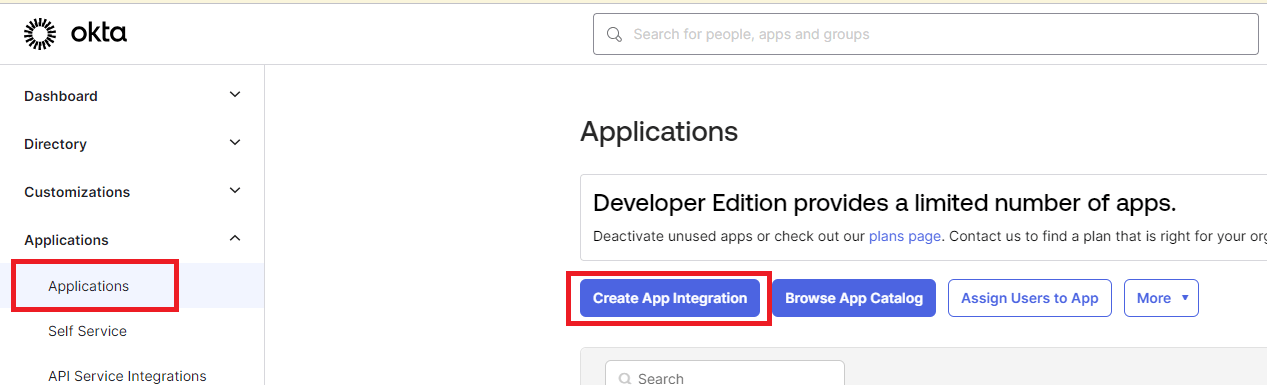
Log in to Okta Administrator Dashboard and go to the "Applications" link on the left-side navigation bar. Then, Select "Create App Integration"

ka0PW0000000cq5YAA_0EMPW000003kinV.jpeg

 
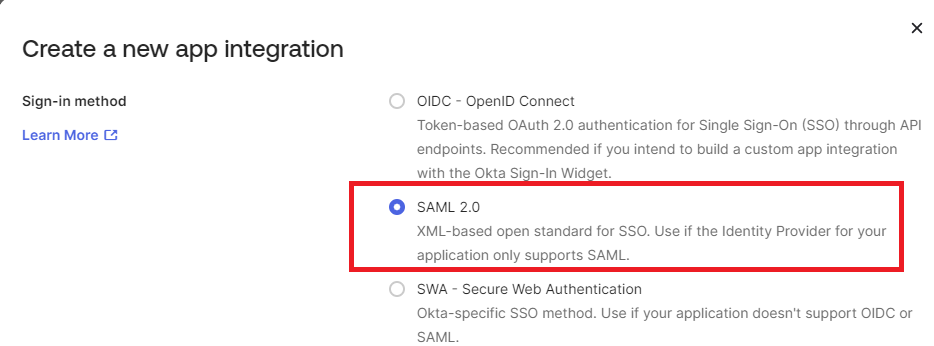
Select "SAML 2.0" as the sign on method, then click "Next"

ka0PW0000000cq5YAA_0EMPW000003kaV2.jpeg

 
The Create SAML Integration page will then show up.
Finish step 1 "General Settings" (application name, icon, etc.) as desired.
 
Okta app SAML configuration
Note: it's recommended to finish SAML setup on the Strategy side first so that values can be directly copied over from the generated configuration files.
 
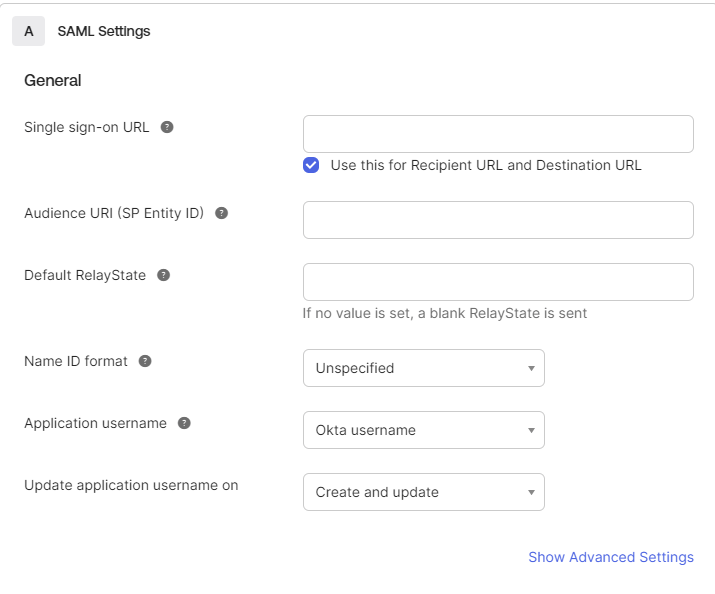
In Step 2, SAML options will show as follows:

ka0PW0000000cq5YAA_0EMPW000003kYbI.jpeg
  • Single Sign-on URL also referred to as "assertion consumer service URL", is the Strategy application address that sends and receive SAML messages. If SAML setup is already finished on the Strategy side, It's the same URL that presents in the SPMetadata.xml file within the "md:AssertionConsumerService" tag at the bottom. The URL usually takes the form of HTTP(s)://{host server}/{MSTR application name}/saml/SSO.
  • Audience URI (SP Entity ID): corresponds to the "entityID" value at the top of the SPMetatada.xml file, which is also the first input field on the Strategy SAML config page. It is a unique identifier of our application. Simply match the value here, just make sure no other application is using the same Entity ID.
  • Default RelayState: leaving it blank works
  • Name ID format & Application username: These options control what information would be sent over as the "Name ID", which is the primary attribute we use to link a user outside (in this case an Okta user) to a Strategy user. Consider what attribute is more desirable to serve as the unique identifier inside Strategy, and pick the options accordingly.

 
"Show advanced settings" will drop down additional SAML settings:

ka0PW0000000cq5YAA_0EMPW000003kWG8.jpeg

 
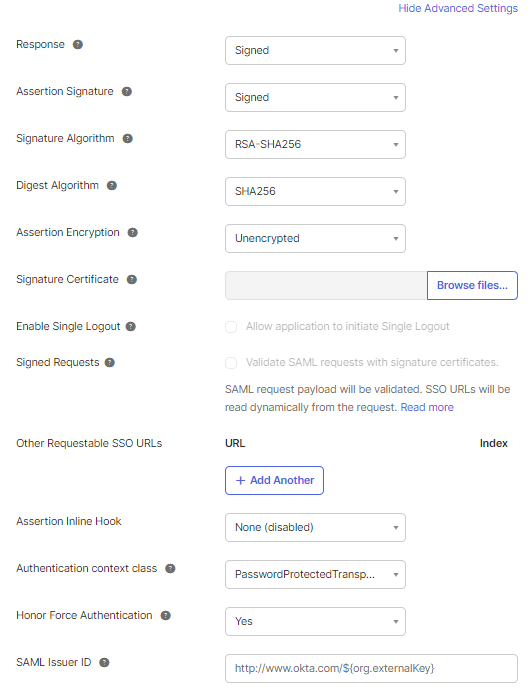
Some notes on the advanced settings:

  • Generally, everything can be kept the default. Note that assertion encryption is not used by default – this usually is considered safe if HTTPS connections are used on both sides. It can also be turned on for enhanced security, but it will require some extra configurations including exporting the certificate from Strategy SAML config files, upload it to the Okta app and set correct encryption method.

 
Configure attribute mapping
The last part of SAML configuration attributes mapping:

ka0PW0000000cq5YAA_0EMPW000003kaek.jpeg

 
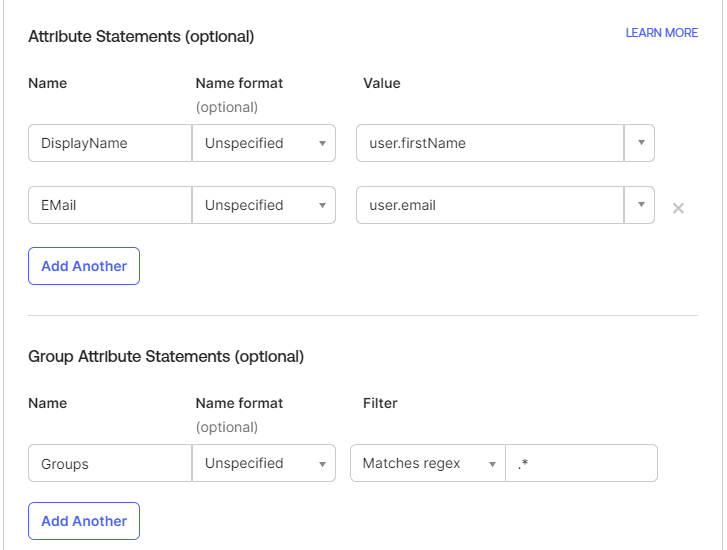
This is to configure what SAML attributes to be sent to Strategy. Currently, Strategy is asking for four attributes that could potentially be used inside Strategy, namely "Email", "DistinguishedName", "DisplayName" and "Groups" if default names were used at Strategy SAML configuration. The attribute name mapping can also be found in the MstrSamlConfig.xml file.
 
Detailed information about attribute mapping can be found in the document for Strategy SAML configuration, but generally, it's not required to send over all these attributes. Authentication should work even if no attribute is sent. However, the "Groups" information is more important since the information is used to grant access to the Strategy Web/Mobile admin page, and it can also be used to further integrate into Strategy groups to do user privilege management. Configure what value is to be sent in the attributes (or not sending anything at all) as needed.
 
Note on group attribute setting: Okta placed a configurable filter for sending out group information in case too many unused groups are sent over. The filters can be set to send over all groups that a user belongs to. For this functionality, the filter needs to be set as "Regex", with .’*’ as shown in the screenshot above.
 
After defining the attributes, click "Next" Under the 'Preview the SAML Assertion' section.
Then click "Finish."
Finish SAML setup
The next page should be the "Sign On" tab for the newly created Okta Application:

ka0PW0000000cq5YAA_0EMPW000003kmPh.jpeg

 
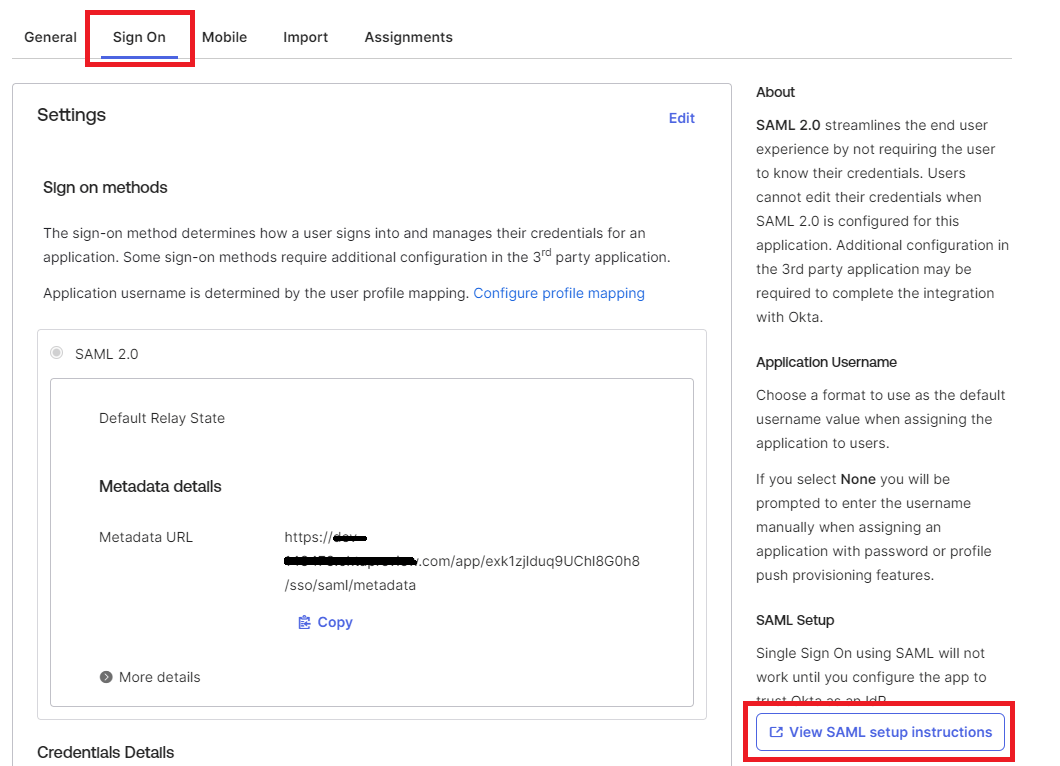
On the right side of the page, select the "View SAML setup instructions" button to retrieve the application metadata.
Copy the XML content from the "Optional" section at the bottom of the page and save it to a file named "IDPMetadata.xml.

ka0PW0000000cq5YAA_0EMPW000003kmmI.jpeg

Copy this newly created IDPMetadata.xml file to the /SAML folder in the Web application.
Web: /MicroStrategy/WEB-INF/classes/resources/SAML
Library: /StrategyLibrary/WEB-INF/classes/auth/SAML
Final Note
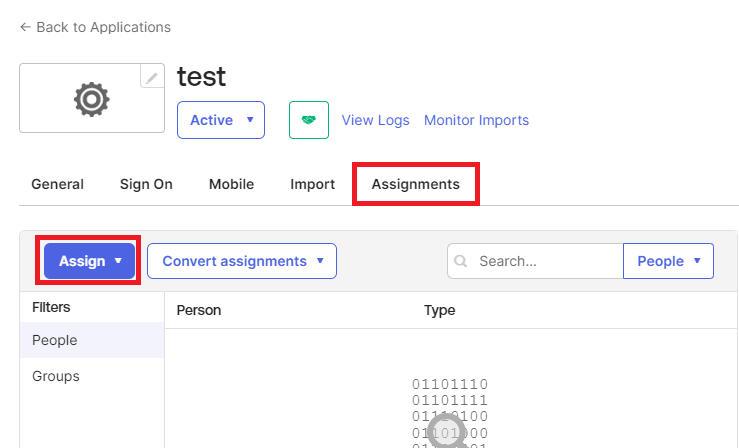
Ensure that the users and groups in Okta are assigned to the application that was created by navigating to the "Assignments" tab, then clicking "Assign" and selecting the Users/Groups to be assigned to this application.
 

ka0PW0000000cq5YAA_0EMPW000003kuv7.jpeg

Third Party Software Installation: WARNING:
The third-party product(s) discussed in this technical note is manufactured by vendors independent of Strategy. Strategy makes no warranty, express, implied or otherwise, regarding this product, including its performance or reliability.
  KB440543


Comment

0 comments

Details

Knowledge Article

Published:

April 3, 2018

Last Updated:

February 13, 2024