In Strategy Web, it is possible to use an image as a button to export a grid on a document to Excel in Strategy version 10.4 and later. This document provides the steps to accomplish the same.
The goal is to create an image link that is used to export the grid, like shown below:
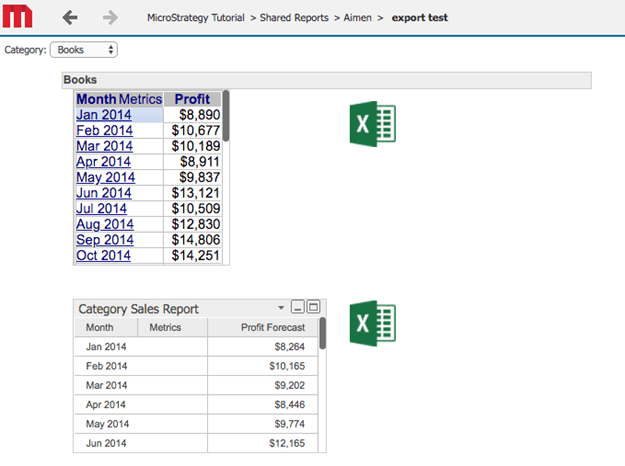
Document in Edit Mode
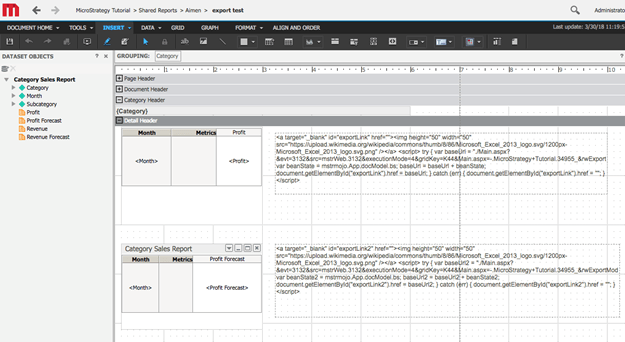
1. Create a Report Services Document in Strategy Tutorial
2. Make two grids with different attributes and metrics in each
3. Insert an HTML container and insert the script below. Make sure the Project name matches the given project and gridKey matches (highlighted in bold in the script below). The code below is used for the first grid and button. Main things to watch are the gridKey values and the name of the element id which in the below code is exportLink.
<a target="_blank" id="exportLink" href=""><img height="50" width="50" src="https://static.wikia.nocookie.net/logopedia/images/7/7f/Microsoft_Office_Excel_%282018%E2%80%93present%29.svg/revision/latest?cb=20190927105356" /></a>

<script>
        try {
            var baseUrl = "./Main.aspx?&evt=3132&src=mstrWeb.3132&executionMode=4&gridKey=K44&Main.aspx=-.Strategy+Tutorial.34955_&rwExportMode=4&rwb=";
            var beanState = mstrmojo.App.docModel.bs;
            baseUrl = baseUrl + beanState;
            document.getElementById("exportLink").href = baseUrl;
        } catch (err) {
            document.getElementById("exportLink").href = "";
        }
</script>
<a target="_blank" id="exportLink2" href=""><img height="50" width="50" src="https://static.wikia.nocookie.net/logopedia/images/7/7f/Microsoft_Office_Excel_%282018%E2%80%93present%29.svg/revision/latest?cb=20190927105356" /></a>


<script>
        try {
            var baseUrl2 = "./Main.aspx?&evt=3132&src=mstrWeb.3132&executionMode=4&gridKey=K45&Main.aspx=-.Strategy+Tutorial.34955_&rwExportMode=4&rwb=";
            var beanState2 = mstrmojo.App.docModel.bs;
            baseUrl2 = baseUrl2 + beanState2;
            document.getElementById("exportLink2").href = baseUrl2;
        } catch (err) {
            document.getElementById("exportLink2").href = "";
        }
</script>