EducationSoftwareStrategy.com
StrategyCommunity

Knowledge Base

Product

Community

Knowledge Base

TopicsBrowse ArticlesDeveloper Zone

Product

Download SoftwareProduct DocumentationSecurity Hub

Education

Tutorial VideosSolution GalleryEducation courses

Community

GuidelinesGrandmastersEvents
x_social-icon_white.svglinkedin_social-icon_white.svg
Strategy logoCommunity

© Strategy Inc. All Rights Reserved.

LegalTerms of UsePrivacy Policy
  1. Home
  2. Topics

KB485059: How to import data from Microsoft Dynamics 365 to MicroStrategy


Community Admin

• Strategy


This article provides steps for importing data from Microsoft Dynamics 365 to MicroStrategy.

Starting with the release of Strategy ONE (March 2024), dossiers are also known as dashboards.

Description


The Dynamics 365 Field Service business application helps organizations deliver onsite service to customer locations. The application combines workflow automation, scheduling algorithms, and mobility to set up mobile workers for success when they are onsite with customers fixing issues. Integration with Strategy gives user the advantage to present all necessary data on single visualization.

Workflow Example


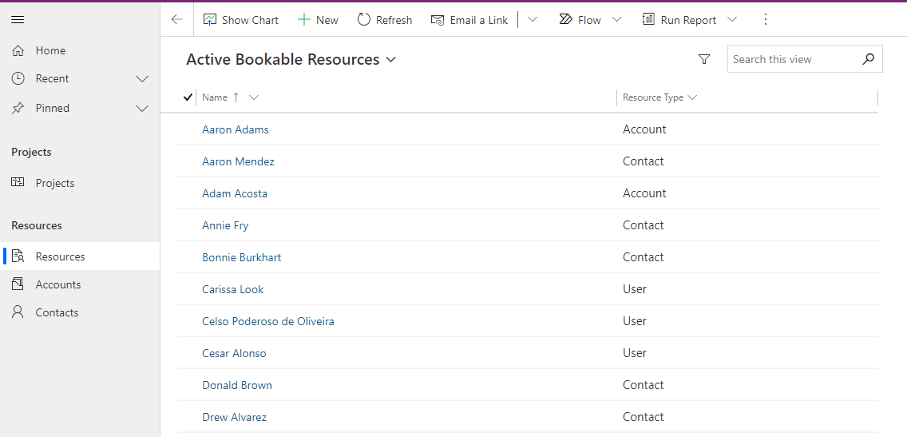
You, a Microsoft Dynamics 365 user, would like to collect email addressees and business phone numbers of all Bookable Resources, who are Contacts, to communicate with them. 
ka0PW0000001Jg6YAE_0EM4W0000028cep.jpeg

To do this, you check Bookable Resources with the Contact type and then go to the Contacts tab.

ka0PW0000001Jg6YAE_0EM4W0000028cfE.jpeg

Here, you can check the Bookable Resources' email addresses and business phone numbers. 
Let's see how you can utilize the Microsoft Dynamics 365 connector in Strategy.
  • Log into Strategy Web and click Create.
  • Choose Add External Data. 
ka0PW0000001Jg6YAE_0EM4W0000028cfs.jpeg
  • Select the Microsoft Dynamics 365 connector.
ka0PW0000001Jg6YAE_0EM4W0000028ciN.jpeg
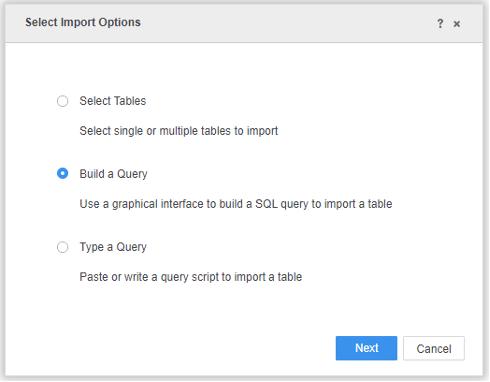
  • Select an import option.
ka0PW0000001Jg6YAE_0EM4W0000028ciX.jpeg
  • In the Data Source dialog, complete the required fields.
    To obtain the parameters required for User Level OAuth authentication, see Required Parameters for Authentication in Microsoft Dynamics 365.
ka0PW0000001Jg6YAE_0EM4W0000028cim.jpeg
  • Click Save.
  • In the OAuth Properties dialog, complete the required fields.
    To obtain the parameters required for User Level OAuth authentication, see Required Parameters for Authentication in Microsoft Dynamics 365.
    Copy the callback URL, as it is needed to whitelist in Azure AD.
ka0PW0000001Jg6YAE_0EM4W0000028cj1.jpeg
  • Click OK to save the database connection.
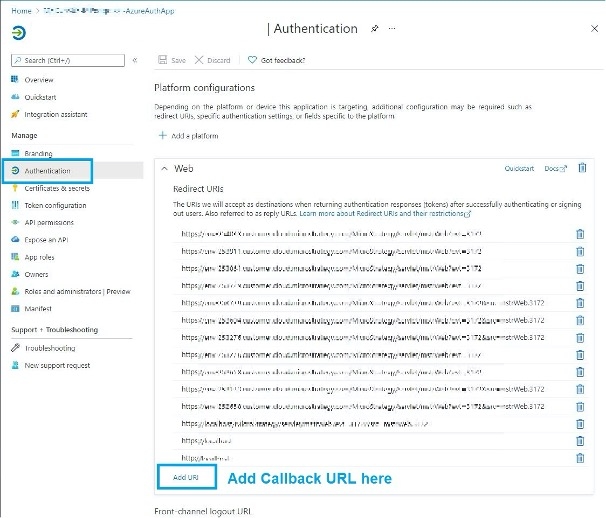
  • Access the application in Azure AD.
  • Go to Application > Web > Redirect URIs and click Add URI.
ka0PW0000001Jg6YAE_0EM4W0000028cjB.jpeg
  • Click on the newly created database instance.
    The Azure AD authentication dialog appears.
    Your browser must allow pop-ups.
ka0PW0000001Jg6YAE_0EM4W0000028cjz.jpeg
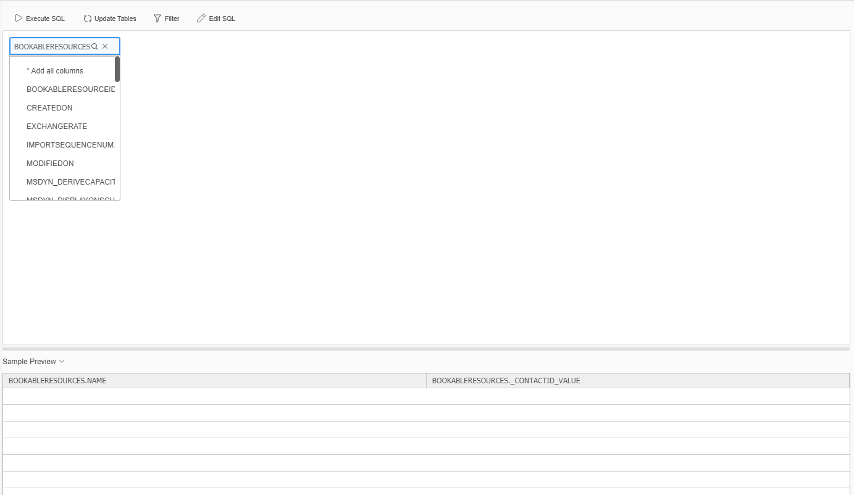
  • Select the DYNAMICS365 namespace. Other namespaces contain system tables.
  • Add NAME and _CONTACTID_VALUE from the BOOKABLERESOURCES table.
ka0PW0000001Jg6YAE_0EM4W0000028ckE.jpeg
  • Click Add a new table and select the Microsoft Dynamics 365 data source.
ka0PW0000001Jg6YAE_0EM4W0000028e8q.jpeg
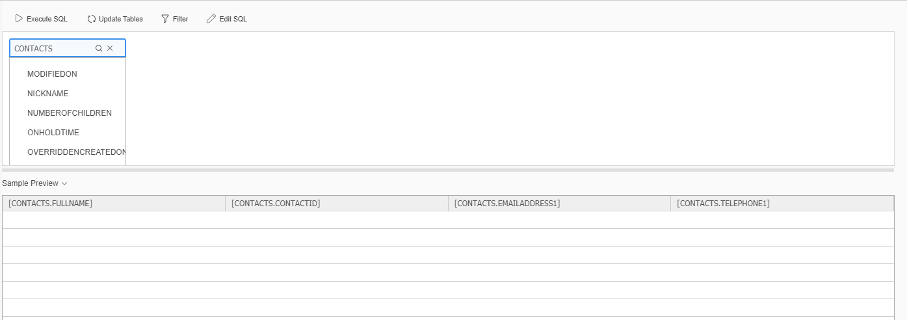
  • Add FULLNAME CONTACTID, EMAILADRESS1, and TELEPHONE1 from the CONTACTS table.
ka0PW0000001Jg6YAE_0EM4W0000028e8v.jpeg
  • Map Contactid Value to Contactid and click Finish (Connect Live>.
ka0PW0000001Jg6YAE_0EM4W0000028e90.jpeg
  • Save your dataset.
  • Click on your dataset to create a dossier.
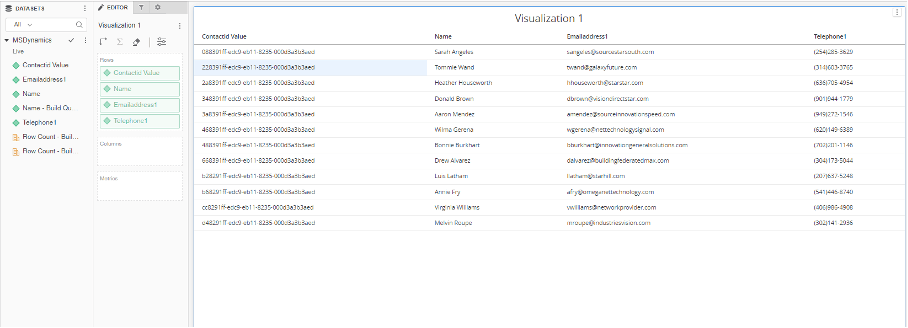
  • Double-click on the ContactID, Name, Emailaddress1, and Telephone1 attributes to add them to the grid.
ka0PW0000001Jg6YAE_0EM4W0000028e95.jpeg
  • We have all Bookable resources with contact type, along with their contact email and phone. They will update automatically when user add Bookable resources with Contacts type to Microsoft Dynamics 365 application.


Comment

0 comments

Details

Knowledge Article

Published:

June 17, 2021

Last Updated:

March 21, 2024