Project Comparison is a tool included in the Strategy Administrator package which compares two related projects and reports the differences between the projects. The tool is a component of Strategy Object Manager and provides results that can be used directly by Strategy Object Manager to assist in the synchronization of projects.
The projects being compared must be on the same version if objects are to be moved using Strategy Object Manager. A read-only comparison can be performed between projects existing in different versions. Read-only mode will provide the results of the comparison, but will not allow objects to be moved.
Project Comparison will compare two related projects in the same metadata or in separate metadatas. They may be compared in either 2-tier or 3-tier.
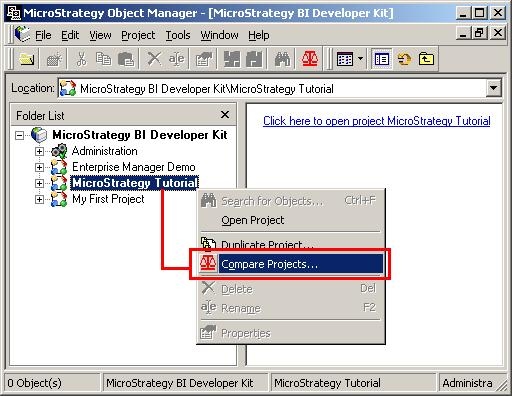
Follow the steps below to access the Project Comparison Wizard:
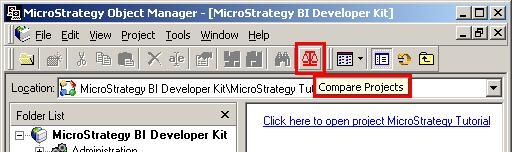
An alternative way to access the Project Comparison Wizard is by clicking on the 'Compare Projects' shortcut in the Strategy Object Manager menu, as shown below:
Project Comparison Wizard contents
Welcome page:
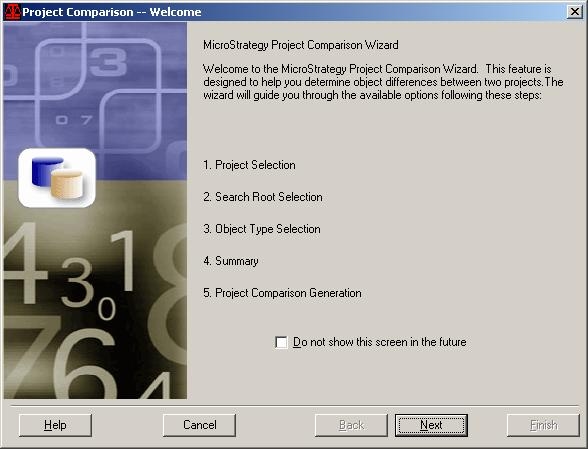
The Welcome page summarizes the options that are available in the Project Comparison Wizard.
Select the 'Do not show this screen in the future' check box so the Welcome screen will not be displayed the next time the Project Comparison Wizard is run.
Specify the Source Data Source page:
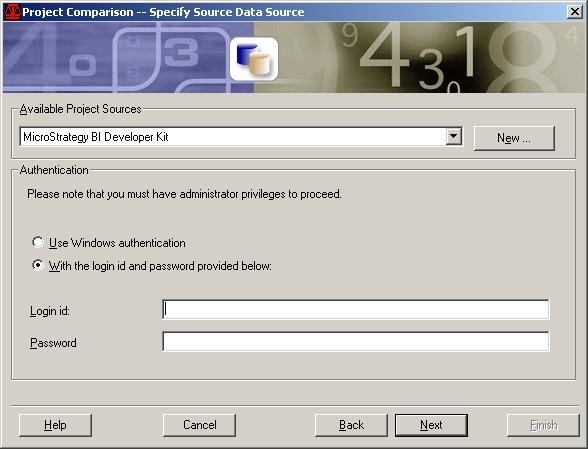
Select the source project from the Available Project Sources drop-down list. By default, Windows authentication is used to access the project. Users can use a different login and password by selecting the 'With the login id and password provided below' check box and entering the login and password. Note that Administrator privileges are required to perform a comparison.
To create a new project source, click New. The Project Source Manager opens.
Specify the Source Project page:
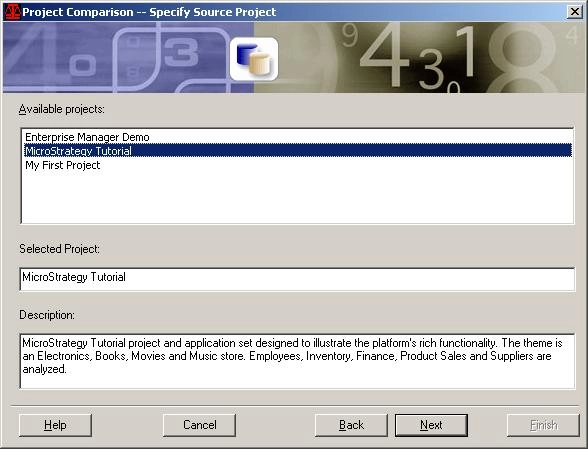
Select the source project from the Available projects area. These are the projects available within the selected project source. Once a project is selected, the project name appears under Selected Project, along with the project description in the Description area. Users may not modify either of these.
Specify the Destination Data Source page:
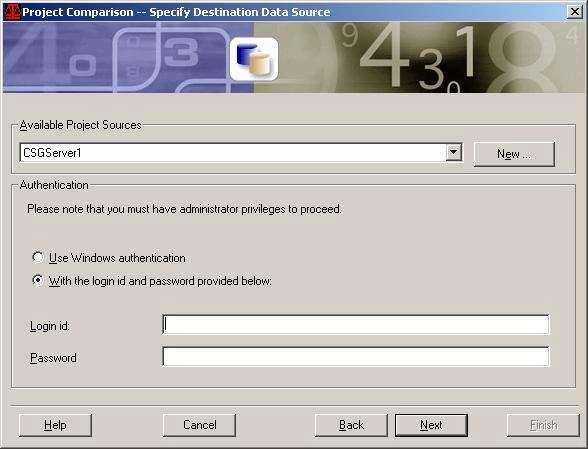
Select the destination project from the Available Project Sources drop-down list. By default, Windows authentication is used to access the project. Users can use a different login and password by selecting the 'With the login id and password provided below' check box and entering the login and password. Note that Administrator privileges are required to perform a comparison.
To create a new project source, click New. The Project Source Manager opens.
Specify the Destination Project page:

Select the destination project from the Available projects area. These are the projects available within the selected project source. Once a project is selected, the project name appears under Selected Project, along with the project description in the Description area. Users may not modify either of these.
Select Search Root page:
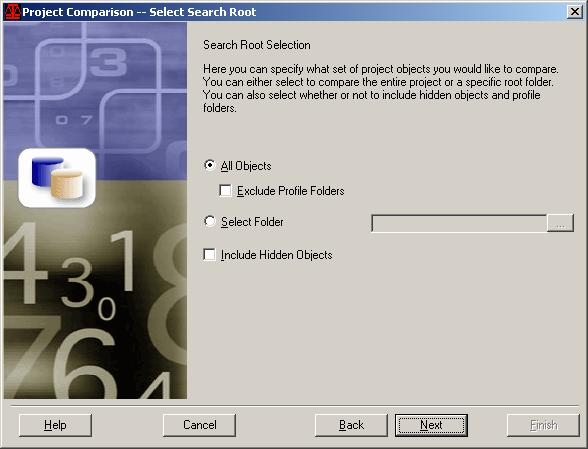
Search Root Selection allows users to select the set of project objects to compare by following the steps below:
Select Object Types page:
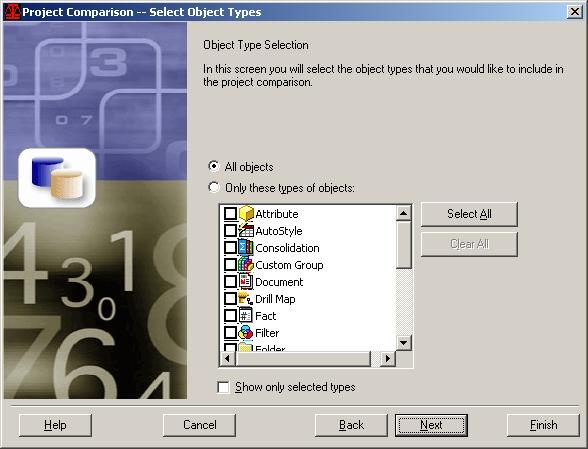
Users can select the object types to include in the project comparison by following the steps below:
Summary page:
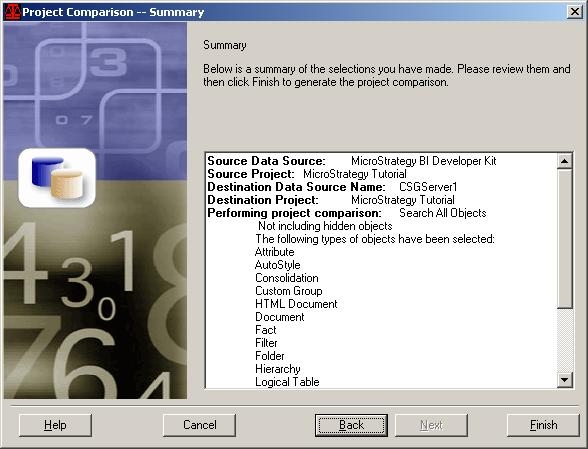
Users can view a summary of all the selections that they have made. Before proceeding, review the information to ensure it is correct. Click Back to make changes. To choose to generate the project comparison, click Finish. Note: The destination project will not be modified as a result of the comparison.
Project Comparison Result Set selection:
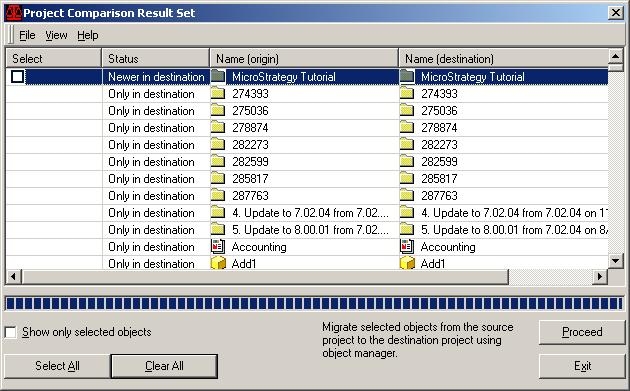
Users can view the result set of the project comparison. It displays the following information in a tabular format:
Saving the result set:
Users can save the result set of the comparison as a text file or an excel file. Users can also print the result set to a printer of their choice.
Moving objects displayed in the result set:
The following steps describe how to synchronize the two projects based on the results of Project Comparison:
NOTE: This action migrates the selected objects from the source project to the destination project. Changes are made only in one direction