SYMPTOM:
When triggering an outline in Command Manager Universal, the outline is not executed. When opening the command manager log (CMDMGR.log), the error "Invalid Project Source" is displayed.
###################################################################
5/19/09 2:17 PM Invalid Project Source Name.
5/19/09 2:17 PM To display help, use the -help option.
CAUSE:
The error message implies that a Project Source is either incorrect or has not been created.
ACTION:
The Strategy Configuration Wizard must be used to edit or create a new project source. There are two methods of creating a Project Source in Strategy Universal with the Configuration Wizard: Using the GUI application or the Command line application. Both methods are detailed below:
Method 1 - Configuration Wizard GUI
1) Start the Strategy Configuration Wizard via an xterm by navigating to path to the binary "mstrcfgwiz". The default path on Linux is "/var/opt/MicroStrategy/bin". Select the third option and press "Next".

2) Provide a name for the Project Source. Press "Next".

3) The values seen below were automatically added. If they are missing, provide the hostname and the port number of the Intelligence Server. See below:

4) Select the authentication mechanism. The default "Standard Authentification" has been selected. Press "Next".

5) The Summary page is displayed. Press Finish to complete the process.
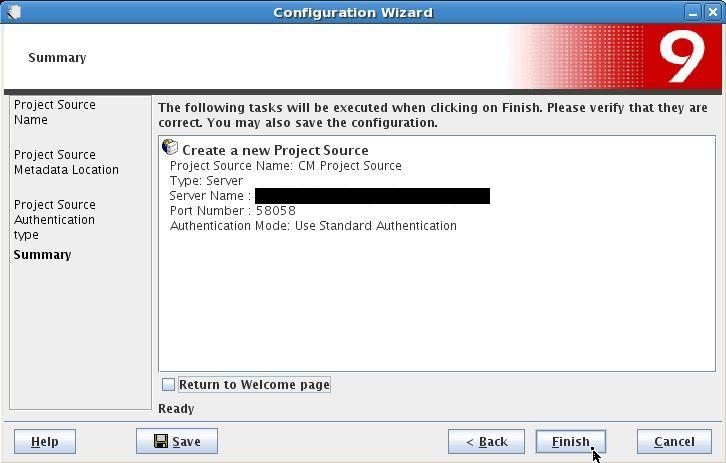
Method 2 - Configuration Wizard command-line
If the graphical environment is not available, the Strategy Configuration Wizard can be invoked in command-line mode with the command "mstrcfgwiz-editor" (<Strategy Home Directory>/bin/mstrcfgwiz-editor). The process is similar to the graphical steps, except they detail the creation of a "Response.INI" file, which contains the steps that need to be performed
The following steps detail the creation of a project source using the command-line version of the Configuration Wizard:
1) Navigate to <Strategy Home Directory>/bin and run "./mstrcfgwiz-editor". The following output will be displayed:
###############################
###############################
Welcome to the Strategy Configuration Wizard. The Strategy
Configuration Wizard walks you through the process of setting up the
environment for the Strategy products installed in your system.
This process is done through creating or editing response files.
Notice that you will need to press <ENTER> after each step in order to
proceed. Default values are applied in some cases. They are
distinguised by enclosed brackets (i.e. ). You can apply them by
pressing <ENTER>. Finally if you want to exit from the application,
please press <Q> anytime.Press <ENTER> to continue.
###############################
###############################
2) Pressing "Enter" will show the following two options and number 2 needs to entered in order to create a response. ini file (this file will be executed later):
The Strategy Configuration Wizard walks you through the process
of setting up the environment for the Strategy products installed
in your system. Select the component to be configured from the list
below.
1. Use Response file
2. Create Response file
->2
3) Three options will be displayed, which mirror the options shown in the first screenshot. The third option is selected:
1. Metadata, History List and Statistics Repository Tables
2. Strategy Intelligence Server
3. Project Sources
->3
4) Select a Project Source name, the server name and the port number of the Intelligence Server:
Project Source Name ->Test
Intelligence Server name ->
A Strategy Intelligence Server was not found at this location.
Would you like to use this machine name anyway (Y/N) ?y
TCP Port number ->58058
5) Select the Authentication method being used . Standard Authentication is selected below:
1. Use login id and password entered by the user (standard authentication)
2. Use login id and password entered by the user for Warehouse (database authentication)
3. Use Integrated Authentication
Enter authentication type to use ->1
6) Provide a name for the response.ini file. The default is "Response.INI". For this example, the filename is "ProjectSource.INI" (the INI file will be saved in <Strategy Home Directory>/install/)
Response file to be saved ->ProjectSource.INI
7) Once the file is saved, it can be executed immediately. See below:
Configuration procedures have been saved to Response file successfully.
Do you want to execute the Response File just created (Y/N) ->y
8) Once the response.ini has been executed, the following output is shown:
Configuring a new Project Source...
Step 1 :Creating a new Project Source
Step 2 :Saving the newly created Project Source
The configuration procedure has been run successfully.
The project source has now been created.
