EducationSoftwareStrategy.com
StrategyCommunity

Knowledge Base

Product

Community

Knowledge Base

TopicsBrowse ArticlesDeveloper Zone

Product

Download SoftwareProduct DocumentationSecurity Hub

Education

Tutorial VideosSolution GalleryEducation courses

Community

GuidelinesGrandmastersEvents
x_social-icon_white.svglinkedin_social-icon_white.svg
Strategy logoCommunity

© Strategy Inc. All Rights Reserved.

LegalTerms of UsePrivacy Policy
  1. Home
  2. Topics

KB41359: How to configure Trusted Authentication for MicroStrategy Office


Community Admin

• Strategy


The following provides the steps on how to configure Trusted authentication for MicroStrategy Office Office.

INTRODUCTION
The following provides the steps on how to configure Trusted authentication for Strategy Office Office 9.2.x through 10.x.
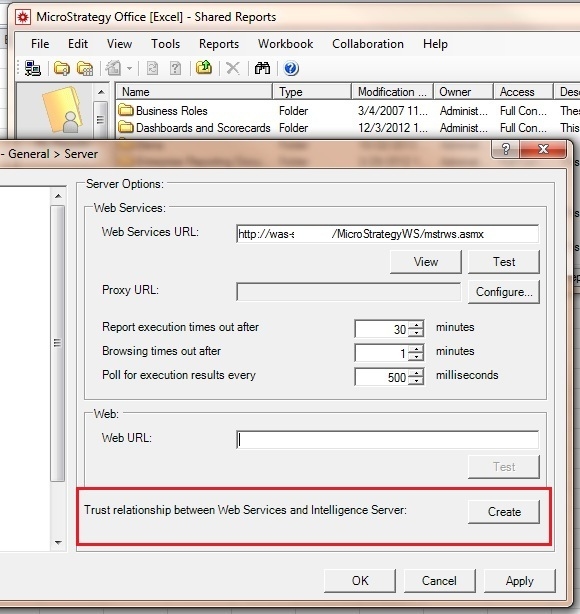
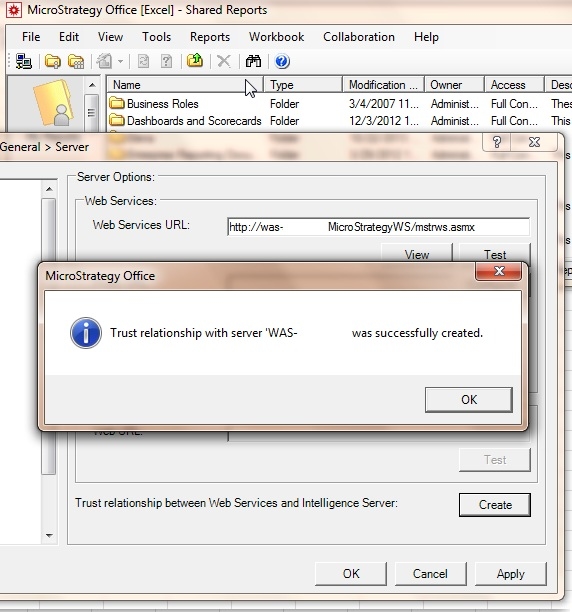
ESTABLISH THE TRUST RELATIONSHIP
First, establish a trust relationship between the Strategy Web Services instance and your Strategy Intelligence Server.

  • On a machine where the Strategy Office plugin is installed, open a Microsoft Office product, such as Excel.
  • In the Strategy Office toolbar, click Strategy Office. Strategy Office starts with a list of project sources you can connect to.
  • In the left pane, select the project source you want to enable trusted authentication for.
  • In the right pane, enter the login ID and password for a user with administrative privileges, and click Get Projects. A list of projects is displayed.
  • Select any project, and click Ok. The project is loaded, and the Shared Reports folder is loaded in a new window.
  • In the Strategy Office toolbar, click Options. The Strategy Office Options dialog box opens.
  • Under the General category, select Server. The Server Options pane is displayed on the right.
  • Next to Trust relationship between Web Services and Intelligence Server, click Create. An alert is displayed when the trust relationship has been established.

ka04W00000148mFQAQ_0EM4400000026yM.jpeg
  • In the Web Services URL field, enter the URL for the Tivoli Junction or SiteMinder Web Agent, as applicable, that you created for Strategy Web Services.

ka04W00000148mFQAQ_0EM4400000026yX.jpeg

 
ENABLE TRUSTED AUTHENTICATION IN OFFICE

  1. Configure the trusted authentication provider that will be used by modifying the following file depending on the Web Services code base.
    For an ASP.NET environment: \Web Services\web.config
    For a J2EE environment: \webapps\StrategyWS\MWSConfig.properties
  2. Modify the TRUSTEDAUTHPROVIDER parameter to one of the following values:
    1=Tivoli
    2=SiteMinder
    3=Custom
  3. On the machine where the Strategy Web Services server is installed, open the projectsources.xml file. By default, this file is located at C:\Program Files\Strategy\Web Services for an ASP.NET environment.
  4. Locate the <ProjectSource> tag describing the project source you want to enable trusted authentication for.
  5. Replace the content of the <AuthMode> tag with MWSSimpleSecurityPlugin. The contents of the new <ProjectSource> tag should appear similar to the following:
    
    <ProjectSource>
    <ProjectSourceName>Name</ProjectSourceName>
    <ServerName>Name</ServerName>
    <AuthMode>MWSSimpleSecurityPlugIn</AuthMode>
    <PortNumber>0</PortNumber>
    </ProjectSource>

     
  6. Save projectsources.xml and restart the Web Services server.

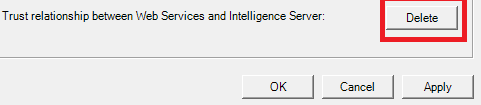
To delete a trusted relationship the following conditions have to be met:

  • A valid token has to exist in the Web Services machine with the following format: <IServer-Name>.token
  • The relationship is shown in the Intelligence Server monitor in Strategy Developer > Configure Intelligence Server > Web Single Sign-On

If these conditions are met, the create button mentioned in the first section of this technote will switch to a delete button as shown below (the button will only switch in newer versions of the plug-in: 9.3.1 and above):
 

ka04W00000148mFQAQ_0EM4400000026yZ.png

 
For more information, please refer to Enabling Single Sign-on to Web, Mobile, and Office with third-party authentication in the System Administration Guide.


Comment

0 comments

Details

Knowledge Article

Published:

April 3, 2017

Last Updated:

April 3, 2017