EducationSoftwareStrategy.com
StrategyCommunity

Knowledge Base

Product

Community

Knowledge Base

TopicsBrowse ArticlesDeveloper Zone

Product

Download SoftwareProduct DocumentationSecurity Hub

Education

Tutorial VideosSolution GalleryEducation courses

Community

GuidelinesGrandmastersEvents
x_social-icon_white.svglinkedin_social-icon_white.svg
Strategy logoCommunity

© Strategy Inc. All Rights Reserved.

LegalTerms of UsePrivacy Policy
  1. Home
  2. Topics

KB42378: How to enable HTTP Compression Microsoft IIS 7.5


Community Admin

• Strategy


Compression of dynamic application responses can affect CPU resources because IIS doesn't cache compressed versions of dynamic output. If compression is enabled for dynamic responses and IIS receives a request for a file that contains dynamic content, the response that IIS sends is compressed every time it is requested. Because dynamic compression consumes significant CPU time and memory resources, it should be used only on servers that have slow network connections and have CPU time to spare

IIS 7.5 provides the following compression options:

  • Static Files Only
  • Dynamic Application Responses Only
  • Both Static Files and Dynamic Application responses.

Compression of dynamic application responses can affect CPU resources because IIS doesn't cache compressed versions of dynamic output. If compression is enabled for dynamic responses and IIS receives a request for a file that contains dynamic content, the response that IIS sends is compressed every time it is requested. Because dynamic compression consumes significant CPU time and memory resources, it should be used only on servers that have slow network connections and have CPU time to spare. Unlike dynamic response, compressed static responses can be cached without degrading CPU resources.
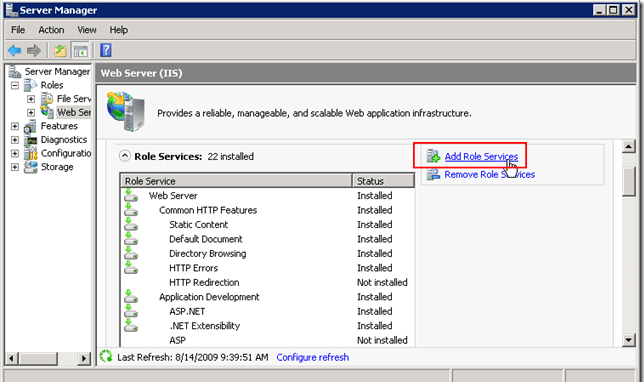
Static Compression is installed out-of-the-box. To use dynamic compression the user needs to install it first:

  1. Open server manager.
  2. Go to Roles > Web Server (IIS)
  3. Scroll down to find Role Services > Add Role Services.
ka04W000000OhgeQAC_0EM4400000026rZ.png

        4.   Add desired role (Web Server > Performance > Dynamic Content Compression)
   

ka04W000000OhgeQAC_0EM4400000026rV.png

 
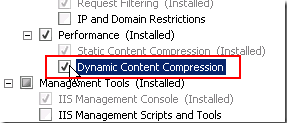
       5.    Next, Install, Wait ... Done!
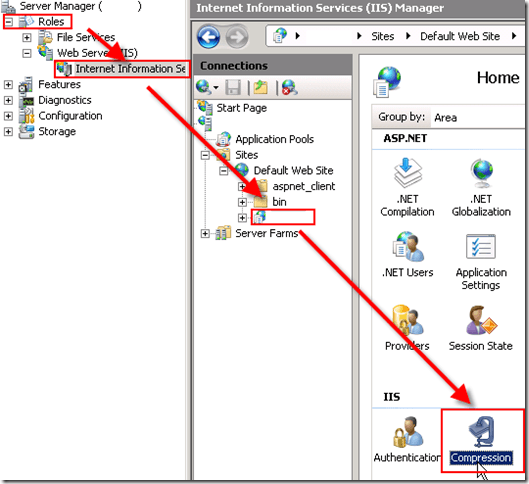
Enable Compression:

  1.  Open Server Manager
  2. Roles > Web Server (IIS) > Internet Information Services (IIS) Manager
  3. In connections pane: Sites > Default Web Site > Users Web Site
  4. In the next pane: Scroll to section IIS and double click Compression to open the Compression setting.
ka04W000000OhgeQAC_0EM4400000026rW.png

Comment

0 comments

Details

Knowledge Article

Published:

April 25, 2017

Last Updated:

April 25, 2017