

shibboleth2.xml - site |
<Site id="1" name="sp.example.org"/> |
shibboleth2.xml - host |
<Host name="sp.example.org"> |
shibboleth2.xml - entityID |
| <SSO entityID="https://idp.example.org/idp/shibboleth" discoveryProtocol="SAMLDS" discoveryURL="https://ds.example.org/DS/WAYF"> SAML2 SAML1 </SSO> with the following (note that discoveryProtocol and discoveryURL is only required with Shibboleth Identity Provider), <SSO entityID="YOUR_SSO_SAML_ENTITY_ID"> SAML2 SAML1 </SSO> |
shibboleth2.xml - IdP metadata |
| <MetadataProvider type="XML" url="https://adfs.example.org/federationmetadata/2007-06/federationmetadata.xml"/> |
shibboleth2.xml - IdP metadata |
<MetadataProvider |
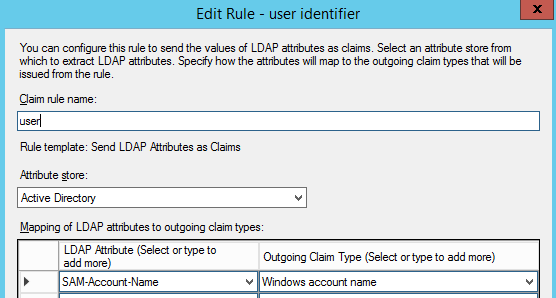
attribute-map.xml user mapping - AD FS |
| <Attribute name="http://schemas.microsoft.com/ws/2008/06/identity/claims/windowsaccountname" id="SBUSER"/> |
attribute-map.xml user mapping |
<Attribute |
attribute-map.xml user mapping |
<Attribute name="urn:oasis:names:tc:SAML:1.1:nameid-format:unspecified" id="SBUSER"/> |
c:\> net stop shibd_default |
c:\> net stop w3svc |

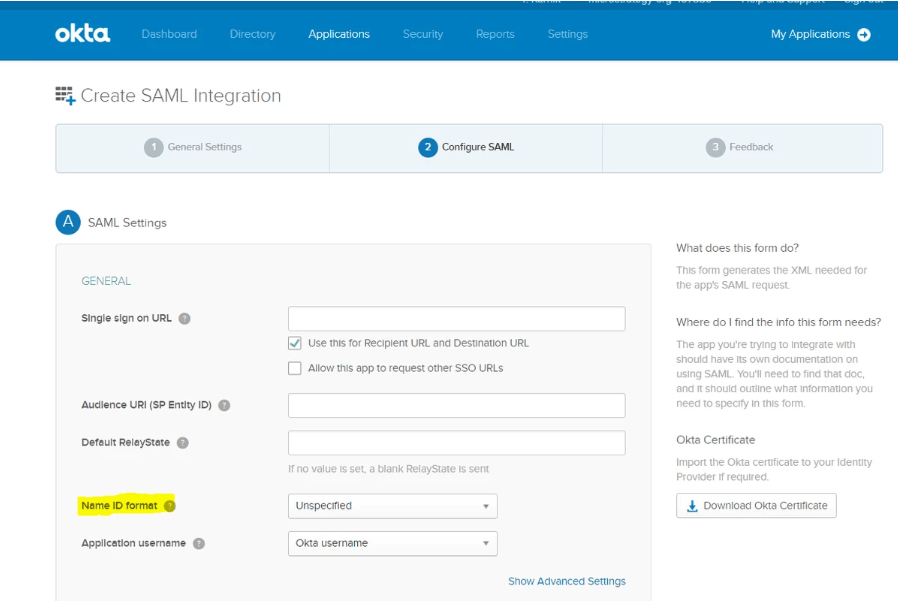
Okta
To configure SAML with Okta, refer to How to integrate Okta with out of the box MicroStrategy SAML
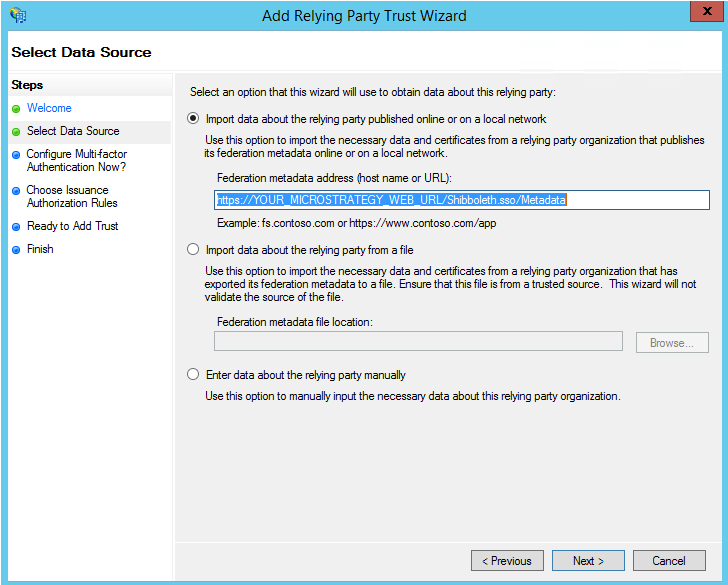
To get the Single Sign-On URL, use the Shibboleth Metadata which can be retrieved from the URL https://"FULLY_QUALIFIED_SERVICE_PROVIDER_HOST_NAME"/Shibboleth.sso/Metadata
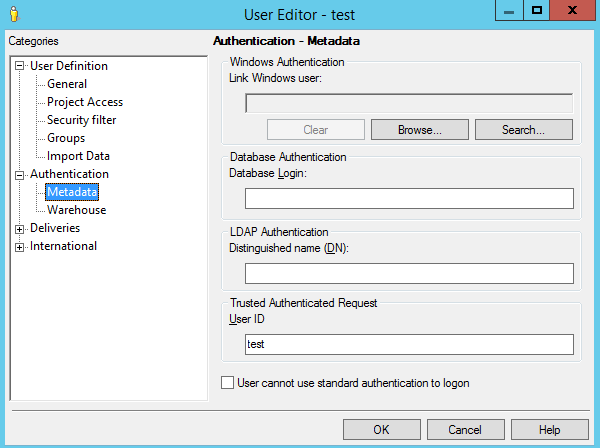
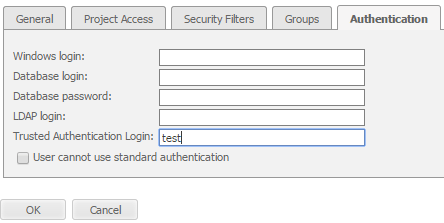
LoginParam=SBUSER |
Cause | Problem | Recommendation | |
|---|---|---|---|
Shibboleth Service Provider | Shibboleth installation not properly configured | https://localhost/Shibboleth.sso/Status returns a 404. | Check: Shibboleth Service Provider Setup > Installation > #2 |
shibboleth2.xml service provider not properly configured | Not seeing SAML login, and seeing MicroStrategy Web directly.
| Check: Shibboleth Service Provider Setup > Configuration > 1.a.i & 1.a.ii | |
shibboleth2.xml identity provider not properly configured | Shibboleth complains it cannot find Identity Provider metadata: | Check: Shibboleth Service Provider Setup > Configuration > 1.a.iv & 1.a.v | |
MicroStrategy Web | Trust not established between MicroStrategy Web/Mobile and Intelligence Server | See MicroStrategy Integration > Integration with MicroStrategy ASP Web > 1 | |
Trusted Authentication not enabled | After logging in via SAML you are presented with yet another login page from MicroStrategy Web. | Ensure that Trusted Authentication is enabled (requires MicroStrategy user with Administrator privileges). For a seamless Single-Sign-On experience, ensure that Trusted Authentication is also the Default mode. | |
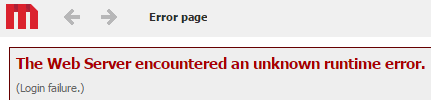
| After SAML login, MicroStrategy returns a "Login failure" error: | See "Troubleshooting Login Failure" section below. | |
Troubleshooting Login Failure | |||
|---|---|---|---|
Verification Step | Component | How to check if working properly? | Recommendation if not configured |
#1 | Identity Provider |
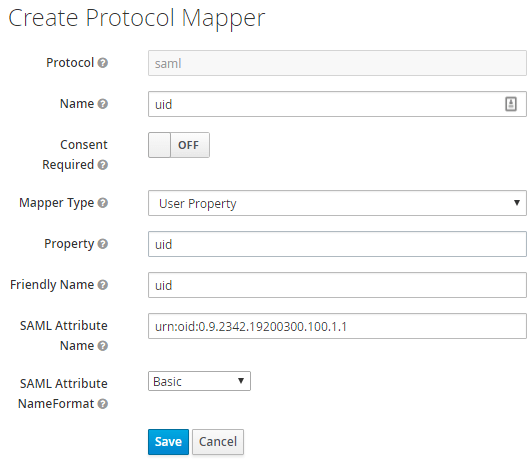
| Check: SAML Identity Provider Configuration > Configure Assertion Parameter uid Mapping. Check your Identity Provider documentation on how to setup attributes in your SAML asssertions. |
#2 | Shibboleth Service Provider | After SAML login, proceed to: Replace YOUR_MICROSTRATEGY_WEB_URL accordingly. Here's a sample response: Did it contain the SBUSER parameter under Attributes? If yes, then it means the Shibboleth Service Provider is properly configured - proceed to next verification step. If missing, see next column for recommendations. | Check: Shibboleth Service Provider Setup > Configuration > 1.b Also ensure you restart services: Shibboleth Service Provider Setup > Configuration > 1.c |
#3 | MicroStrategy Web | See recommendations column. | Check: MicroStrategy Integration > |
#4 | MicroStrategy Intelligence Server | Make sure you have a user mapped with the same SAML Attribute observed in step #1, See recommendation column. | Check: MicroStrategy Integration > MicroStrategy User Mapping |