EducationSoftwareStrategy.com
StrategyCommunity

Knowledge Base

Product

Community

Knowledge Base

TopicsBrowse ArticlesDeveloper Zone

Product

Download SoftwareProduct DocumentationSecurity Hub

Education

Tutorial VideosSolution GalleryEducation courses

Community

GuidelinesGrandmastersEvents
x_social-icon_white.svglinkedin_social-icon_white.svg
Strategy logoCommunity

© Strategy Inc. All Rights Reserved.

LegalTerms of UsePrivacy Policy
  1. Home
  2. Topics

KB4378: How to create a custom group by using a metric qualification in MicroStrategy


Stefan Zepeda

Salesforce Solutions Architect • Strategy


How to create a custom group by using a metric qualification in MicroStrategy

What are custom groups?
A custom group is a special filter that can be placed on a template and is comprised of an ordered collection of elements called custom group elements. Each custom group element can be labeled with a header and includes a logical expression of attribute, metric, object, advanced or custom group banding qualifications. These qualifications resolve into a list of attribute elements once the report is run. Custom groups; therefore, provide a way to group attribute elements from the same or different attributes to meet user's reporting requirements.
 
How can users access the Custom Group Editor?
To access the Filter Editor, execute the following:

  • From the File menu, go to New and choose Custom Group.
     
ka044000000kIngAAE_0EM440000002GIy.gif
  •  
    NOTE: Users must be granted 'Create Application Objects' and 'Use Custom Group Editor' privileges.


How do users create a custom group by using a metric qualification?

  • From the Filter Editor, double-click in the Custom Group definition area of the Custom Group Editor. A default custom group element name appears. Enter a new name for the custom group element and press ENTER.
     
ka044000000kIngAAE_0EM440000002GJ0.gif
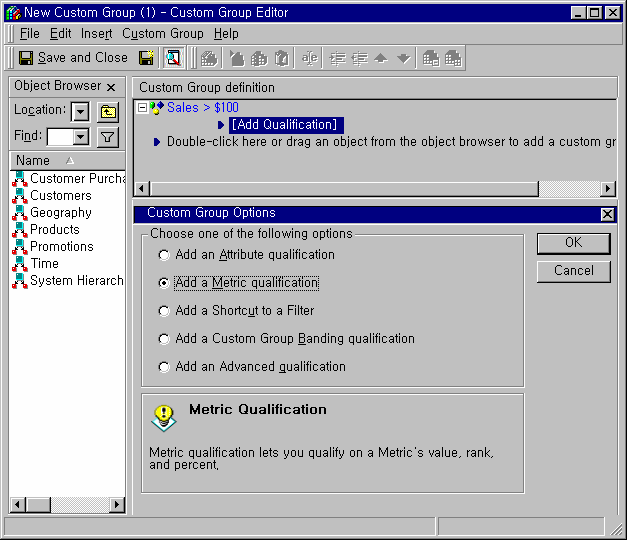
  • Double-click 'Add Qualification'. The Custom Group Options dialog box opens. Select 'Add a Metric qualification' and click OK.
     
ka044000000kIngAAE_0EM440000002GIw.gif
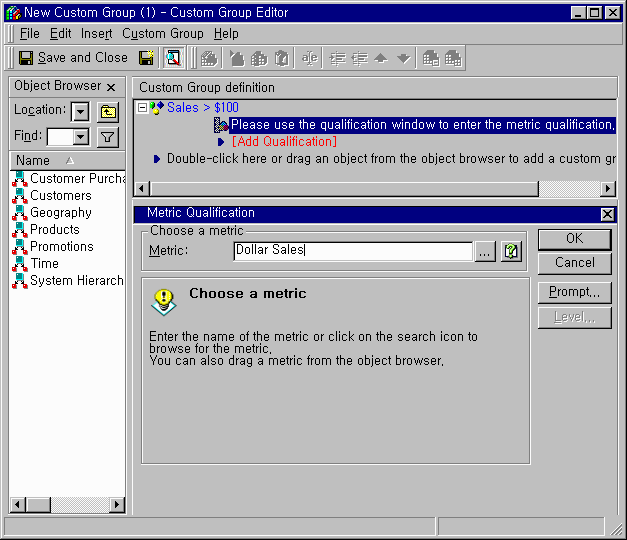
  • The Metric Qualification dialog box opens. To choose a metric, execute one of the following:
    • In the Metric box, enter in the desired metric name and click OK.
       
      OR
       
       
    • Click '...' to browse for the metric. The Open dialog box opens. Locate and select the metric and click OK.
       
      OR
       
       
    • Select a metric in the Object Browser and drag it to the Metric box.
ka044000000kIngAAE_0EM440000002GIi.gif
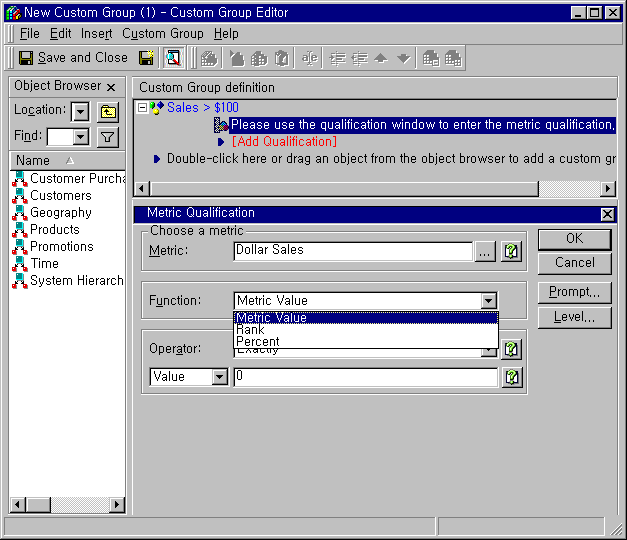
  • For 'Function', select 'Metric Value', 'Rank' or 'Percent'.
     
ka044000000kIngAAE_0EM440000002GIm.gif
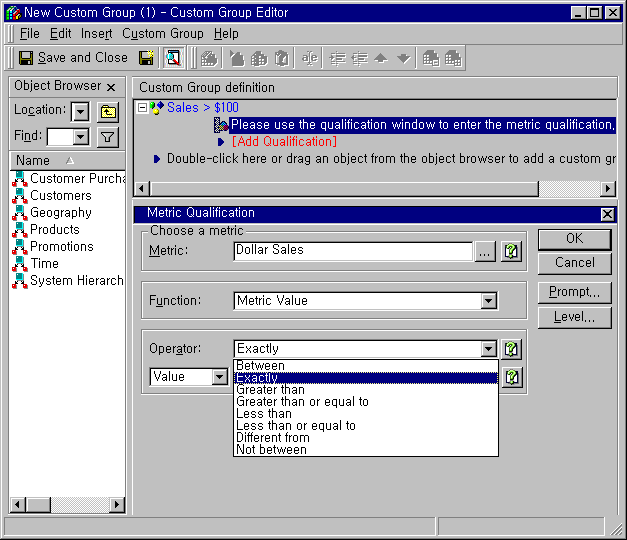
  • For 'Operator', select a logic operator from the drop-down list.
     
ka044000000kIngAAE_0EM440000002GIu.gif
  • For 'Value', select 'Value', 'Simple Prompt' or 'Custom' and enter a value or custom expression.
     
ka044000000kIngAAE_0EM440000002GIs.gif
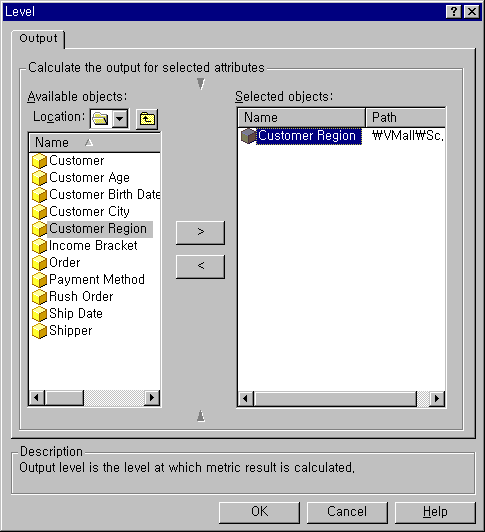
  • Click 'Level'. The Level dialog box opens. Output level is the level at which the metric result is calculated. Select an attribute from the Available objects list and click '>' to add it to the Selected objects list.
     
ka044000000kIngAAE_0EM440000002GIo.gif
  • Click OK and save the Custom Group.


KB4378


Comment

0 comments

Details

Knowledge Article

Published:

June 8, 2017

Last Updated:

December 31, 2018