
2. Login with your google account if you are not logged in.
3. Click create new project or using an existing project if you want
4. How to create a new project: click create new project, input the project name

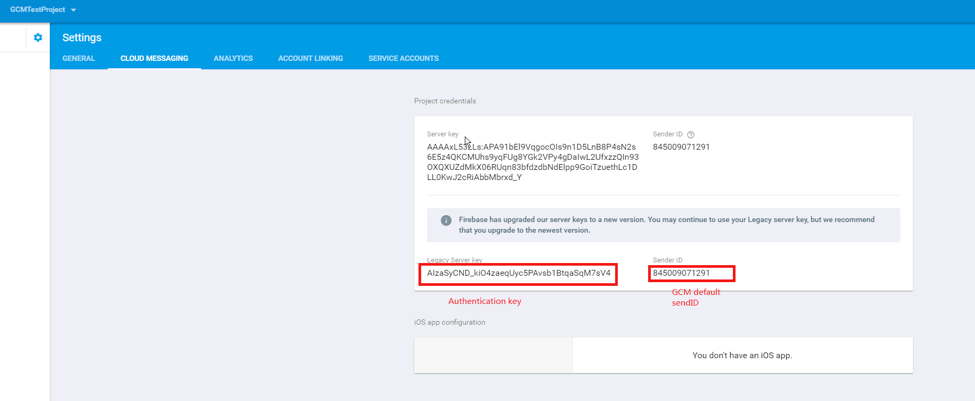
5. Pick one project and click on it, it will go to its settings page as below, by default the cloud messaging tab is selected, from there you can find the Authentication key (aka server key) and senderID:
6. Now go to general tab of settings, click add app, only need to provide the package name and then click ADD APP in the pop up.
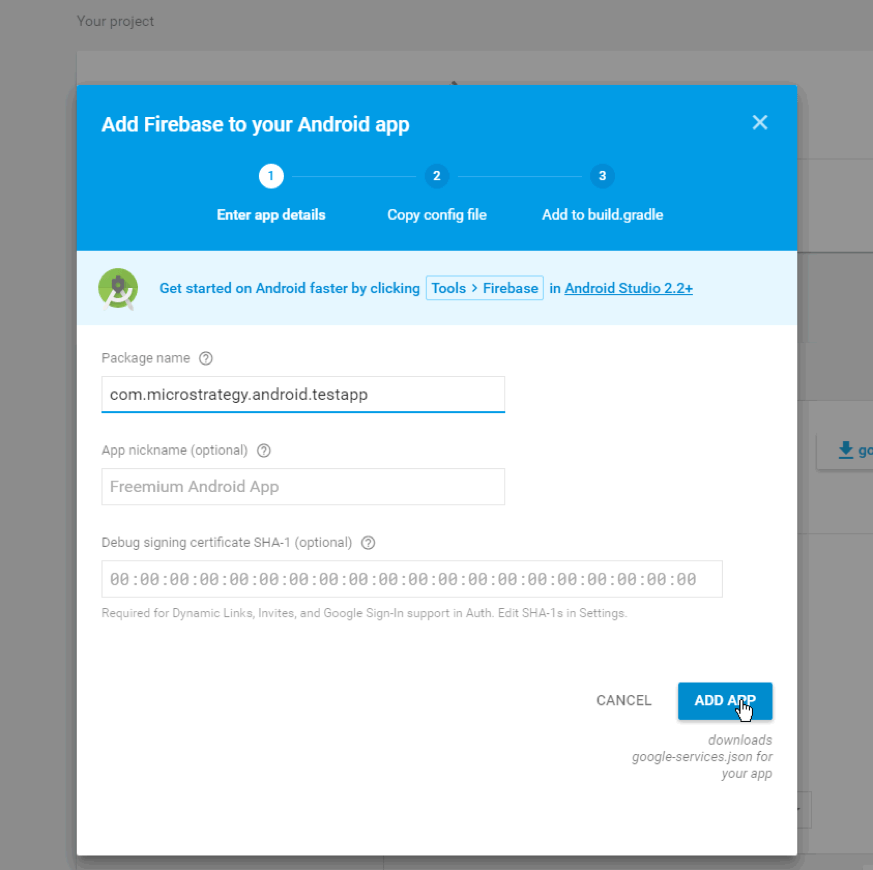
7. Once the app is created, click Download google-service.json and put it your MSTR Android SDK app module to replace the existing one.

Here is a sample JSON, you ‘ll notice that the the sendID is the same as the project_number in the JSON. And package name is the same as when you ADD APP.
{
  "project_info": {
    "project_number": "845009071291",
    "firebase_url": "https://gcmtestproject-f536d.firebaseio.com",
    "project_id": "gcmtestproject-f536d",
    "storage_bucket": "gcmtestproject-f536d.appspot.com"
  },
  "client": [
    {
      "client_info": {
        "mobilesdk_app_id": "1:845009071291:android:95de33ed8825db42",
        "android_client_info": {
          "package_name": "com.Strategy.android.testapp"
        }
      },
      "oauth_client": [
        {
          "client_id": "845009071291-v59t0uq5a27a4489n2agpiu90h5v8co6.apps.googleusercontent.com",
          "client_type": 3
        }
      ],
      "api_key": [
        {
          "current_key": "AIzaSyA0tNuTAT-HiwW3W_2izNPbNarC6pHUKoo"
        }
      ],
      "services": {
        "analytics_service": {
          "status": 1
        },
        "appinvite_service": {
          "status": 1,
          "other_platform_oauth_client": []
        },
        "ads_service": {
          "status": 2
        }
      }
    }
  ],
  "configuration_version": "1"
}