Starting with Strategy 9.2.1m, Salesforce is supported with Strategy products running on Linux platforms. Follow the steps below to configure Intelligence Server running on Linux to connect to Salesforce.com:
With graphic interface:
1. Launch Strategy Connectivity Wizard with command ./mstrcfgwiz in Linux terminal.
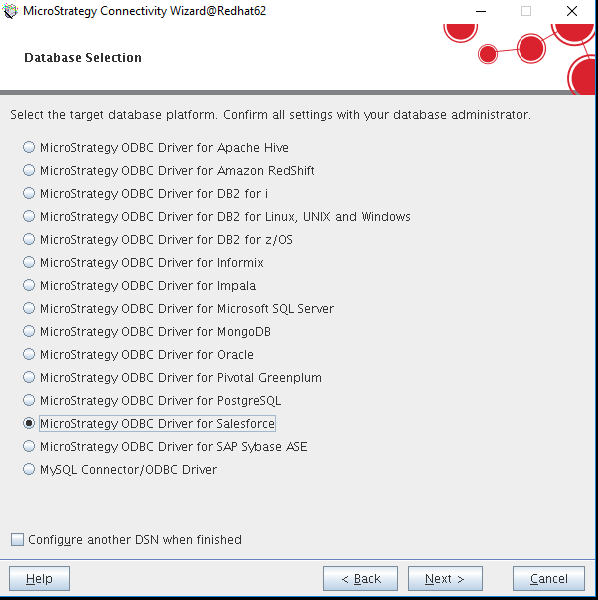
2. Select "Strategy ODBC Driver for Salesforce"
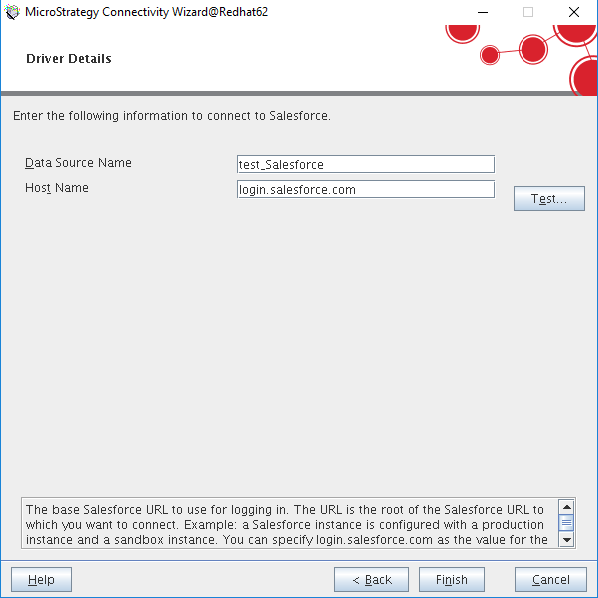
3. Input the name of the DSN and login URL of Salesforce environment as shown below:
Without graphic interface:
1. On the Linux machine that hosts Intelligence Server, browse to HOME_PATH where HOME_PATH is the Home Directory during installation.
2. Open the odbc.ini.example file and find the section that starts with . Copy this section into the odbc.ini file. An example is as follows:
[ODBC Data Sources]
test_Salesforce=Strategy ODBC Driver for Salesforce

[test_Salesforce]
Driver=<ODBCLIBPATH>/MYsfrcXX.so
Description=Strategy ODBC Driver for Salesforce
ApplicationUsingThreads=1
BulkLoadAsync=0
BulkLoadBatchSize=1024
BulkLoadConcurrencyMode=1
BulkLoadPollInterval=10
BulkLoadThreshold=4000
BulkLoadTimeout=0
ConnectionReset=0
ConfigOptions=AuditColumns=AuditOnly;MapSystemColumnNames=0;CustomSuffix=Include
CreateDB=2
Database=
Extended Options=
FetchSize=160
HostName=
InitializationString=
JVMArgs=-Xmx256m
JVMClasspath=<ODBCLIBPATH>/sforce.jar
LoadBalanceTimeout=0
LogConfigFile=
LogonDomain=
LoginTimeout=15
LogonID=
MaxPoolSize=100
MinPoolSize=0
Password=
Pooling=0
ProxyHost=
ProxyPassword=
ProxyPort=
ProxyUser=
QueryTimeout=0
ReportCodepageConversionErrors=0
ReadOnly=0
RefreshDirtyCache=0
SecurityToken=
StmtCallLimit=0
StmtCallLimitBehavior=1
TransactionMode=1
WSFetchSize=0
WSRetryCount=0
WSTimeout=120
[ODBC Data Sources] test_salesforce=Strategy ODBC Driver for Salesforce [test_salesforce] ApplicationUsingThreads=1 CreateDB=2 Description=Strategy ODBC Driver for Salesforce WSFetchSize=0 Driver=/home/104HF4/install/lib/MYsfrcXX.so LogConfigFile= LogonDomain= FetchSize=160 WSTimeout=120 SecurityToken= CustomSuffix=Strip JVMClasspath=/home/104HF4/install/lib/mongodb.jar:/home/104HF4/install/lib/sforce.jar JVMArgs=-Xmx256m -Dhttps.protocols=TLSv1.1,TLSv1.2 InitializationString= LoginTimeout=15 TransactionMode=1 Extended Options= Database= StmtCallLimitBehavior=1 WSRetryCount=0 StmtCallLimit=0 QueryTimeout=0 ConfigOptions=AuditColumns=AuditOnly;MapSystemColumnNames=0;CustomSuffix=Strip HostName=login.salesforce.com
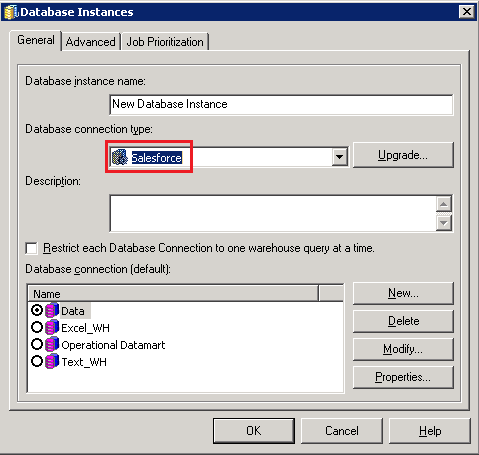
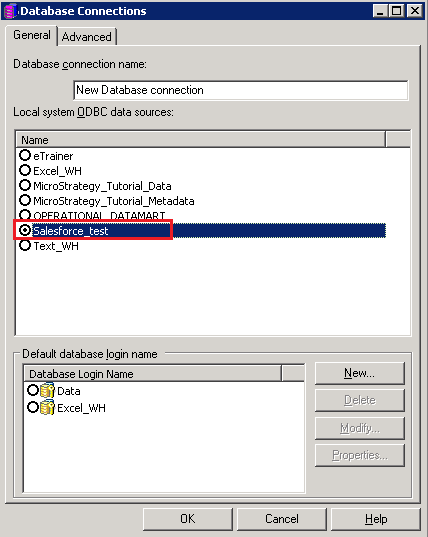
iii) Edit an existing Database connection or create a new Database connection as shown below.
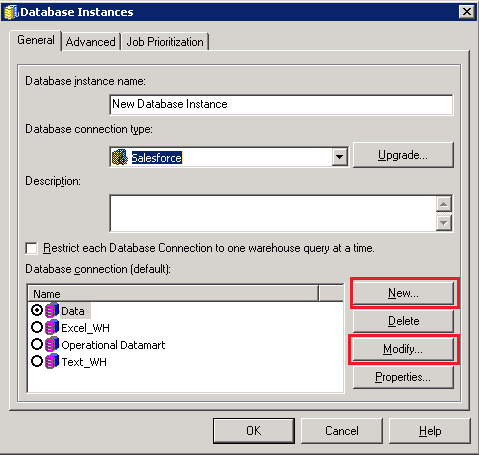
iv) Select the DSN created at Step #2 and #3 as shown below:
v) Edit an existing Database Login Name or create a new Database Login Name.
vi) Use a Salesforce account login information. Note that The password syntax is PasswordSecurityToken, where Password is the password for the user account and SecurityToken is the additional security token required to access Salesforce.com. Do not use any spaces or other characters to separate the password and security token.
KB439548
