The steps below will demonstrate how to place an object prompt in a view report template so that users can select the objects that they want to see on the report. In addition, an administrator can place object-level security permissions by the use of ACL's on the objects placed in the object prompt so that users are only able to interact with specific objects in which they have the Browse permission granted. This can provide an advantage because it restricts specific users or user groups to only see certain data for specific objects.
The following steps demonstrate how an object prompt is inserted into a view report, and the objects within the cube and prompt have the Browse permission set to them to only allow certain user groups access to specific objects. This demonstration was performed in the Strategy Tutorial project using Strategy Developer 9.x.
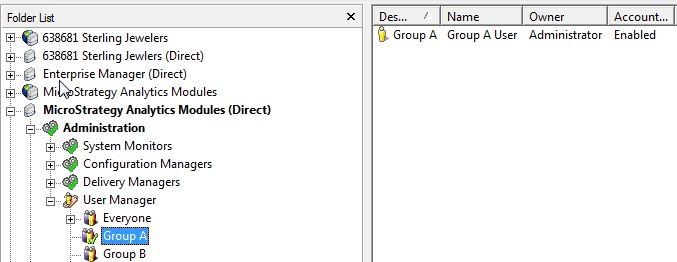
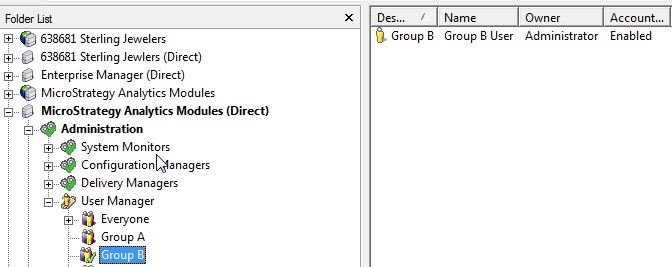
1) Create new users or user groups, if necessary, to make assigning the permissions of the objects a bit easier. In this example, two user groups were created: Group A and Group B that contains one user and is named after the group it is in.
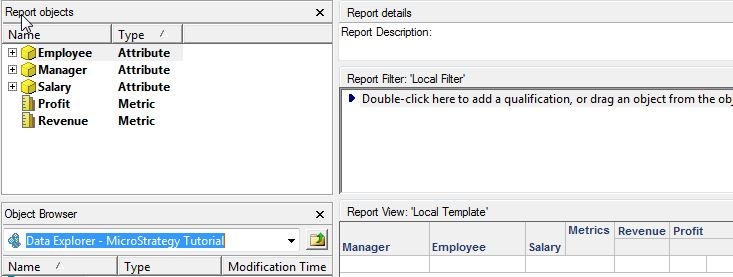
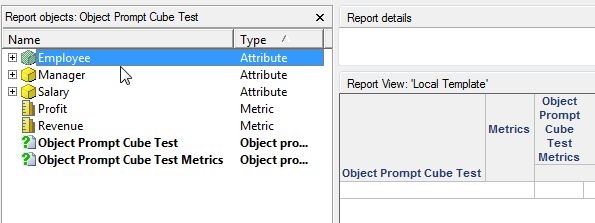
2) Create an intelligent cube that contains the objects that you require. In this example, 3 attributes and 2 metrics were placed in the cube: the Employee, Manager, and Salary attributes, and the Profit and Revenue metrics respectively.
3) Save and publish the intelligent cube that was created.
4) Right click the cube and select "Create report" to create a view report.
5) Save the blank report; it will be returned to later.
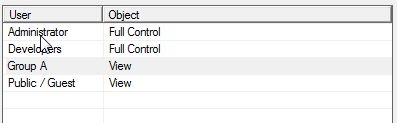
6) Set object-level security permissions via ACL's by setting the Browse permission for users or user groups in respect to what they should be able to see on the object prompt. In this example, the ACL's were set for the user groups created in Step 1 so that Group A and Group B could only see specific objects.
7) Go back into the report created in Step 5 and navigate to the top menu and select Template > Add New Prompt.
8) Create an object prompt for the report using the objects within the cube. Create as many object prompts as necessary. In addition, object prompts can be created as stand-alone prompt objects and then added to the report using the Insert Prompt option under the Template menu.
9) Arrange the prompts on the grid as you see fit. In this example, 2 object prompts were created: one for the row headers that contain the attributes, and one for the column headers that contain the metrics.
10) Test running the view report as the different users or user groups to determine if the objects that display are desired. In this example, the cube report is run and only a subset of all the cube objects can be seen and selected in the prompts due to the Browse permissions set for the user logged in.
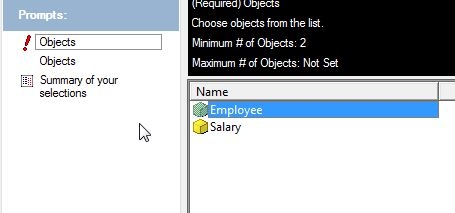
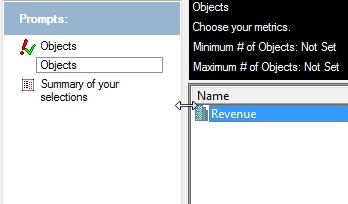
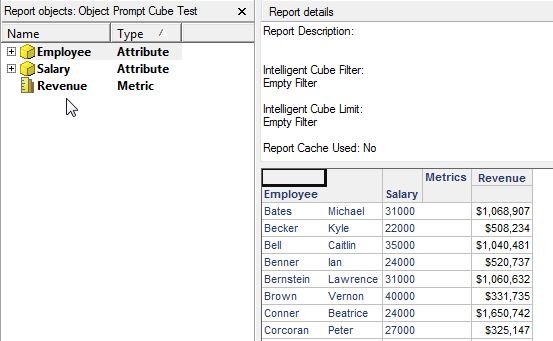
Notice how neither the Manager attribute and Profit metric are not able to be selected in the object prompt, nor are displayed on the grid when the report is executed. This is why this technique can be useful -- you are able to set object-level security permissions for Browse so that certain users can only see and select certain objects in the prompt.