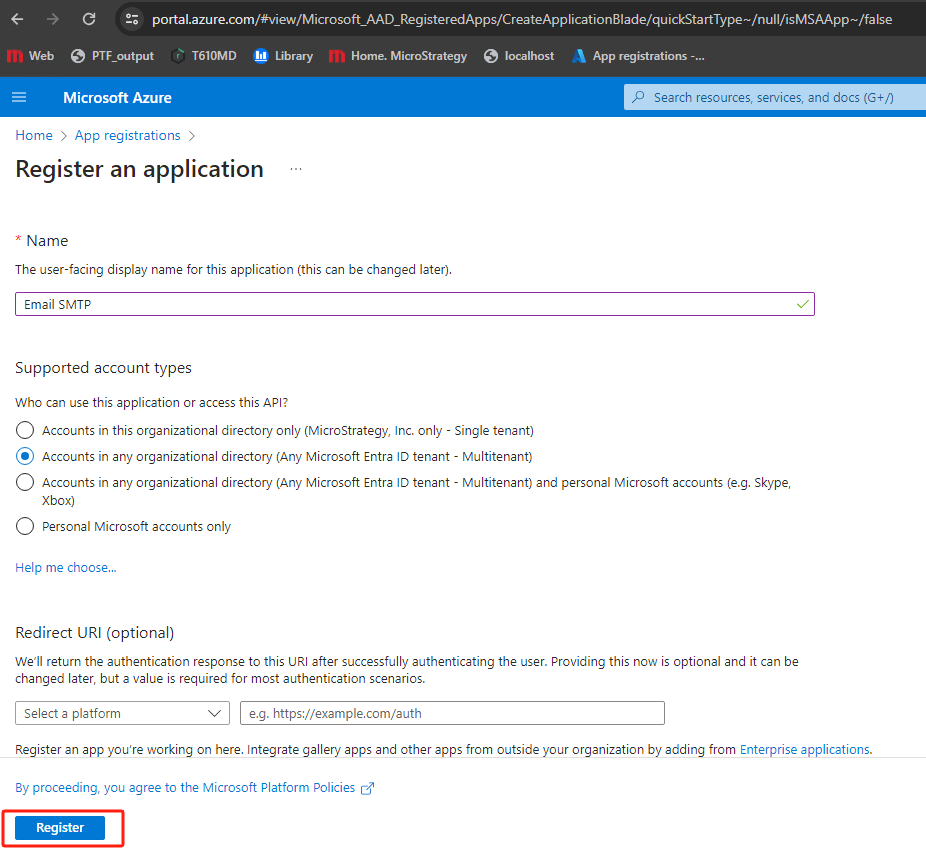
To use oauth, user needs to create an app registration.
Manage, click
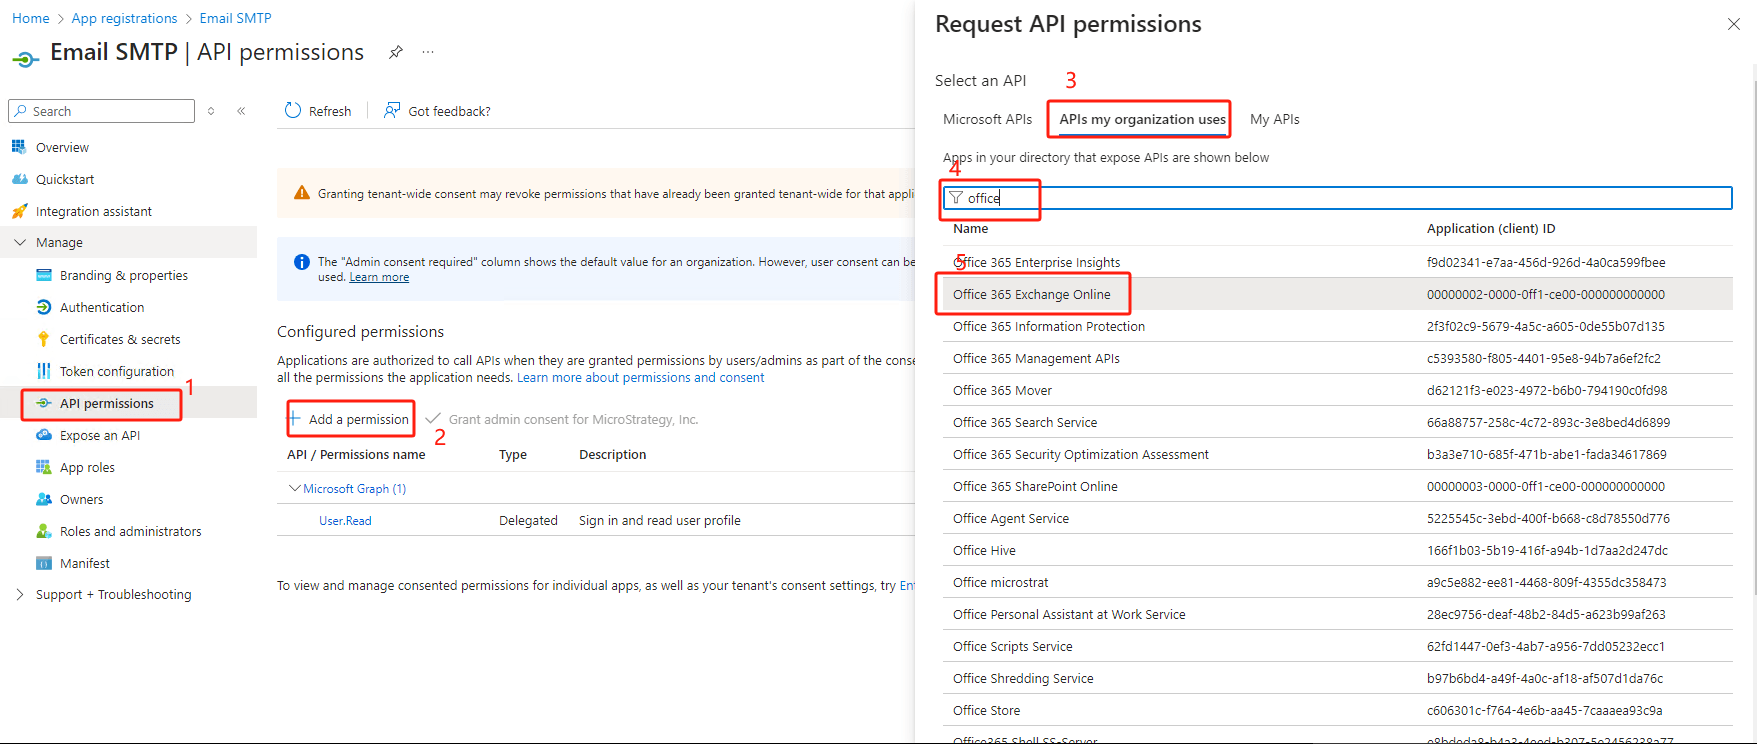
API permissions. Click
Add a permission. In the right “Request API permissions” panel, click on
APIs my organization usese→ In search box, input
office→ choose
Office 365 Exchange Online
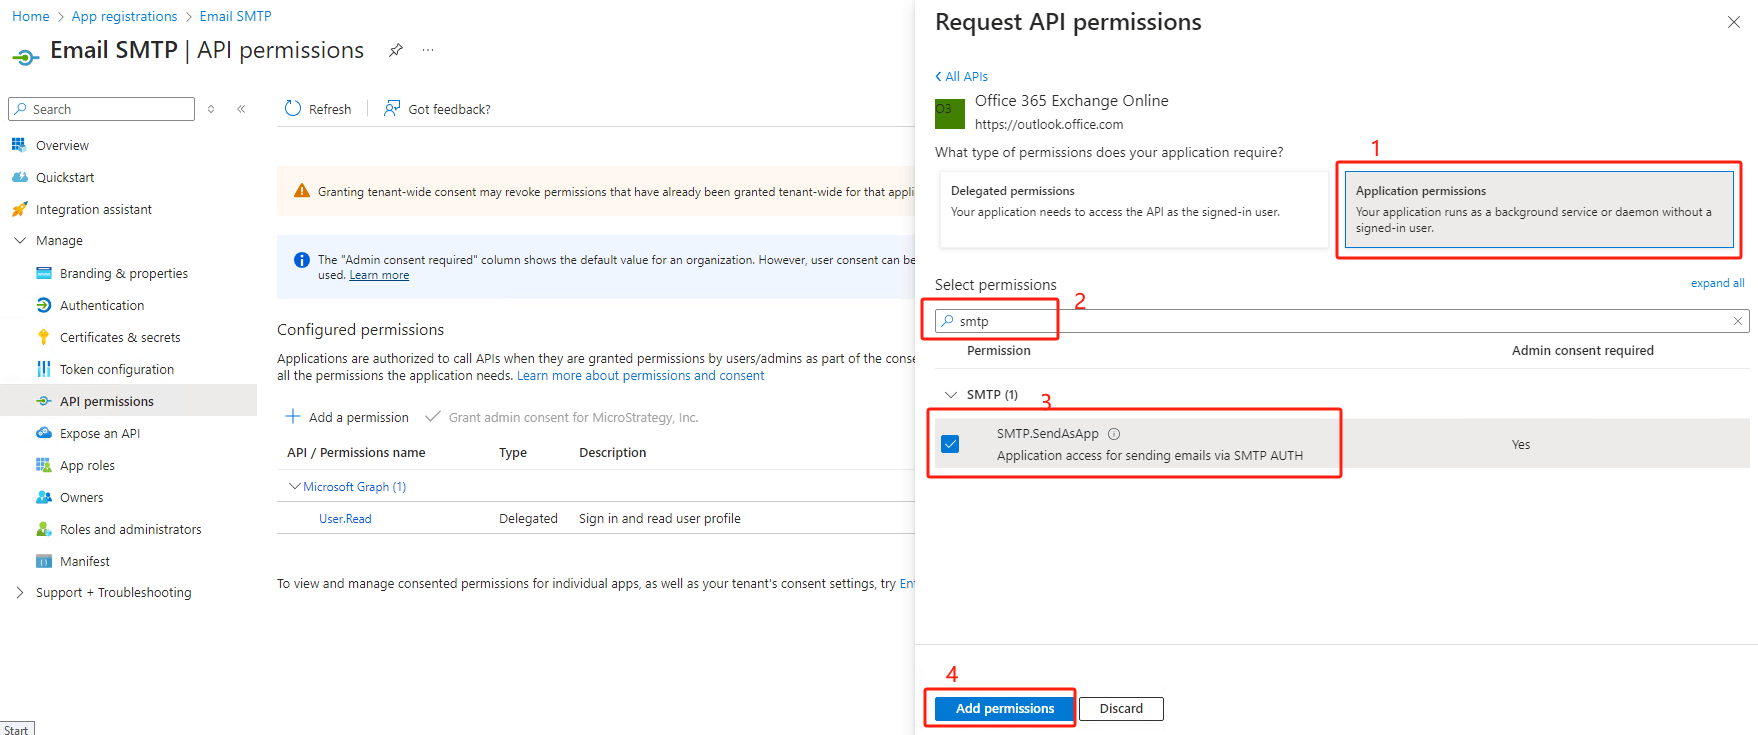
Application permissions→ search
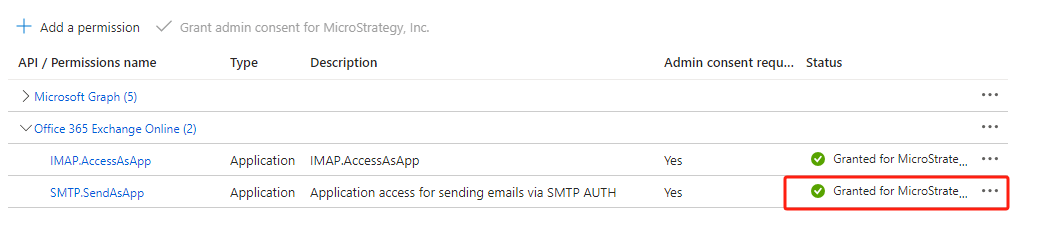
smtp→ choose SMTP.SendAsApp → hit
Add permissions
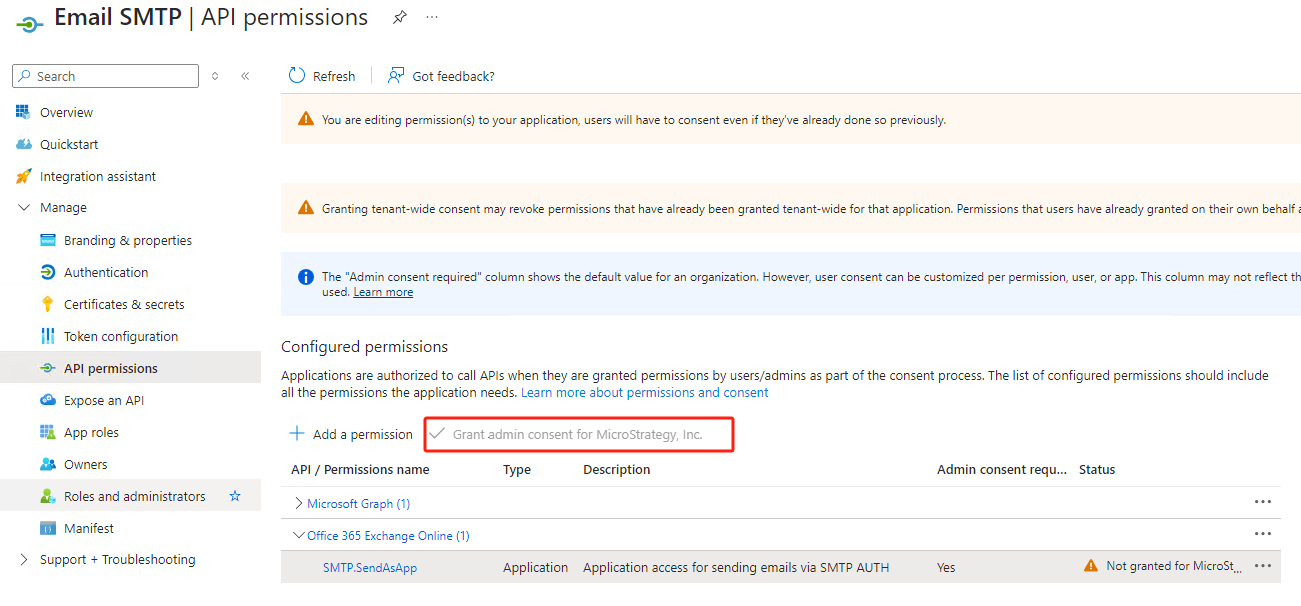
Not granted for .... If the status is yellow, click
Grant admin consent for ...(user many need to ask azure administrator to do this).
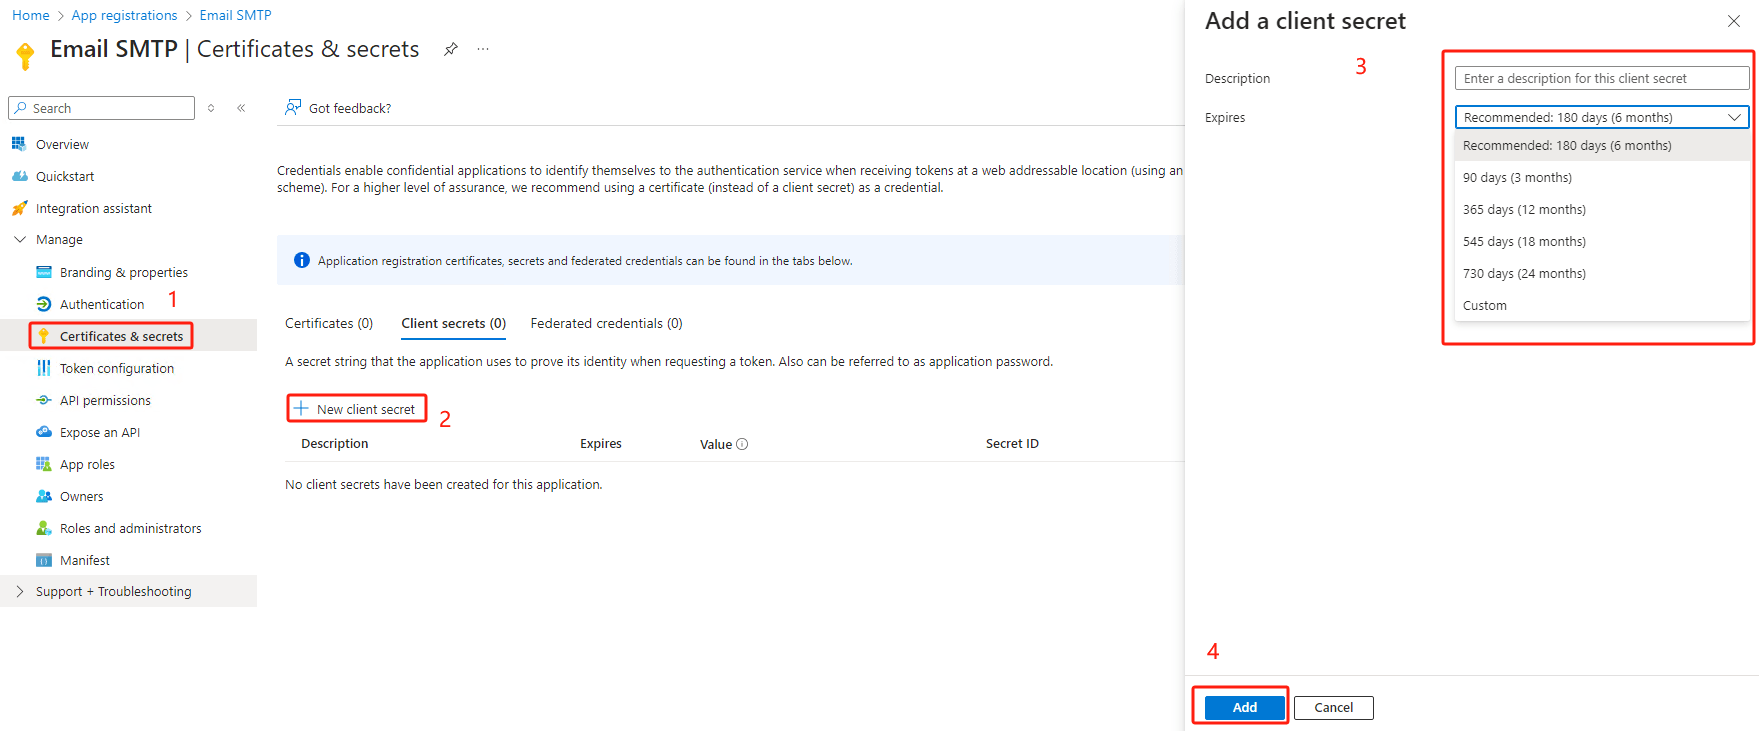
Certificates & secrets→ click
New client secret-> input description, and choose the expiration date → click “Add”
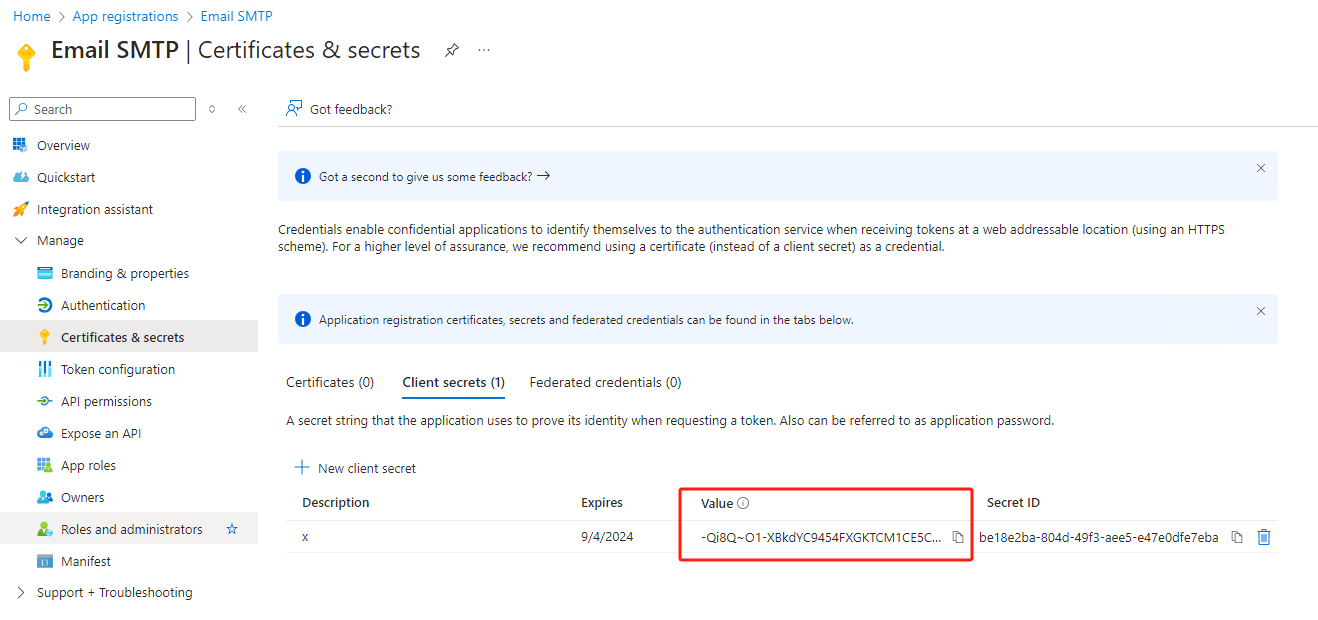
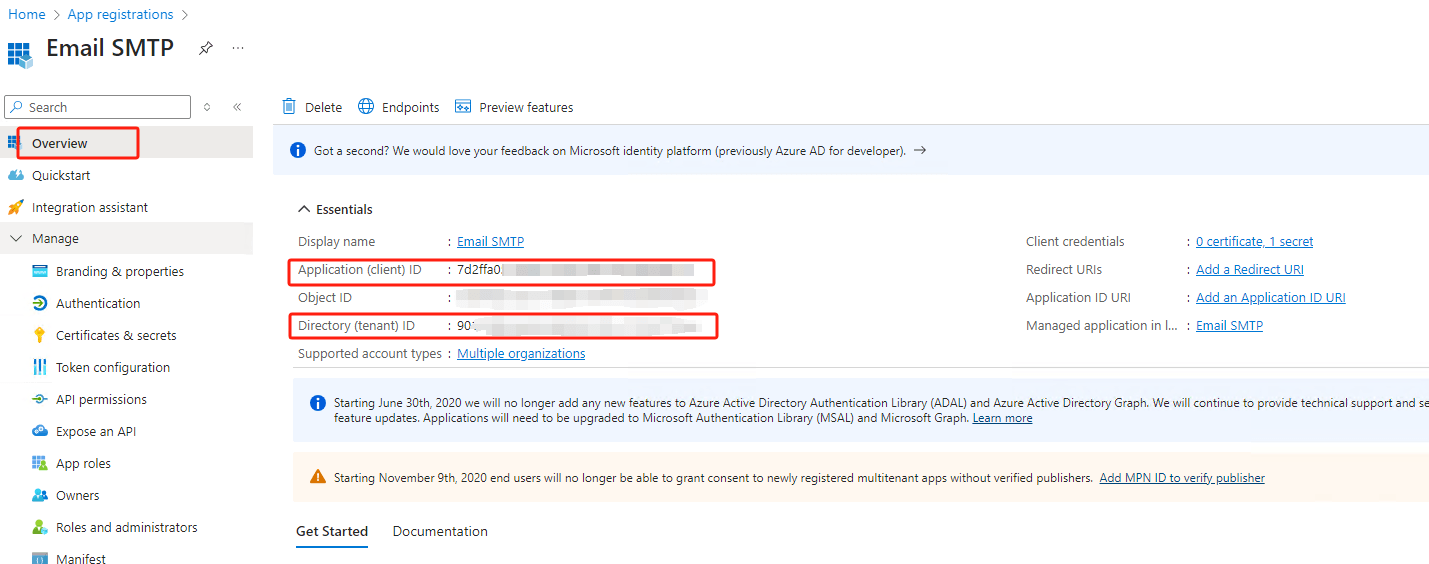
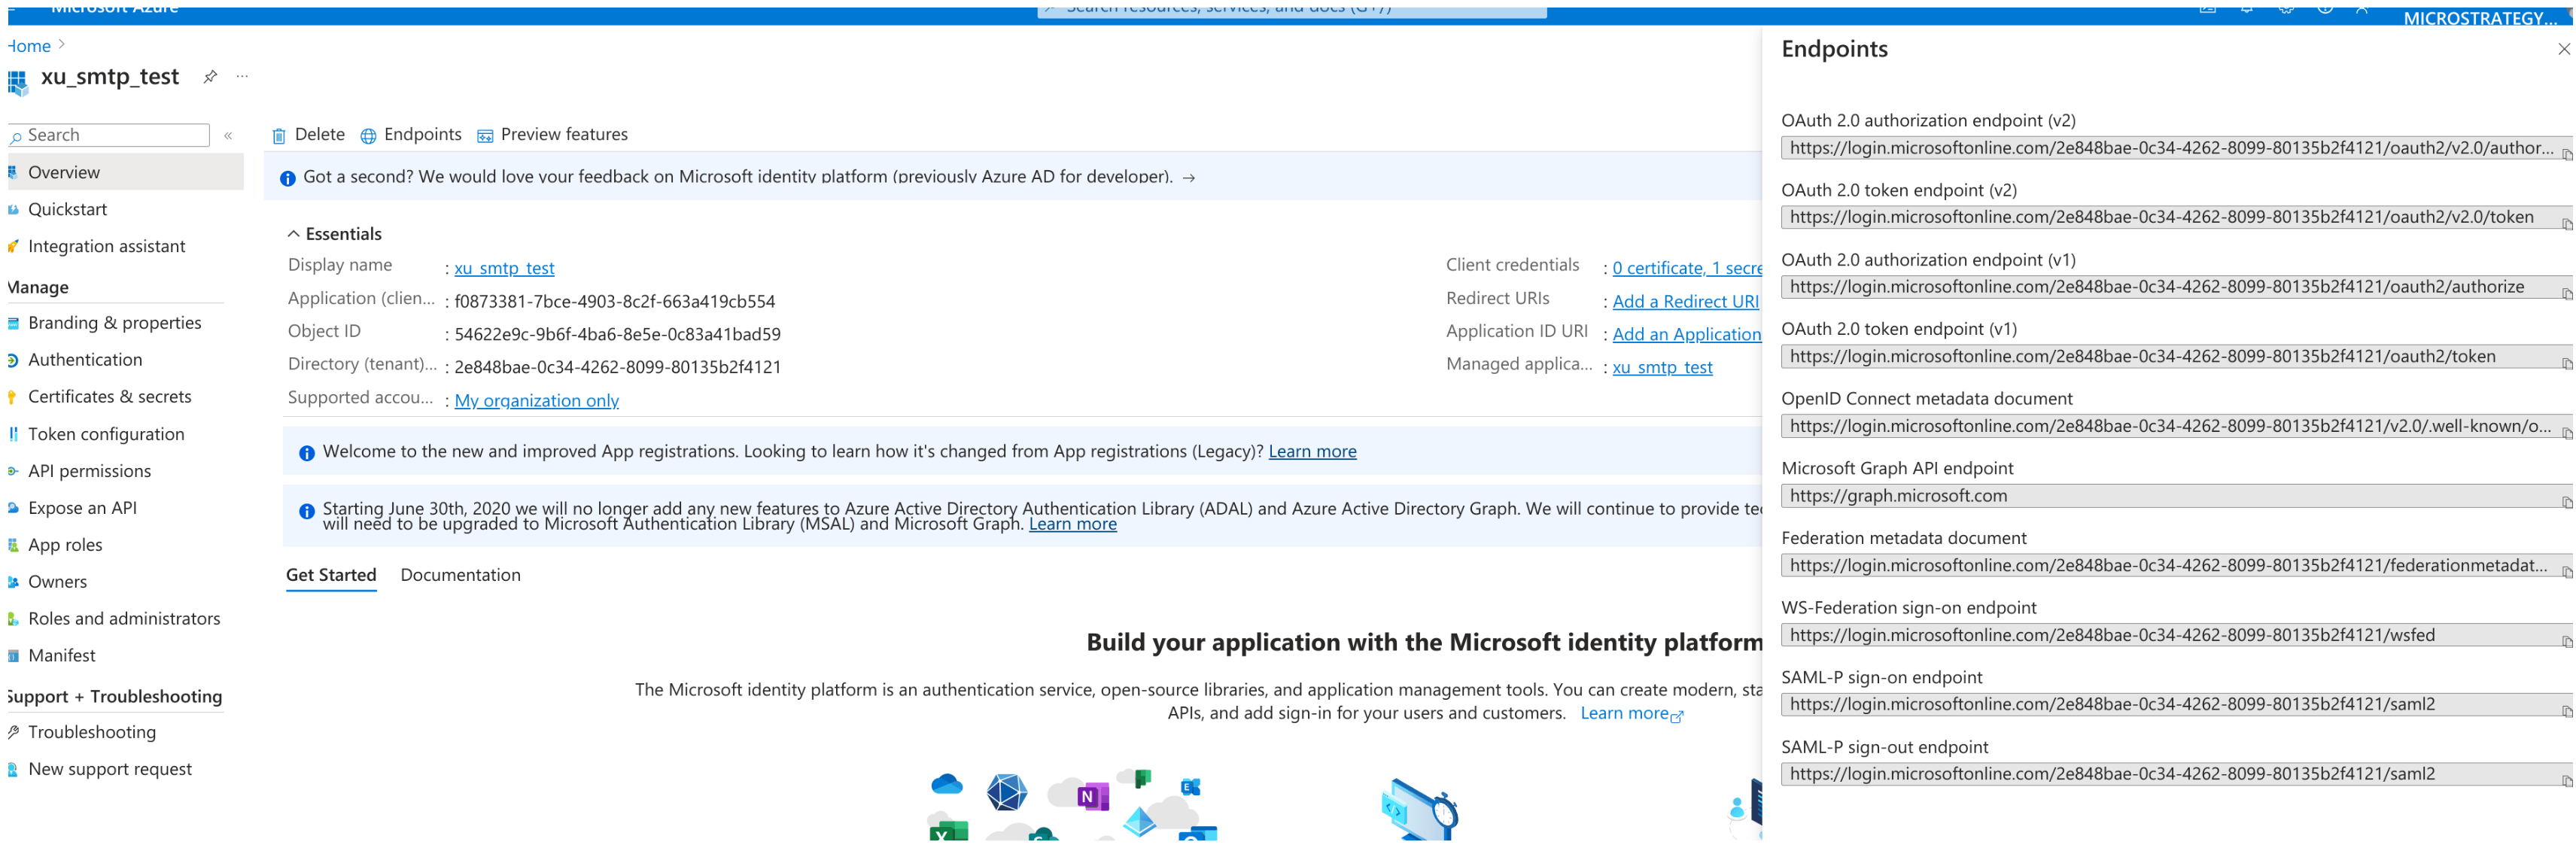
tenant ID,
client ID. which will be used with
client secret(generated in last step) later.
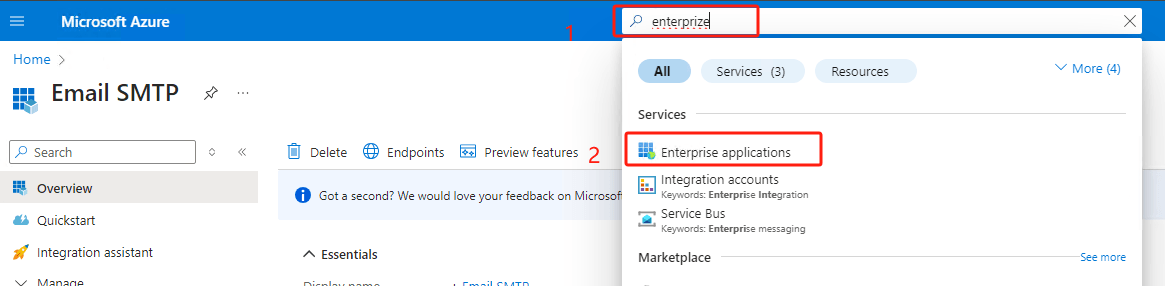
In search box at the top, input “enterprise”, click
Enterprise applications.
Search the app name user just created
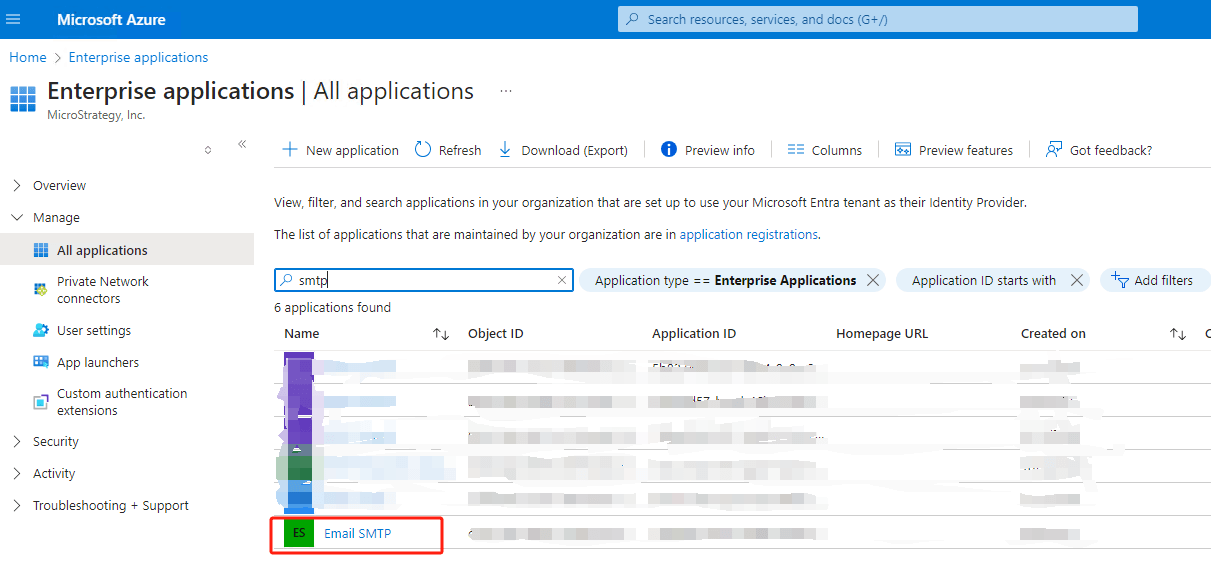
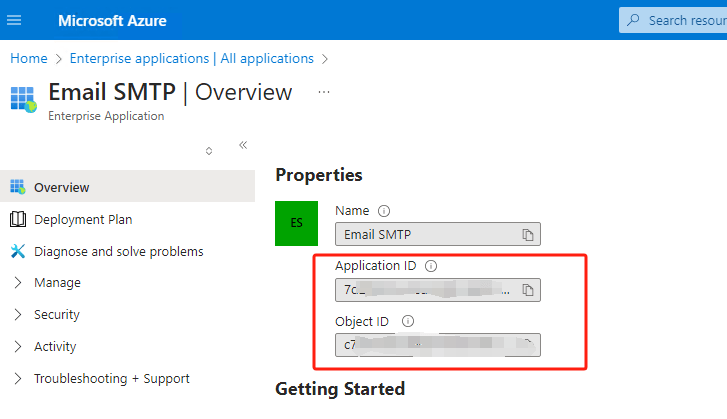
Click on the app, user can see the
application IDand
object ID.
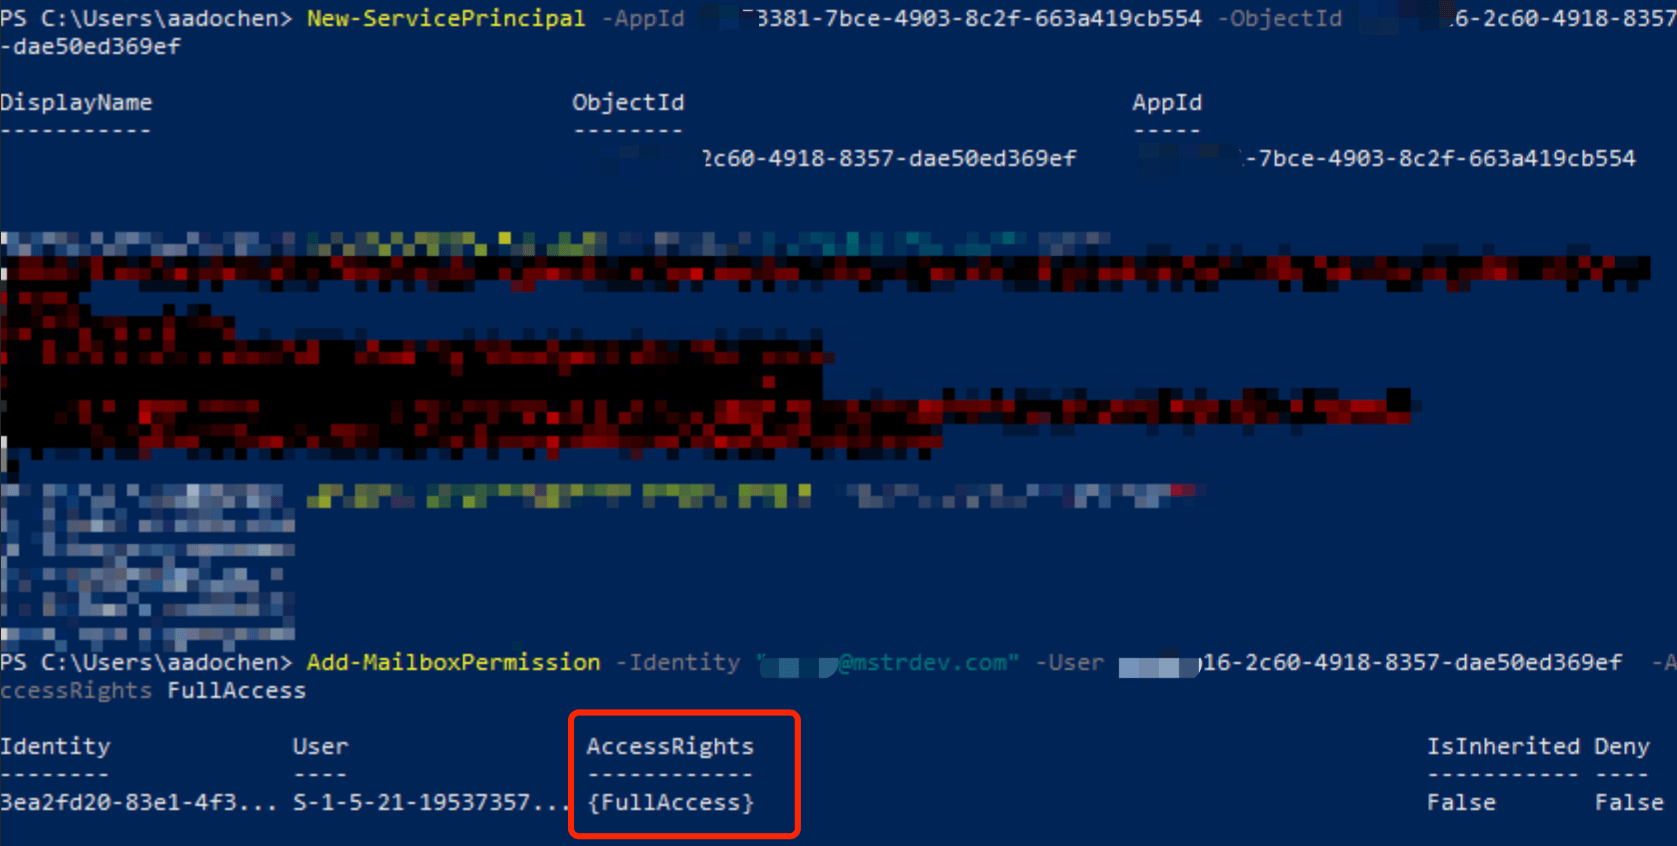
Refer to this document to register principle: Authenticate an IMAP, POP or SMTP connection using OAuth
This step is optional, but it is strongly recommend to run it.
To make sure the configurations are correct, user can use following python script to verify before start test on Strategy.
Requirements:
3.9+
requests
pyjwt
Change following variables at the top of python scripts:
- Python script
import socket
import ssl
import base64
import sys
import requests
import jwt
import json
tenant_id =
client_id =
client_secret =
from_mail =
to_mail =
scope = 'https://outlook.office365.com/.default'
def get_token_client_credential_flow():
print('Start to get access token'.center(100, '='))
global flow
flow = 'client credential'
url = f'https://login.microsoftonline.com/{tenant_id}/oauth2/v2.0/token'
# url = f'https://login.microsoftonline.com/{tenant_id}/oauth2/token' # 535 5.7.3 Authentication unsuccessful
payload = {
'client_id': client_id,
'client_secret': client_secret,
'scope': scope,
'grant_type': 'client_credentials',
'state': '12345',
}
headers = {
'Content-Type': 'application/x-www-form-urlencoded'
}
resp = requests.post(url, headers=headers, data=payload)
try:
access_token = resp.json()['access_token']
expires_in = resp.json()['expires_in']
if not isinstance(expires_in, int):
print(f'Field expires_in is not an integer', file=sys.stderr)
print(resp.text)
print(f'Access token is generated successfully.')
return access_token
except:
print(resp.status_code, resp.text, file=sys.stderr)
raise Exception(f'Failed to get access token!!! Please check response.')
def verify_access_token(input_access_token):
print('Start to validate access token'.center(100, '='))
decoded_token = jwt.decode(input_access_token, options={"verify_signature": False})
if (roles := decoded_token.get('roles')) and 'SMTP.SendAsApp' in roles:
print(f'Access token has permission "SMTP.SendAsApp". Roles: {roles}.')
return
raise ValueError(f'Failed to find permission "SMTP.SendAsApp" in access token: {json.dumps(decoded_token)}')
def send_mail_smtp(input_access_token):
print('Start to send email by SMTP'.center(100, '='))
client_socket = socket.socket(socket.AF_INET, socket.SOCK_STREAM)
SMTP_SERVER = 'smtp.office365.com'
SMTP_PORT = 587
# Connect to the SMTP server
client_socket.connect((SMTP_SERVER, SMTP_PORT))
response = client_socket.recv(1024).decode()
print(f'Connect\r\n {response}')
# Send the EHLO command to identify ourselves to the server
ehlo_command = 'EHLO example.com\r\n'
client_socket.send(ehlo_command.encode())
response = client_socket.recv(1024).decode()
print(f'{ehlo_command} {response}')
# Send the STARTTLS command to switch to a secure connection
starttls_command = 'STARTTLS\r\n'
client_socket.send(starttls_command.encode())
response = client_socket.recv(1024).decode()
print(f'{starttls_command} {response}')
# Upgrade the socket to a secure SSL/TLS connection
context = ssl.create_default_context()
client_socket = context.wrap_socket(client_socket, server_hostname=SMTP_SERVER)
# Send the EHLO command again to identify ourselves over the secure connection
client_socket.send(ehlo_command.encode())
response = client_socket.recv(1024).decode()
print(f'hello\r\n {response}')
# Send the AUTH LOGIN command to begin the authentication process
oauth2_string = f'user={from_mail}\x01auth=Bearer {input_access_token}\x01\x01'
oauth2_base64 = base64.b64encode(oauth2_string.encode('utf-8')).decode('utf-8')
# auth_command = f'AUTH XOAUTH2 {oauth2_base64}\r\n'
auth_command = f'AUTH XOAUTH2\r\n'
client_socket.sendall(auth_command.encode())
response = client_socket.recv(1024).decode()
print(f'{auth_command} {response}')
auth_command = f'{oauth2_base64}\r\n'
client_socket.sendall(auth_command.encode())
response = client_socket.recv(1024).decode()
print(f'{auth_command} {response}')
if response.strip().startswith('5'):
raise Exception(f'Failed to login')
# Send the MAIL FROM command to specify the sender's email address
mail_from_command = f'MAIL FROM:<{from_mail}>\r\n'
client_socket.send(mail_from_command.encode())
response = client_socket.recv(1024).decode()
print(f'{mail_from_command} {response}')
# Send the RCPT TO command to specify the recipient's email address
rcpt_to_command = f'RCPT TO: <{to_mail}>\r\n'
client_socket.send(rcpt_to_command.encode())
response = client_socket.recv(1024).decode()
print(f'{rcpt_to_command} {response}')
# Send the DATA command to indicate the start of the message data
data_command = 'DATA\r\n'
client_socket.send(data_command.encode())
response = client_socket.recv(1024).decode()
print(f'{data_command} {response}')
# Construct the message headers and content manually
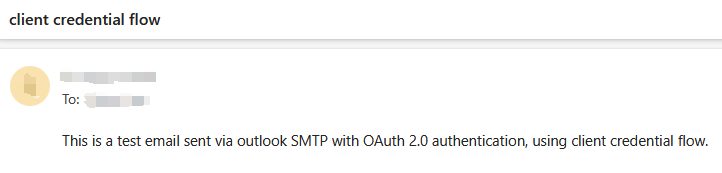
message = f'Subject: {flow} flow\r\nFrom: {from_mail}\r\n' \
f'To: {to_mail}\r\n\r\nThis is a test email sent via outlook SMTP with OAuth 2.0 authentication, ' \
f'using {flow} flow.\r\n.\r\n'
client_socket.send(message.encode())
response = client_socket.recv(1024).decode()
print(f'Send email\r\n {response}')
# Send the QUIT command to close the connection
quit_command = 'QUIT\r\n'
client_socket.send(quit_command.encode())
response = client_socket.recv(1024).decode()
print(f'{quit_command} {response}')
# Close the socket
client_socket.close()
if __name__ == '__main__':
access_token = get_token_client_credential_flow()
verify_access_token(access_token)
send_mail_smtp(access_token)
There are mainly 3 steps for this script
SMTP.SendAsApp.
to_mailbased on SMTP.
Please make sure the network configuration in the test environment can access url
https://login.microsoftonline.com/and server
smtp.office365.comwith port
587
User can continue go to next step. If it failed, user need to fix the errors it returned.
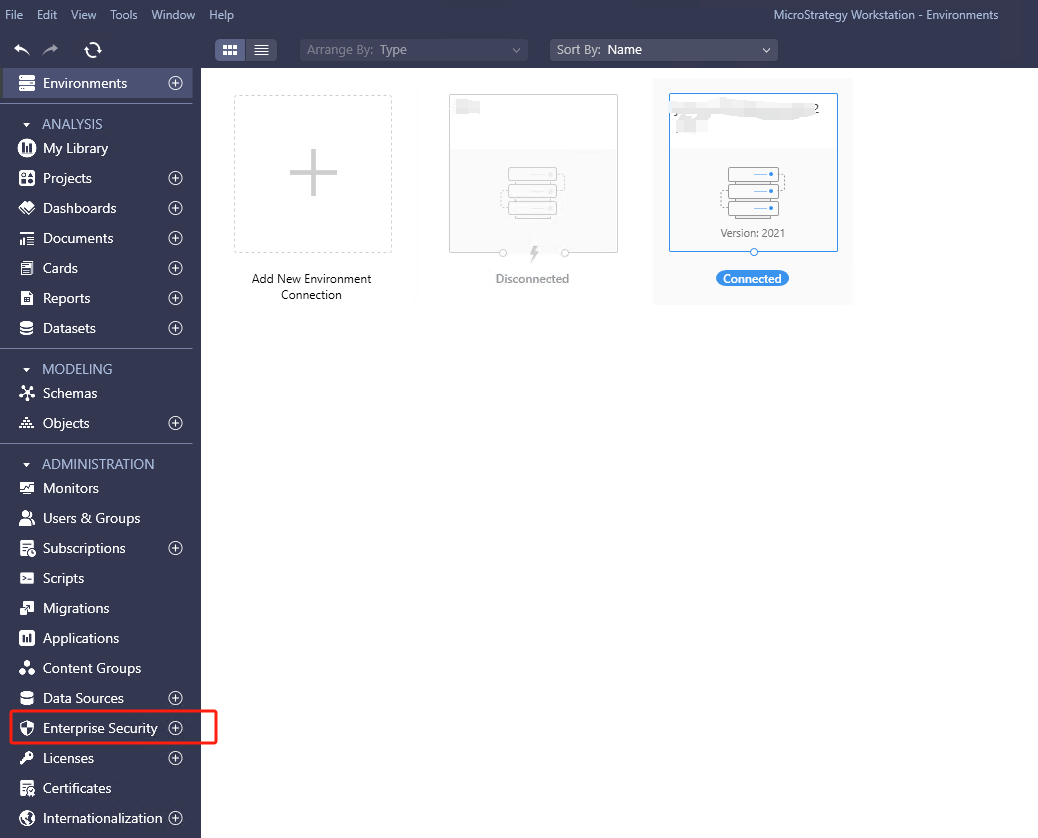
In Strategy Workstation, connect to the environment. Click “+” for
Enterprise Securityto create a new IAM object:
In Configure Authentication Service window, input name, then select predefined provider
Azureas identity provider. Input client ID, client secret, tenant ID got from azure app. Scope should be
https://outlook.office365.com/.default
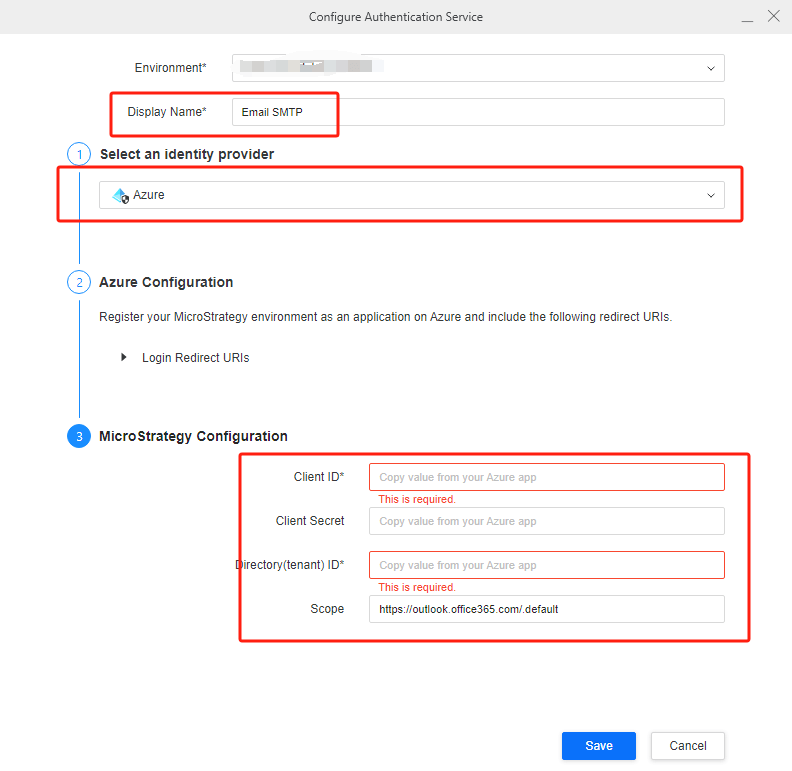
DO NOT use
Generic OAuth, in which user need to input
OAuth URLand
Token URLmanually.
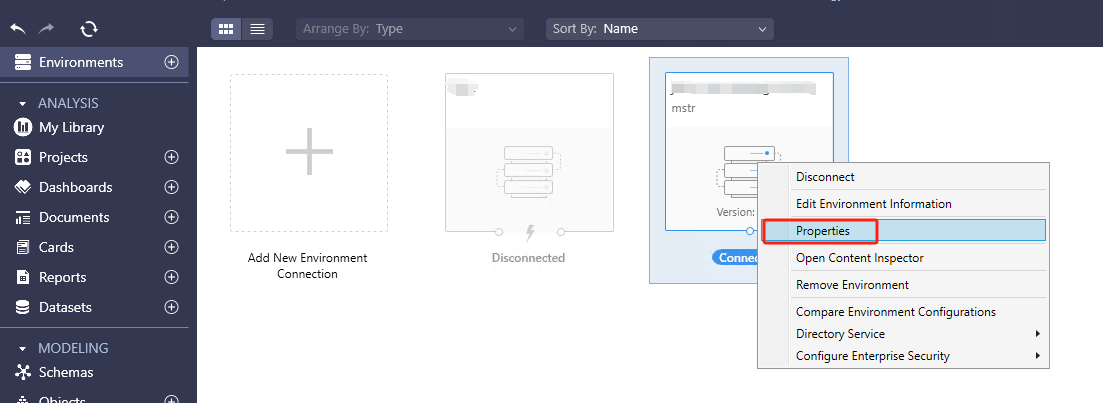
RMC on environment → Properties → Subscription Delivery → Delivery Device
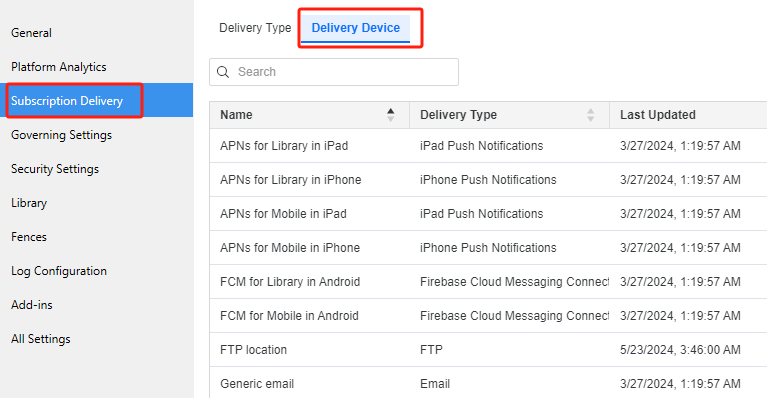
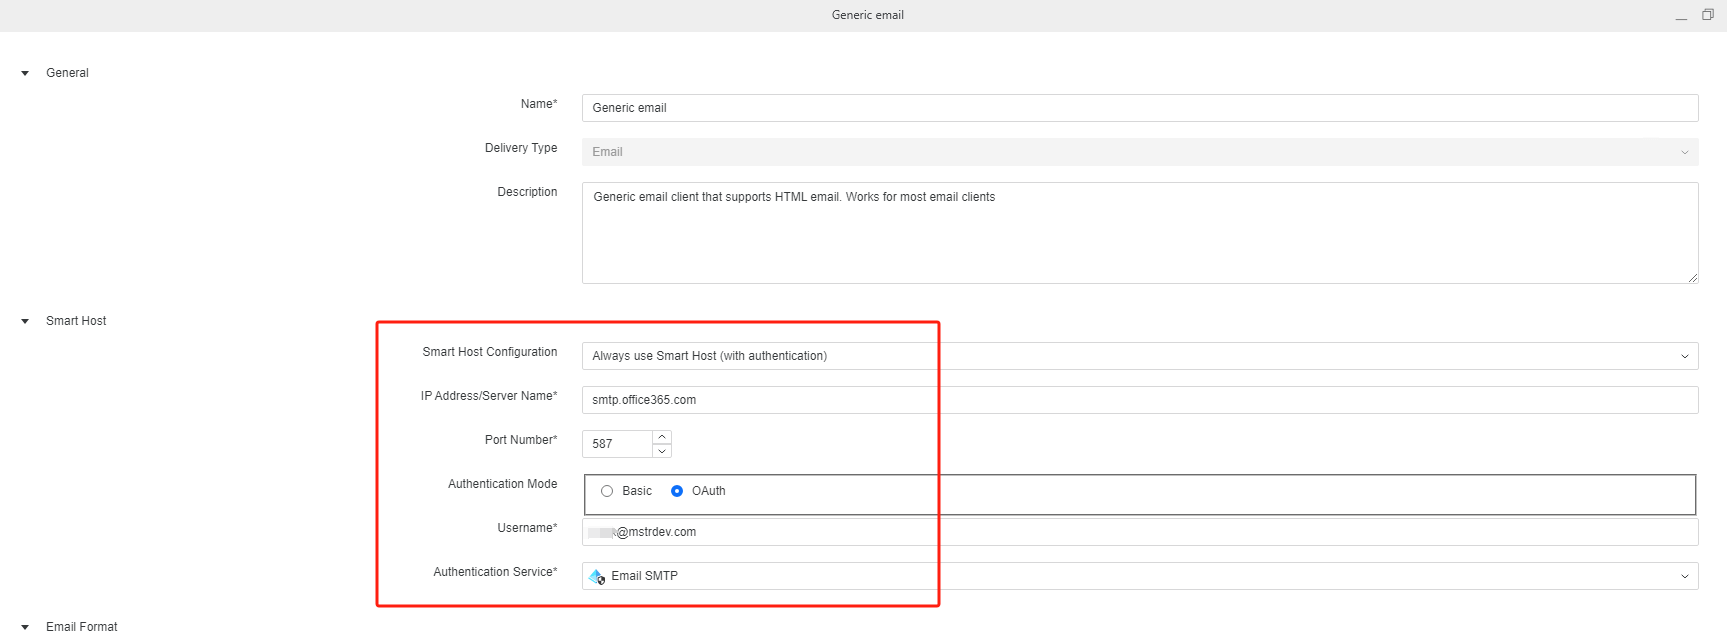
Create or edit email device, for following fields:
Always use Smart Host (with authentication)
smtp.office365.com
587
OAuth

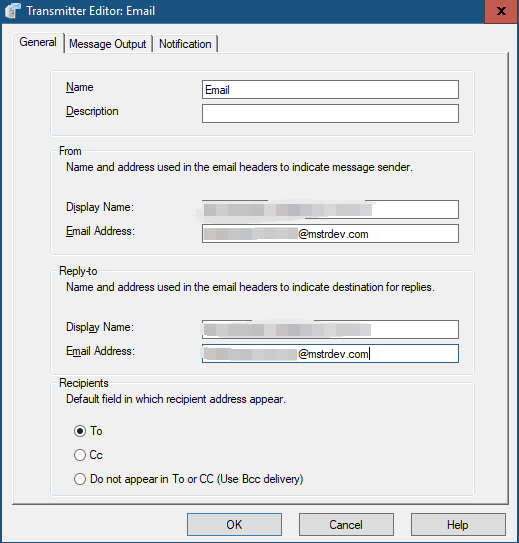
In developer, open email transmitter, set the email address with the same address user input in the device.
Create email subscription based on the device and verify email can be sent successfully.
Below are the steps to do investigation:
Trigger the subscription and check above logs.
Below are errors user may find when user run python script or in DSSErrors.log after trigger subscription.
535 5.7.139 Authentication unsuccessful, the request did not meet the criteria to be authenticated successfully
It means the app is not registered. Please follow "Register Service principals in Exchange" section to register the app.
There are several situations may cause it:
554 5.2.252 SendAsDenied; <email 1> not allowed to send as <email 2>; STOREDRV.Submission.Exception:SendAsDeniedException.MapiExceptionSendAsDenied; Failed to process message due to a permanent exception with message [BeginDiagnosticData]Cannot submit message.
It means the email used in
transmitteris inconsistent with email used in
device. Please modify the email in
transmitterand try again.