Starting with the release of Strategy ONE (March 2024), dossiers are also known as dashboards.
Introduced in Strategy 2021 Update 12, the new data import experience, which is enabled by default in Strategy Library and Workstation, provides users with a more intuitive data navigation and management process. This enhanced experience encompasses new features like a well-structured Data Source Tree, Centralized Table Canvas, and dynamic search functionality. This update further simplifies the process of dataset and data source creation with step-by-step instructions. However, this new model comes with prerequisite settings and privileging factors users need to be mindful of, particularly when working with free-form SQL mode and dealing with certain data sources.
With the release of Strategy 2021 Update 12, the new data import experience is available out-of-the-box in Strategy Library and Strategy Workstation. It sets the stage for a more intuitive and productive analytics journey. An organized Data Source Tree, a Centralized Table Canvas, and powerful search functionality aid users in navigating, importing, and managing data with unprecedented ease.
New Data Import Experience is enabled by default in Strategy Library and Workstation starting from Strategy 2021 Update 12
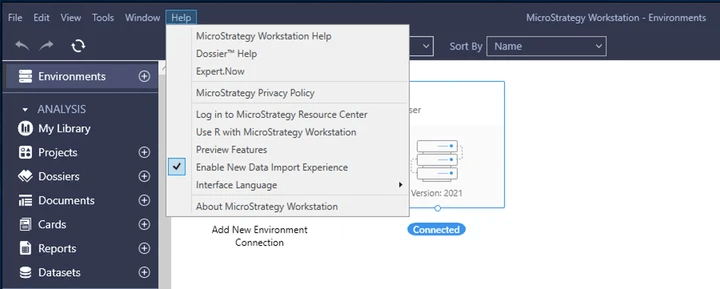
Users can disable New Data Import Experience by unchecking this option. This option is only available in Strategy Workstation for users to use Legacy Data Import.
Start by creating a new dossier or opening an existing one.
Select Add Data > New Data. This action leads users to the main page of the New Dataset, where the data creation process can commence.
To add data to an existing dataset, click More next to the dataset in the Datasets panel, choosing Edit Dataset, and click Add a new table.
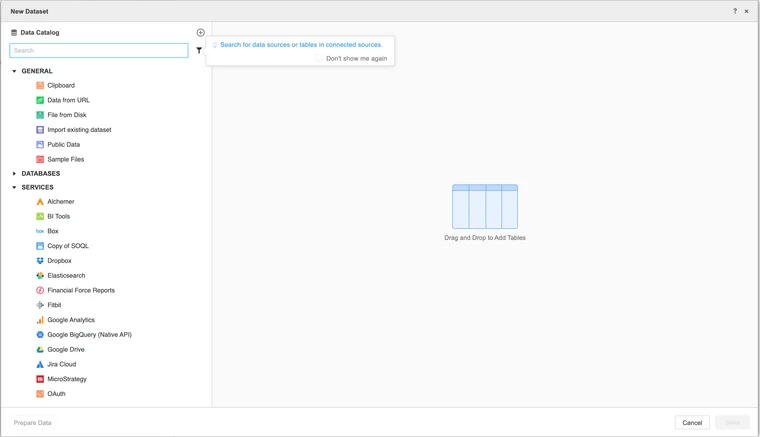
The new data import experience introduces the Data Catalog. This organized structure categorizes data sources into General, Databases, and Services sections. The tree simplifies navigation, making it easier for users to locate and interact with specific data sources.
The new data import experience also introduces a Centralized Table Canvas. It provides a unified space to operate on imported tables, grouping tables by their respective data sources. This visual representation enhances organization and efficiency.
3.1 In the left pane, locate and click on “Create a new data source.”
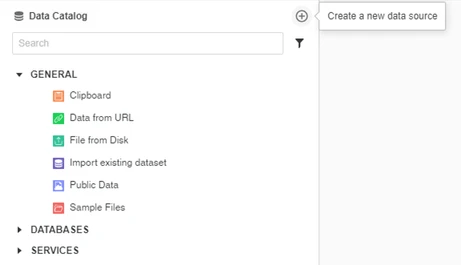
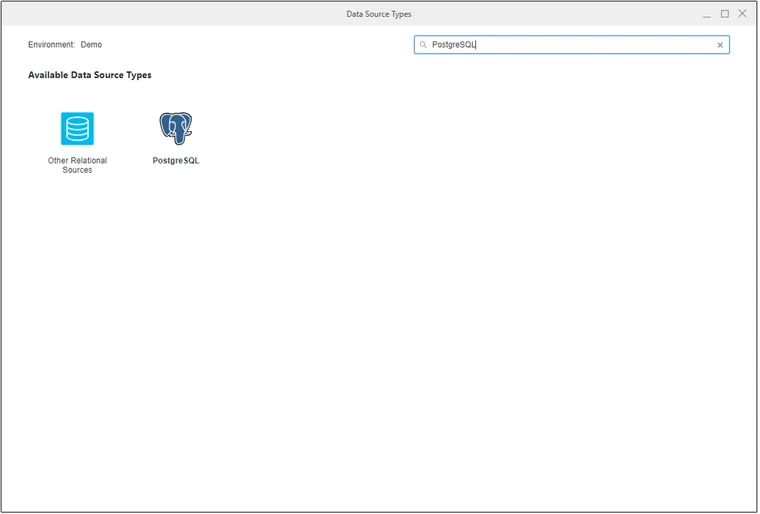
3.2 Search for the specific data source type and click on it.
3.3 Fill in the required information for the data source.
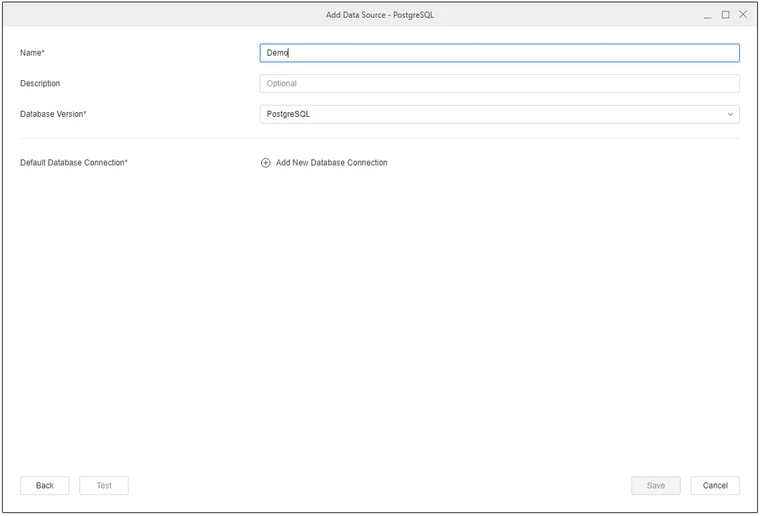
3.4 If adding a new database connection is necessary, provide essential details to establish connectivity with the database.

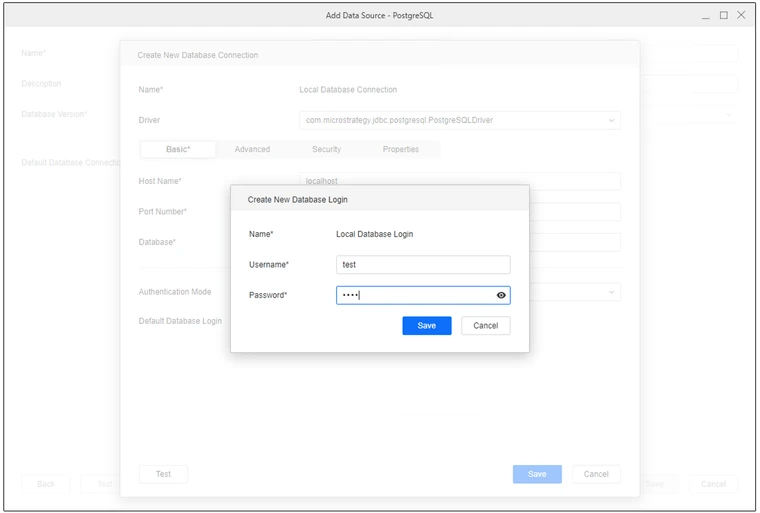
3.5 To finish the the configuration and test connectivity, click "Add New Database Login" and fill in the corresponding fields.
3.6 The new data source will now be visible in the list of available data sources in the left pane.
Right-click on the new data sources for additional options to manage or edit it.

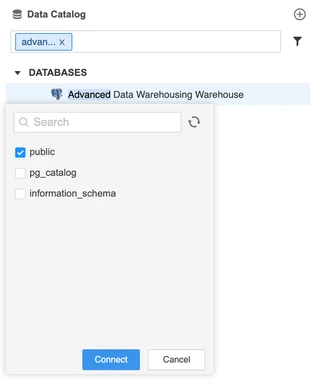
Explore available data source connections in the Data Catalog. Select or search for a data source and click it. Choose or search for the namespaces users wish to connect. Multiple namespaces can be connected simultaneously, and users have the flexibility to disconnect or change the connected namespace.
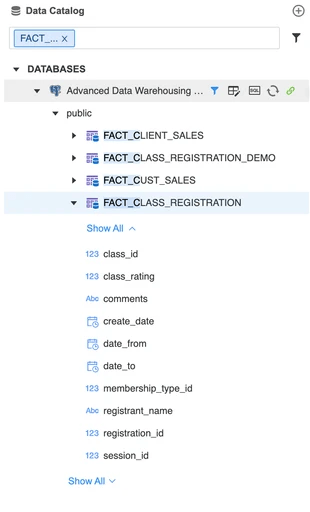
Expand a namespace to access a comprehensive list of all tables contained within it. Further, expand a specific table to view a detailed list of all columns associated with it. Utilize the Search box to locate a specific table by typing its name; the list of tables will dynamically filter as users type. Note that the current functionality does not support double-clicking tables to directly add them to the query. Instead, users must manually input the table names into their query.
There exist three methods to add tables from database sources: incorporating a free-form SQL, building a query, or directly selecting a table.
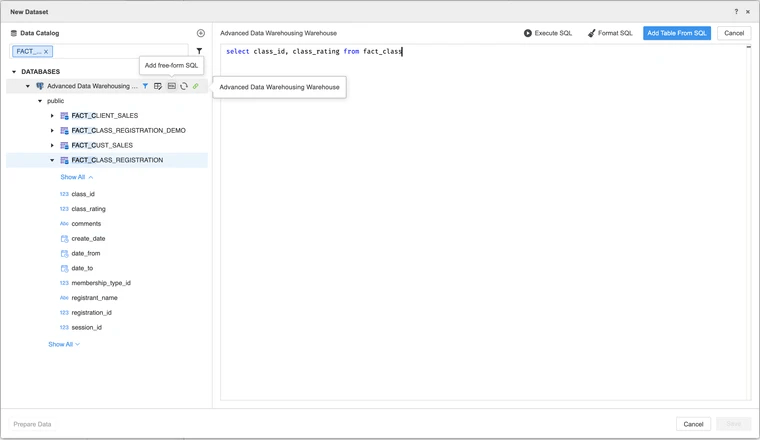
Add table from Free-form SQL
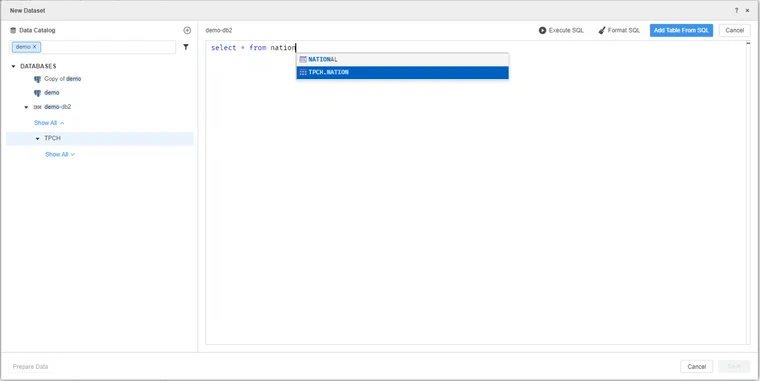
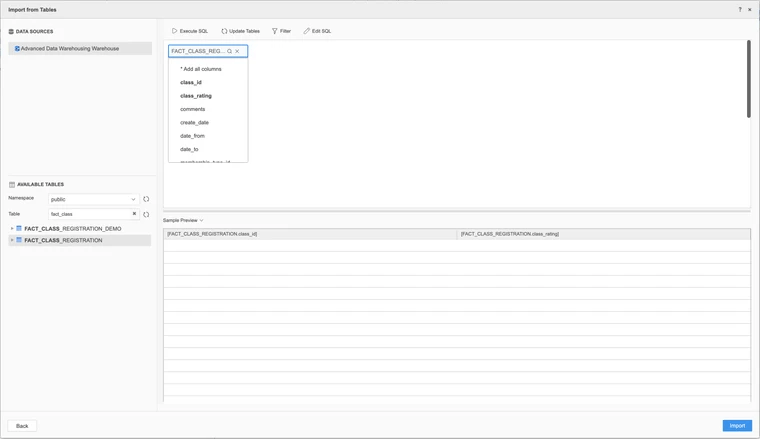
Hover over the data source to reveal a list of buttons. Hovering on the SQL button will display the "Add free-form SQL" tooltip. Clicking on it will open the free-form SQL workspace, where users can enter SQL queries with the added convenience of auto-completion. Click “Execute SQL” to execute the query. If users decide to import the result of their query, click “Add Table From SQL.”
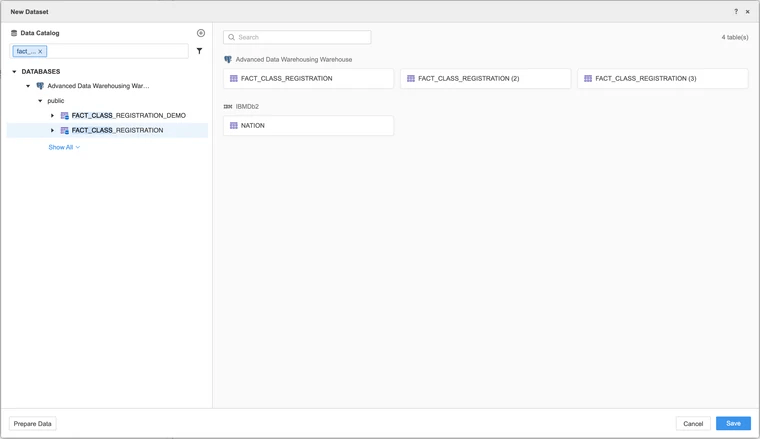
Add table from selecting tables
Double-click or drag-and-drop tables to add them to the table canvas. Users can add tables from multiple data sources. The imported tables are organized, grouped by their respective data sources on the table canvas. Users can also drag tables over the imported table to replace the previous imported table.
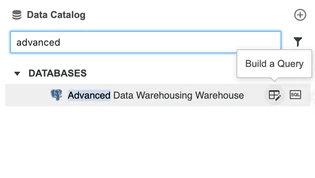
Add table from build a query:
Hover over the data source to reveal a list of buttons. Hovering on the Build Query button will display the "Build a Query" tooltip. Clicking it will pop up a window to add the table by building a query.
Double-click to add the table to the right pane. Scroll through the column list under the selected table and double-click on specific columns to add them individually. Click “Import” to import the result from building a query.
If needed, click “Prepare Data” to preview, or click “Add/Edit Tables” to add more tables or modify imported Tables. If users are satisfied with the current result, they can click “Finish.”

Click “Add/Edit Tables” on preview page to return to main page of the New Dataset. Once satisfied, click “Save.”
Decide whether to “Connect Live” to a live database or “Import as an in-memory dataset” directly into the dossier. Connecting live is suitable for large datasets where importing all data into the dossier may not be practical. Importing data directly into the dossier enables faster interaction but uses more RAM.
In the event of a failed database connection, a red warning icon will appear to the left of the data source. For detailed information about the error, users can hover over this red warning icon to display the tooltip.
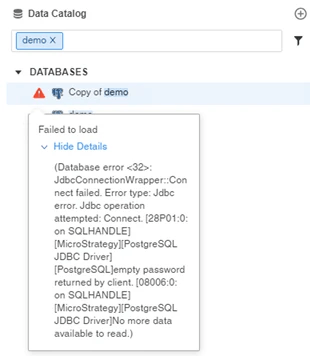
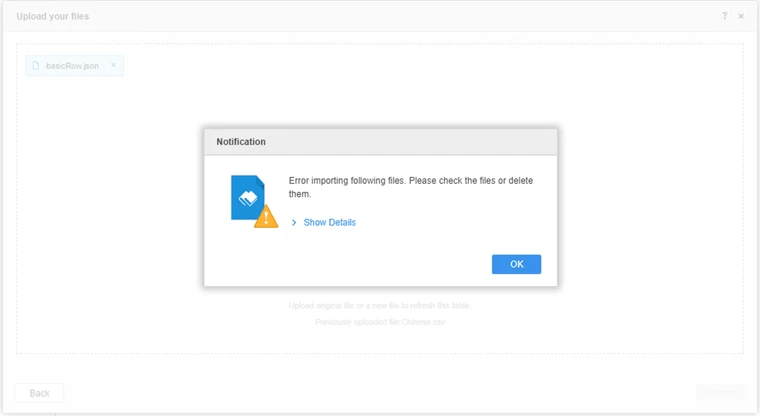
In situations where error messages appear as pop-ups, users have the option to click on 'Show Details' to reveal a comprehensive explanation of the errors.
Some features could be restricted based on user privileges or specific system settings. For instance, the privilege "User FreeForm SQL Editor” is required for users to add a free-form SQL. Likewise, functionality like "Data from URL" could be turned off if "enable URL file upload via HTTP/HTTPS" isn't activated.