Submitting a Case Online
Step 1: Getting Started
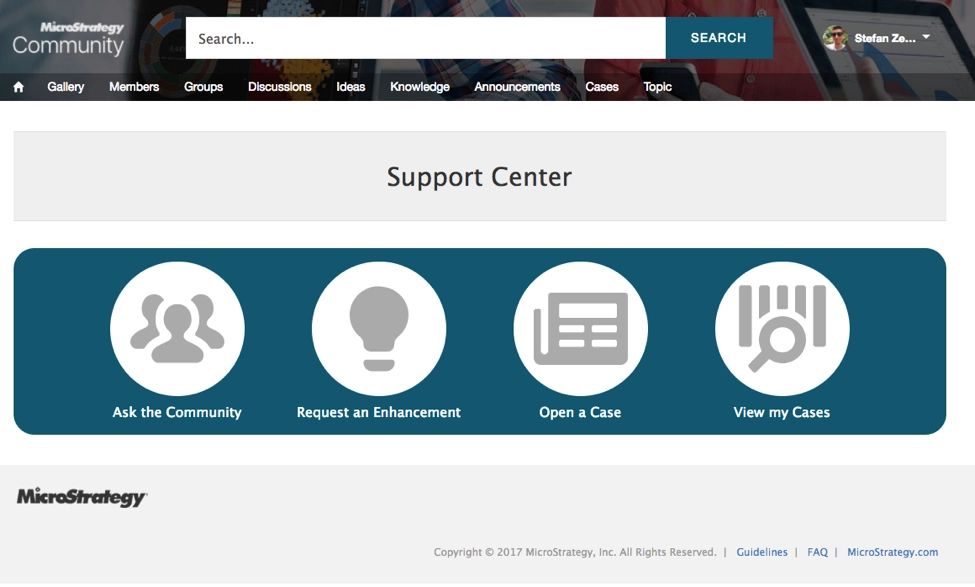
After selecting “Support Center” from the drop-down menu in Community, you will be provided with the following four options:
Step 2: Creating a Case
To submit a Case, select “Open a Case”
Opening a case now requires some new fields. These fields are designed to help us troubleshoot and resolve your issue faster and with less effort from you.
All fields now include an example as a placeholder. This placeholder will go away as soon as you start typing and are meant to give you guidance on what information to provide.
You will be prompted to fill out the following information pertaining to your problem:
Next, you will be asked to provide the following information:
Once the fields are filled, click Next to proceed to useful articles. This articles come directly from our community content and will help you get solutions fast without having to open a case. If you are interested in a specific item, click on it and see if it solves your problem. The article will open in a new window so you can always continue to log a case.
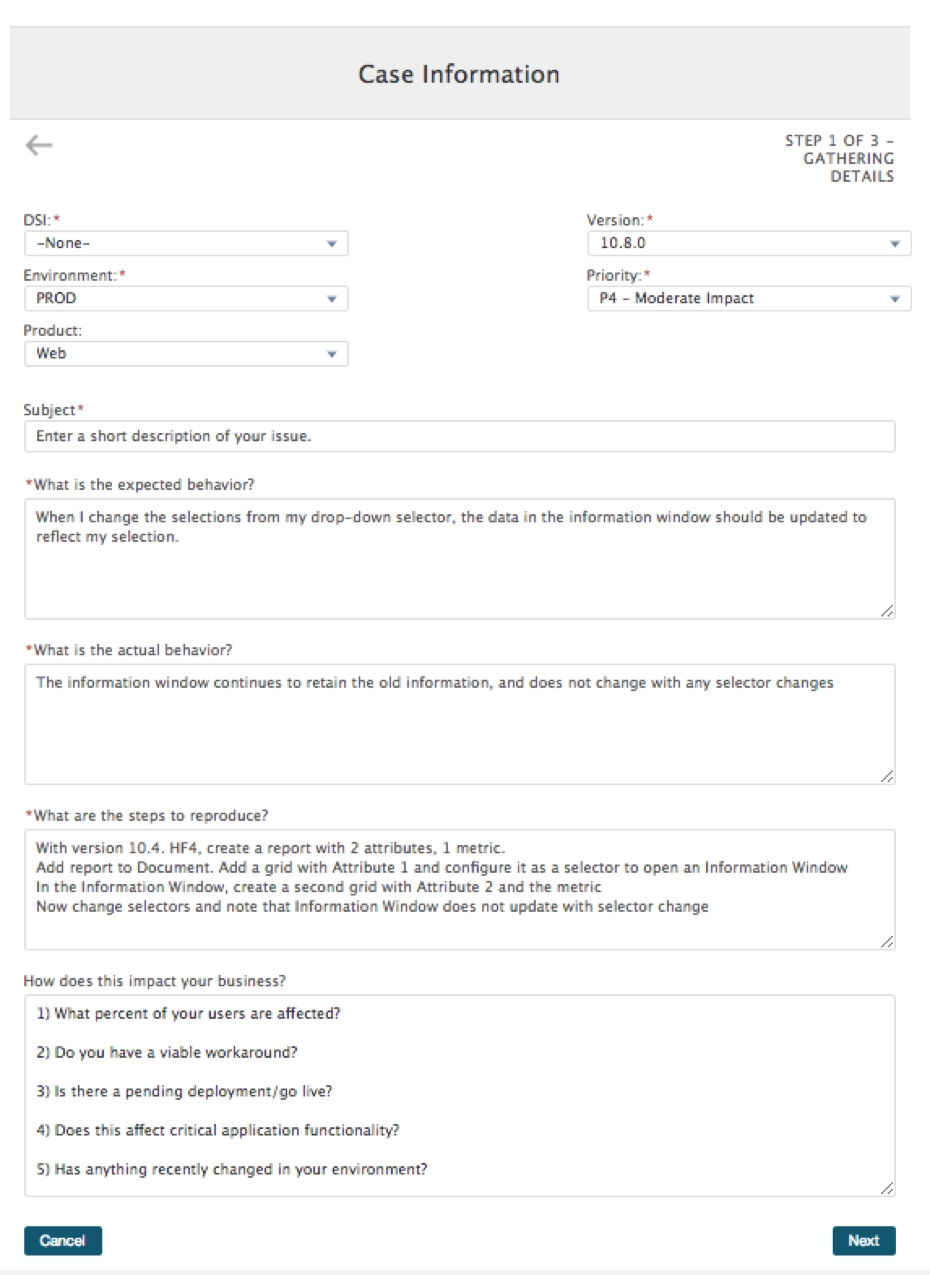
Fill in the required information and select “Next”
Step 3: Explore Pre-Existing Knowledge-Base Articles
You will be directed to a new screen with “Recommended Articles and Solutions.” These knowledge-base articles will provide you with solutions to previously-submitted questions that may resemble your issue. If one of the articles helps to solve your issue, then select “Found what I needed!” to get back to the Community homepage. If the knowledge base articles fail to address your issue, click “Log Case.”

When you click Log Case, the next page will show your case details and provide a link for you:

Click on your case number to meet the redesigned case page:

In the new case page you can see your case details along with a feed on what has been going on. Quickly communicate with your case owner here to provide information or ask for updates.
