EducationSoftwareStrategy.com
StrategyCommunity

Knowledge Base

Product

Community

Knowledge Base

TopicsBrowse ArticlesDeveloper Zone

Product

Download SoftwareProduct DocumentationSecurity Hub

Education

Tutorial VideosSolution GalleryEducation courses

Community

GuidelinesGrandmastersEvents
x_social-icon_white.svglinkedin_social-icon_white.svg
Strategy logoCommunity

© Strategy Inc. All Rights Reserved.

LegalTerms of UsePrivacy Policy
  1. Home
  2. Topics

KB484460: How to set up point-to-site VPN in Azure for Mac


Yashodhan Joshi

Software Engineer, Principal • MicroStrategy


This article provides steps for setting up point-to-site VPN in Azure for Mac.

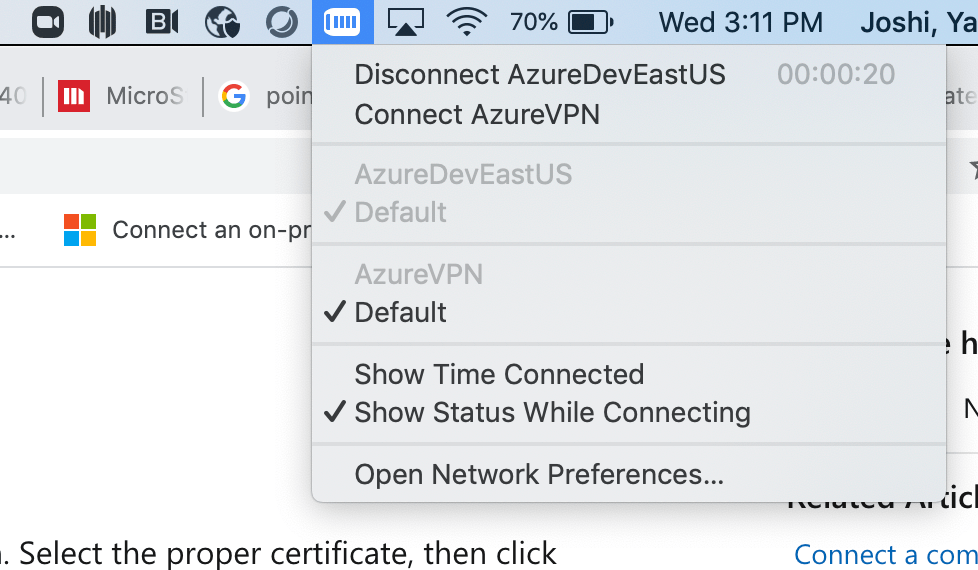
Setting up a point-to-site VPN connection allows you to access the resources deployed inside the virtual network without a public IP address. 
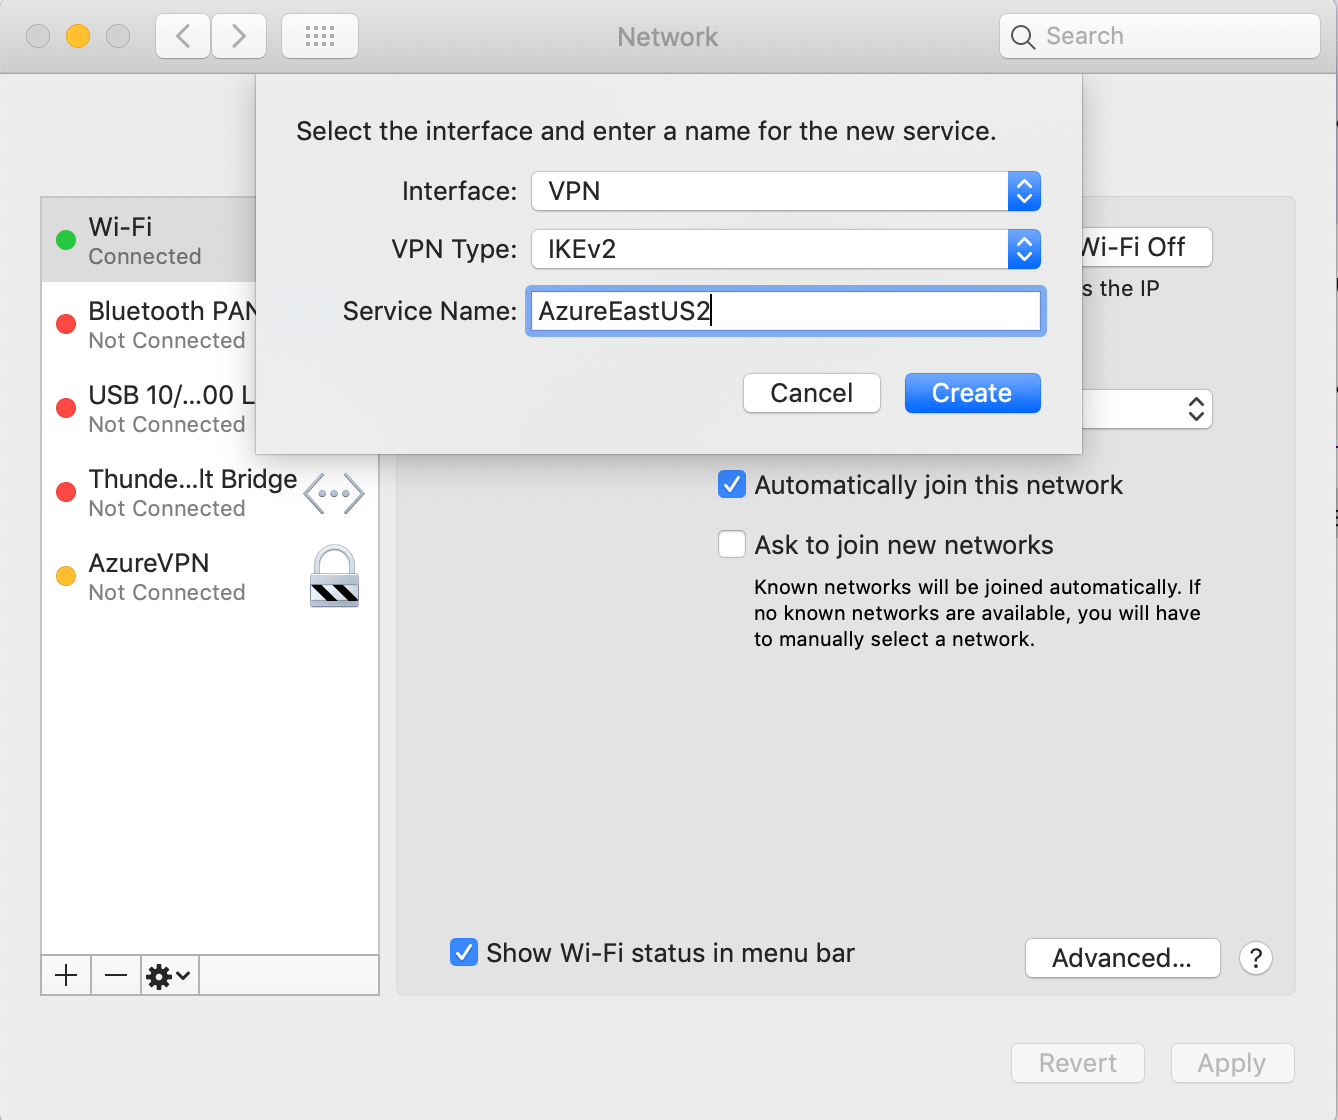
Note: The client configuration described in this article is specific to the Mac machine.
On a high level, the following steps are taken to achieve a point-to-site VPN connection:

  1. Create a gateway subnet in the virtual network
  2. Create a virtual network gateway
  3. Create self-signed certificates 
  4. Download the VPN client and configure VPN on your Mac machine

    If the above 3 steps are already completed by someone else, obtain the certificates from them and proceed with this step to connect to the VNet using VPN.
     

1. Create a gateway subnet


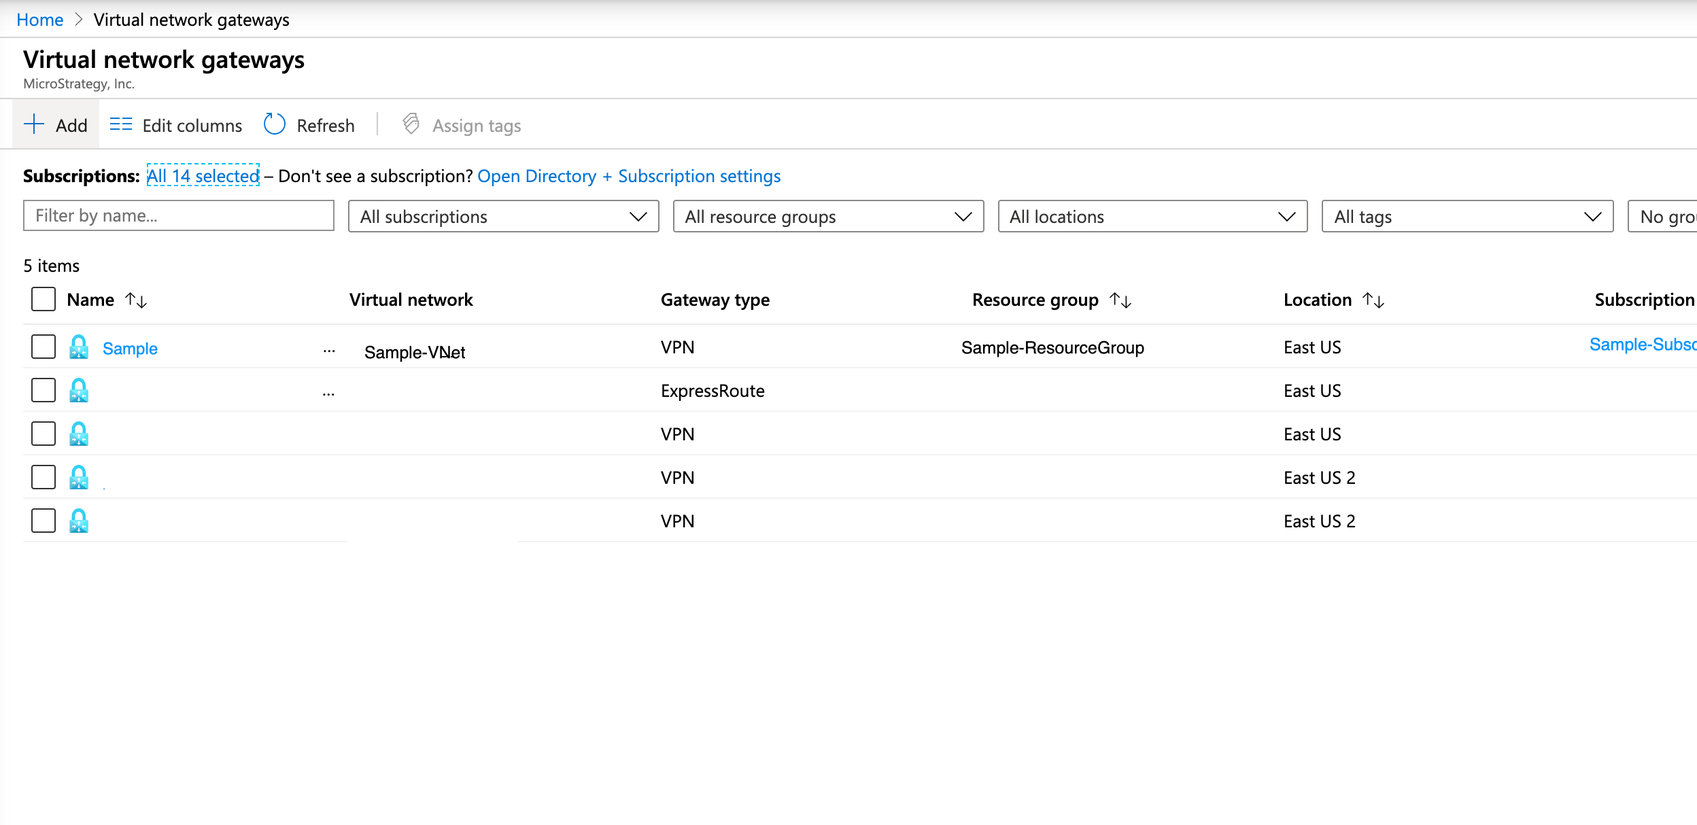
A gateway subnet is required to configure VPN (point-to-site or site-to-site). 

  • Go to the virtual network.
  • On the left panel, click on Subnets. 
  • Click +Gateway subnet. 
  • Leave the details provided by default.
    Do not attach any network security group to gateway subnet.
ka02R000000btd7QAA_0EM2R000001IJVr.jpeg

2. Create a virtual network gateway


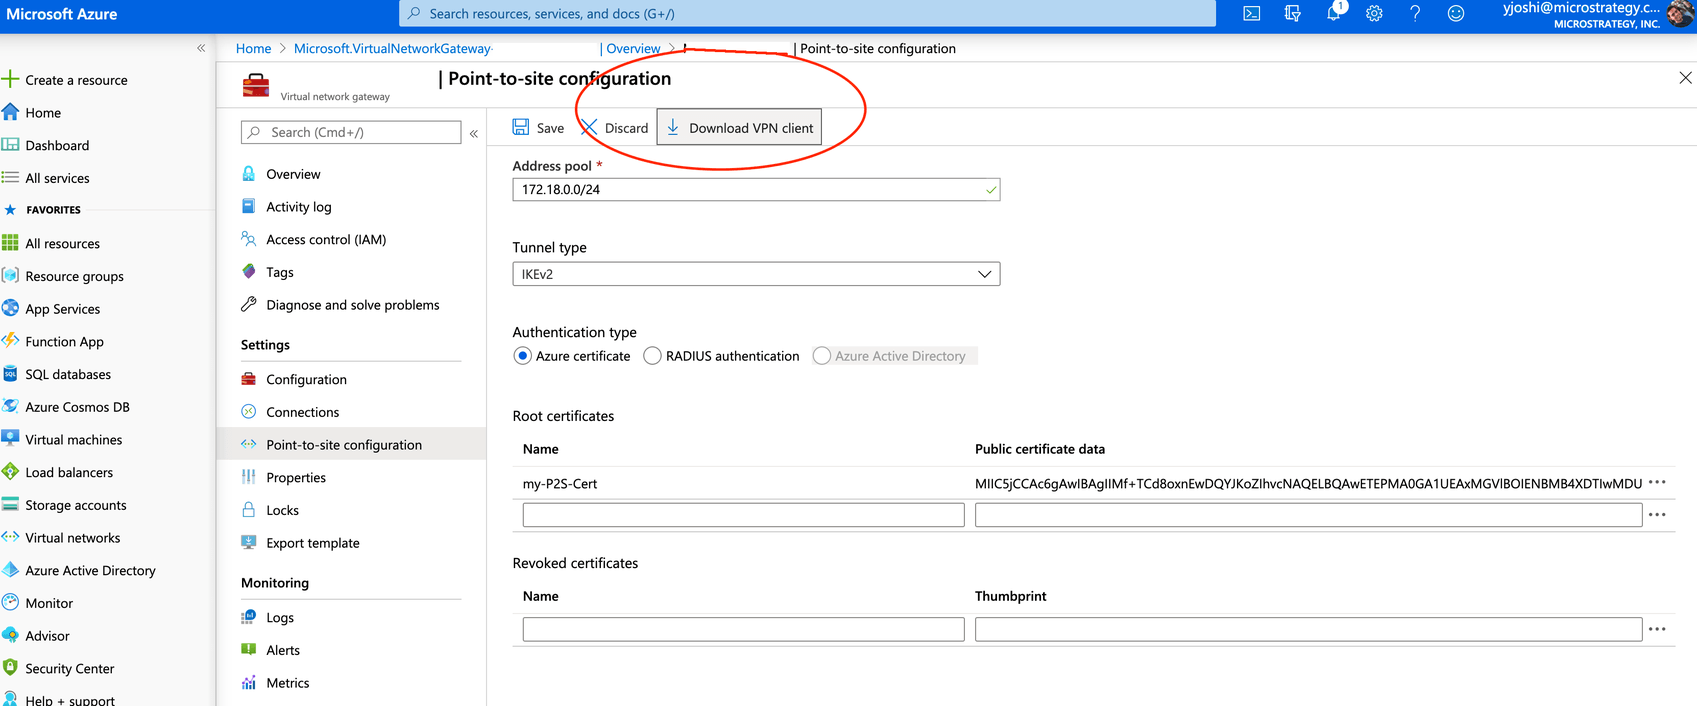
The next step is to create a virtual network a gateway.

  • In the search bar, search for "virtual network gateway."
ka02R000000btd7QAA_0EM2R000001IK2W.jpeg
  • Click on Add and fill out details.
ka02R000000btd7QAA_0EM2R000001IK30.jpeg
  • Make sure that Subscription, Region, SKU, and Virtual Network are chosen correctly. Also, you will be prompted to create a new public IP address as it is required to create a new public IP and it will be attached to the virtual network gateway created.

3. Generate certificates


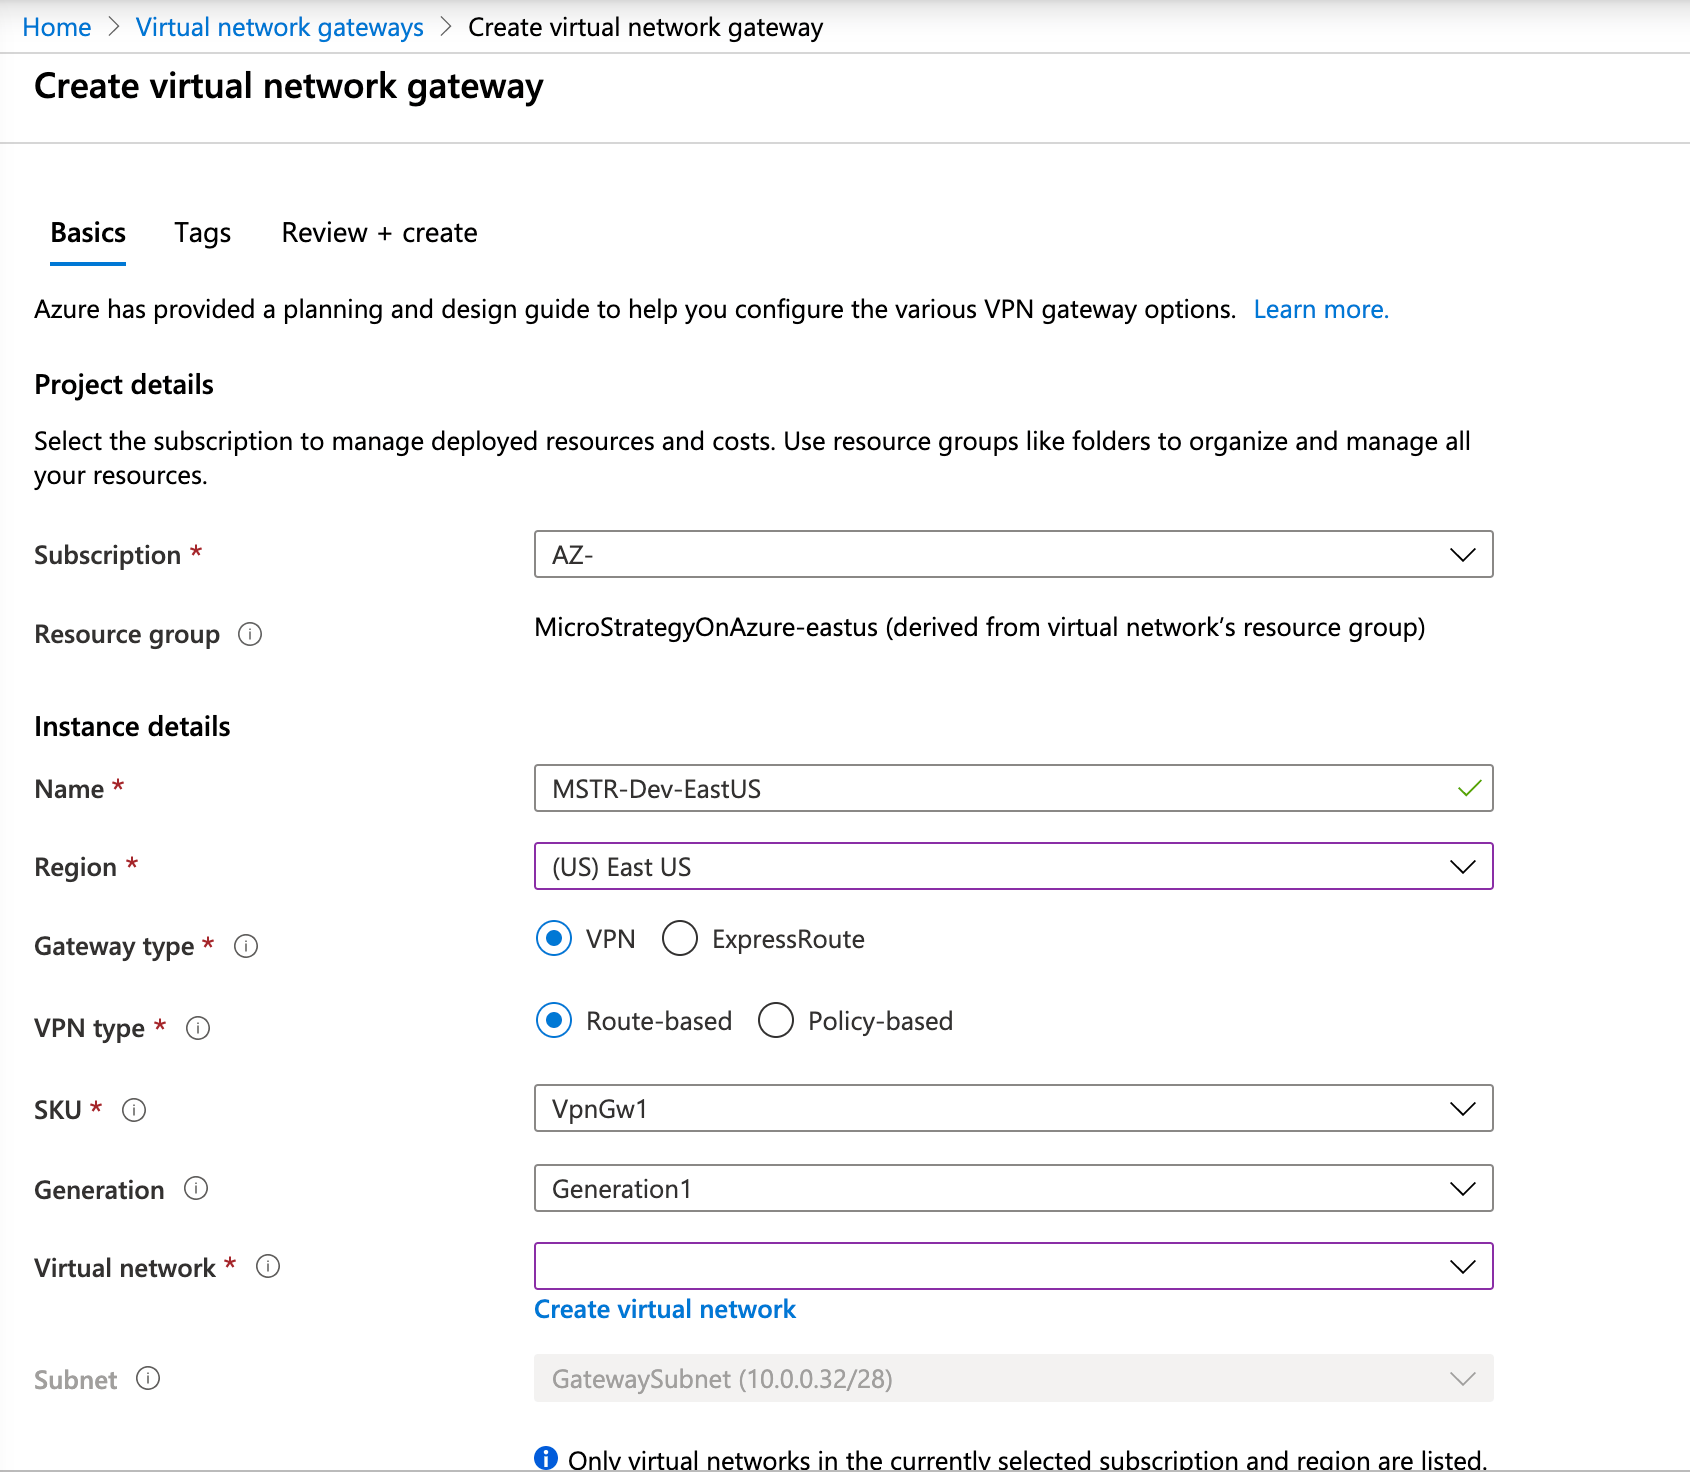
Virtual network gateways takes approximately 15-20 minutes to create. In the meantime, you can generate the self signed certificates, which is required to connect to VPN. Note that you can use the enterprise provided certificates as well.

  • First, install the required packages. You can use homebrew to install these packages.
    
    brew install strongswan
    brew install openssl

     
    Note that depending on your Mac OS version, packages may fail to install. Also, update homebrew before you start the install.
  • Generate the CA certificate. This certificate is required and will be added to the virtual network gateway in step 2.
    
    ipsec pki --gen --outform pem > caKey.pem
    ipsec pki --self --in caKey.pem --dn "CN=VPN CA" --ca --outform pem > caCert.pem
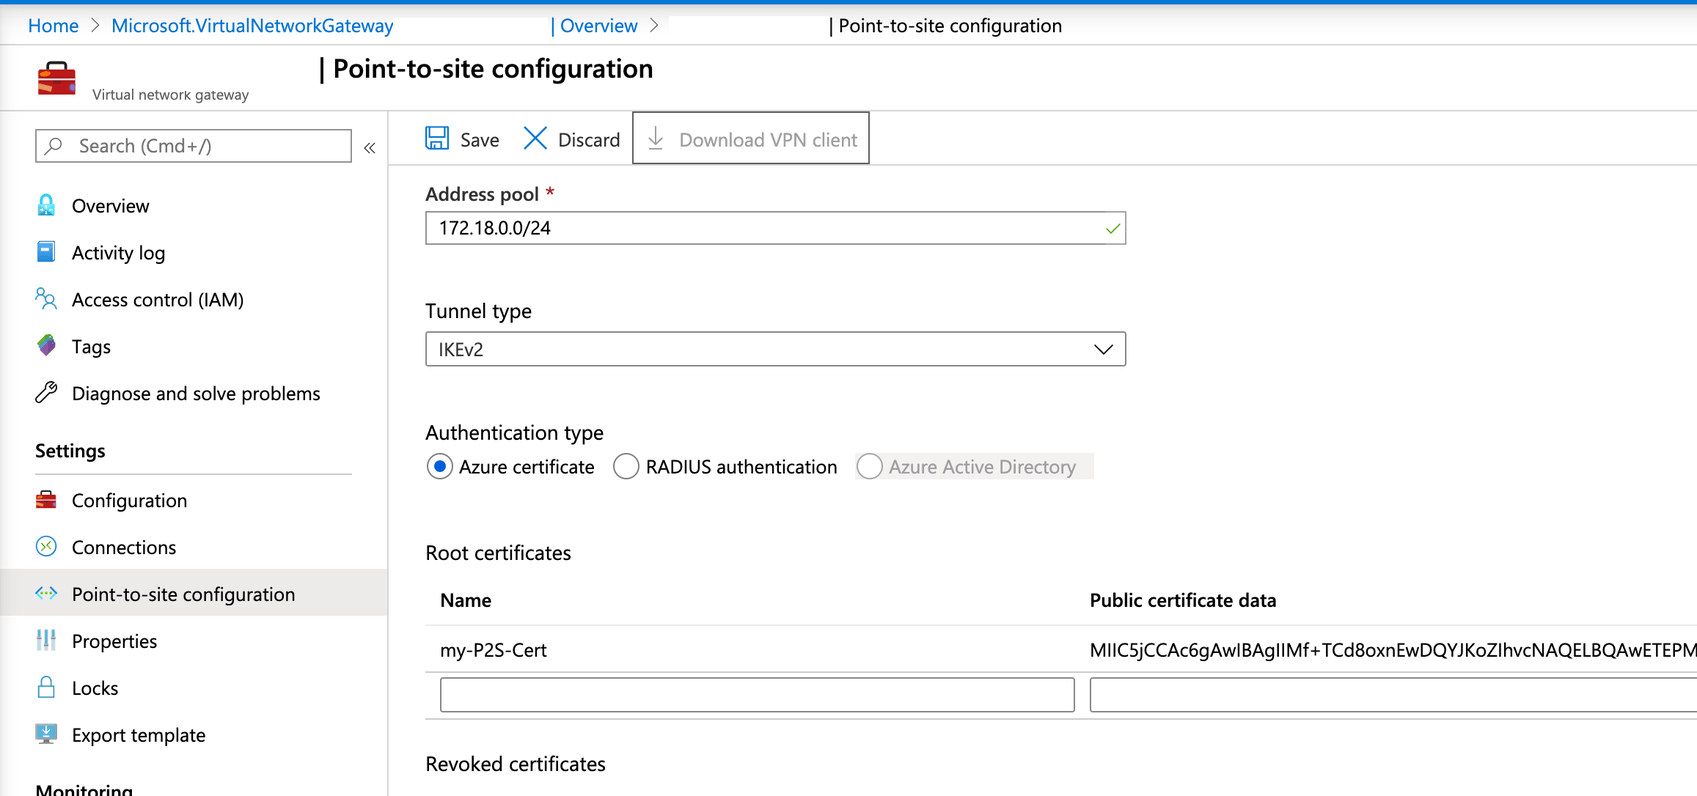
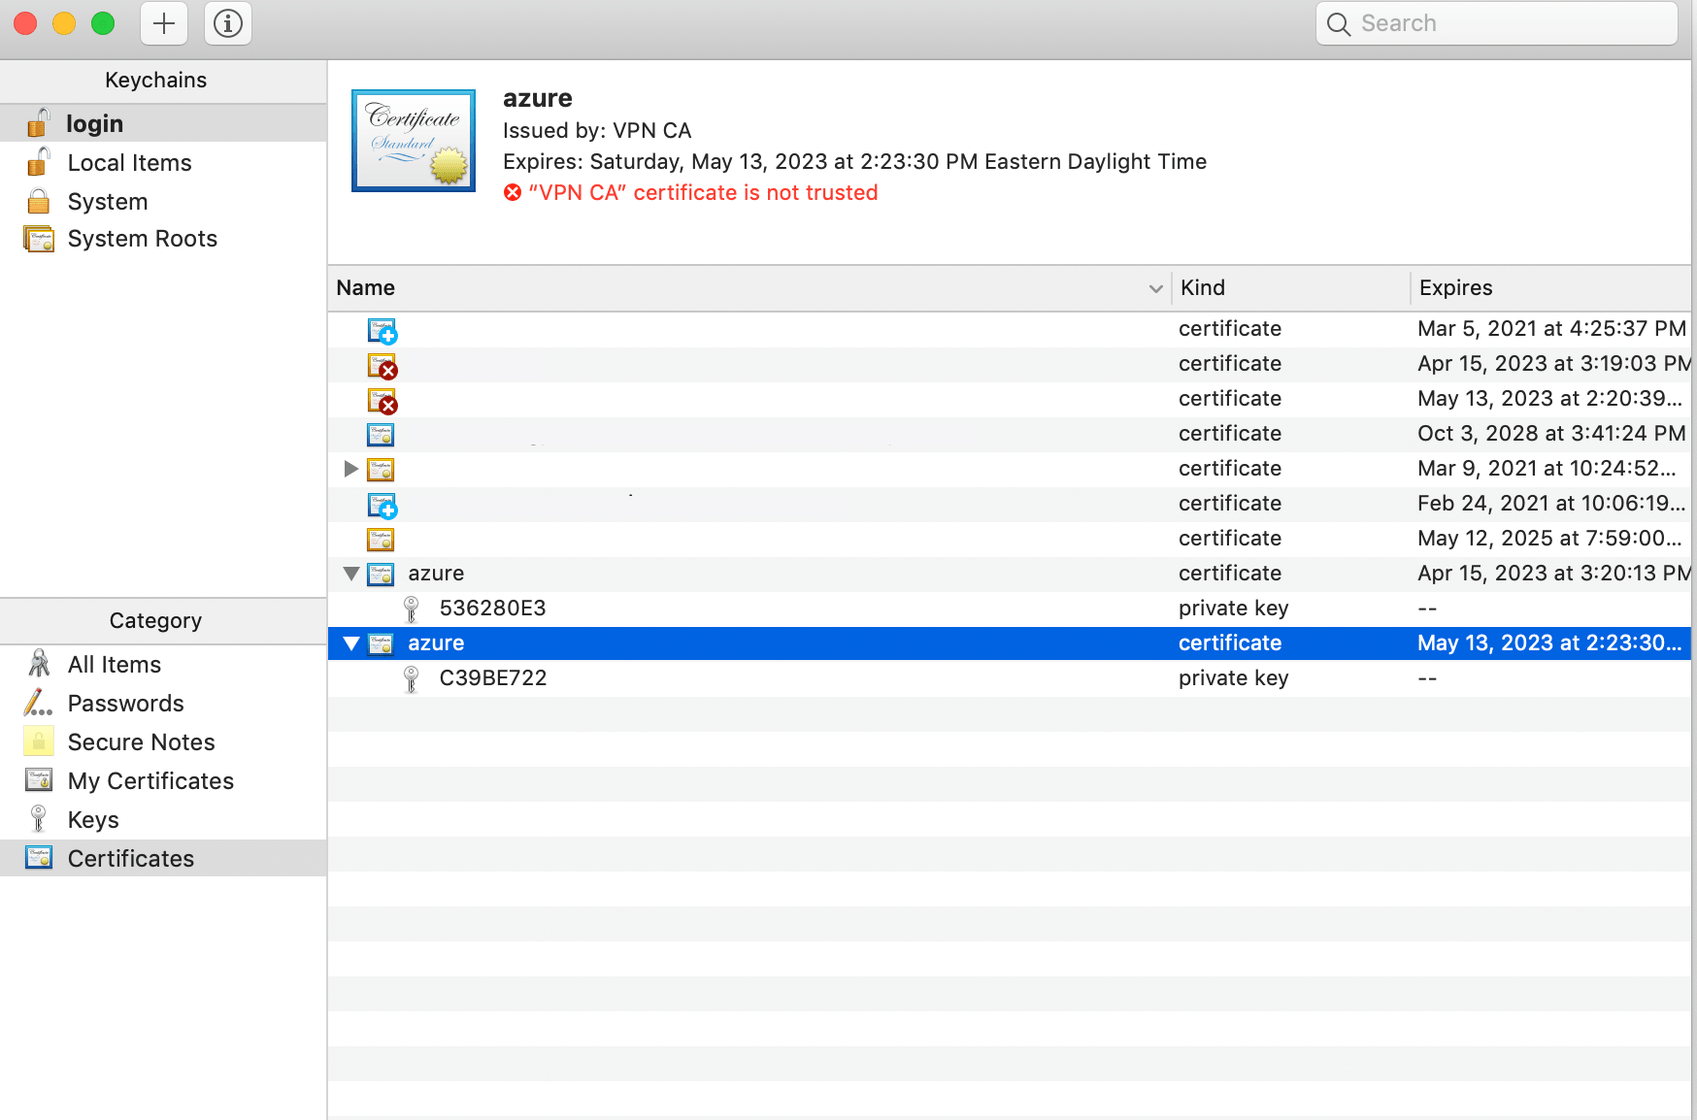
     
    This will generate the
    caCert.pem
    in your current working directory. Now we need to open that certificate in Base64 encoded format so that we can copy the certificate and paste it to virtual network gateway.
    
     openssl x509 -in caCert.pem -outform der | base64


    This will show the certificate details as shown below. Copy the output and paste it in notepad or any text editor to use it later.
ka02R000000btd7QAA_0EM2R000001IK3A.jpeg
  • Add the certificate to the virtual network gateway. Once the deployment is complete, go to the resource and on the left panel, click on Point-to-site configuration.
ka02R000000btd7QAA_0EM2R000001IK4I.jpeg
  • Enter the IP address range of your choice in Address pool. The IP address assigned to the machine connects to the virtual network, in your case it will be IP address of your Mac machine.
    • Enter Tunnel type as “IKEv2” for Mac.
    • Authentication should be set to “Azure certificate.”
    • Under root certificates, add the name of your choice, and copy the certificate you have saved in a text file under “Public certificate data."
  • Click Save.
  • Now generate the certificate that you're going to use for the VPN client in your machine. For this, run the following commands.
    You can use any password and/or username of your choice. Remember that you will need this password for later.
    
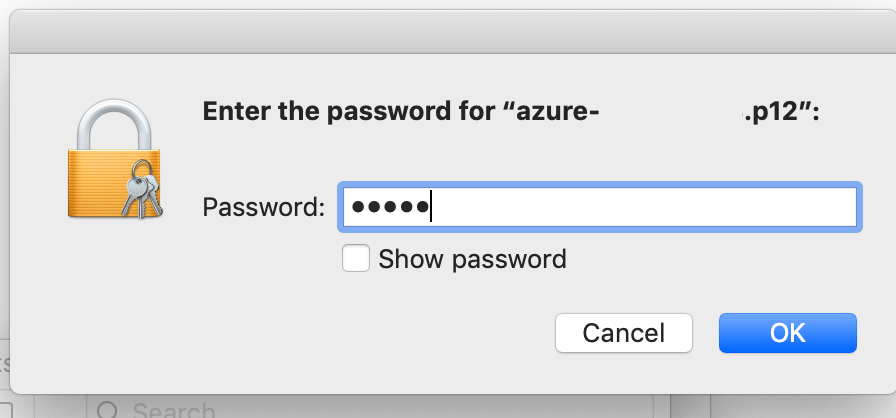
    export PASSWORD="password"
    export USERNAME="client"
    
    ipsec pki --gen --outform pem > "${USERNAME}Key.pem"
    ipsec pki --pub --in "${USERNAME}Key.pem" | ipsec pki --issue --cacert caCert.pem --cakey caKey.pem --dn "CN=${USERNAME}" --san "${USERNAME}" --flag clientAuth --outform pem > "${USERNAME}Cert.pem"

    After executing these commands, two files will be created,
    clientCert.pem
    and
    clientKey.pem.

  • Generate a p12 bundle, which is basically the certificate generated from the pem files mentioned above and it will added to your system certificates. This is the final client certificate.
    If someone else wants to use the VPN tunnel you've set up, you need to give them this p12 bundle generated alone with the password you set above.
    
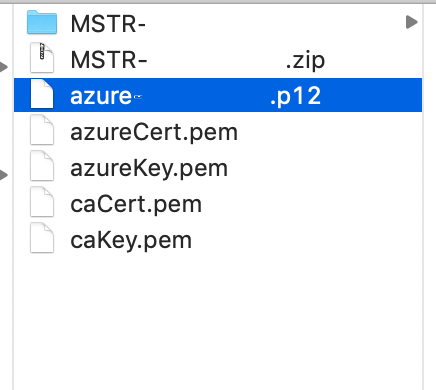
    openssl pkcs12 -in "${USERNAME}Cert.pem" -inkey "${USERNAME}Key.pem" -certfile caCert.pem -export -out "${USERNAME}.p12" -password "pass:${PASSWORD}"
    

    This will create a
    client.p12
    file in your current working directory.
  • Go to the folder where all these files are generated. You should see the files similar to what's shown below, minus the zip file:
ka02R000000btd7QAA_0EM2R000001IK4N.jpeg

4. Configure the VPN client

  • Now you will set up the VPN client on our Mac machine. If you’ve received the p12 bundle file, save it to the location of your choice. Now either go to the Virtual Network Gateway on Azure portal or ask for the zip file (VPN client) to the person you have received the p12 bundle from. If you want to download the VPN client from the Azure portal, go to that Virtual Network Gateway and click on point-to-site from the left panel. Then click Download VPN client. This will download a zip file.
ka02R000000btd7QAA_0EM2R000001IK51.jpeg
  • Unzip that zip file on your machine. The folder will have the following contents in the zip file.
ka02R000000btd7QAA_0EM2R000001IK5L.jpeg
  • Before configuring the VPN client, add the certificate to your machine's root first. To do this, double-click on the p12 file, and you will be prompted for the password. The password is the one you entered above.
ka02R000000btd7QAA_0EM2R000001IK5Q.jpeg
  • Click Ok. You should be able to see the certificate added to the root certificates (in keychain).
ka02R000000btd7QAA_0EM2R000001IK5M.jpeg
  • Go to System Preferences > Network and click "+" (create a new service).
ka02R000000btd7QAA_0EM2R000001IK5k.jpeg
  • From the Interface drop-down, select VPN.
  • From the VPN Type drop-down, select IKEv2.
  • In the Service Name field, enter the name of your choice.
  • Click Create.
    A window will appear where you need to enter the Server Address, RemoteID, and LocalID. The Server Address and Remote ID are the same and can be found in VpnSettings.xml inside the VPN client zip package that you downlaoded in the beginning. The following is a sample VpnSettings.xml file:
    
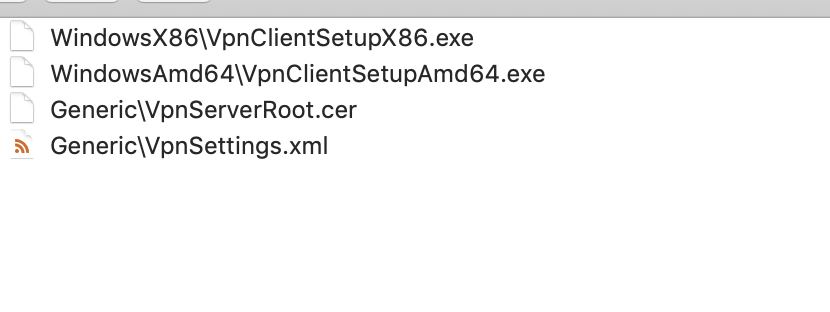
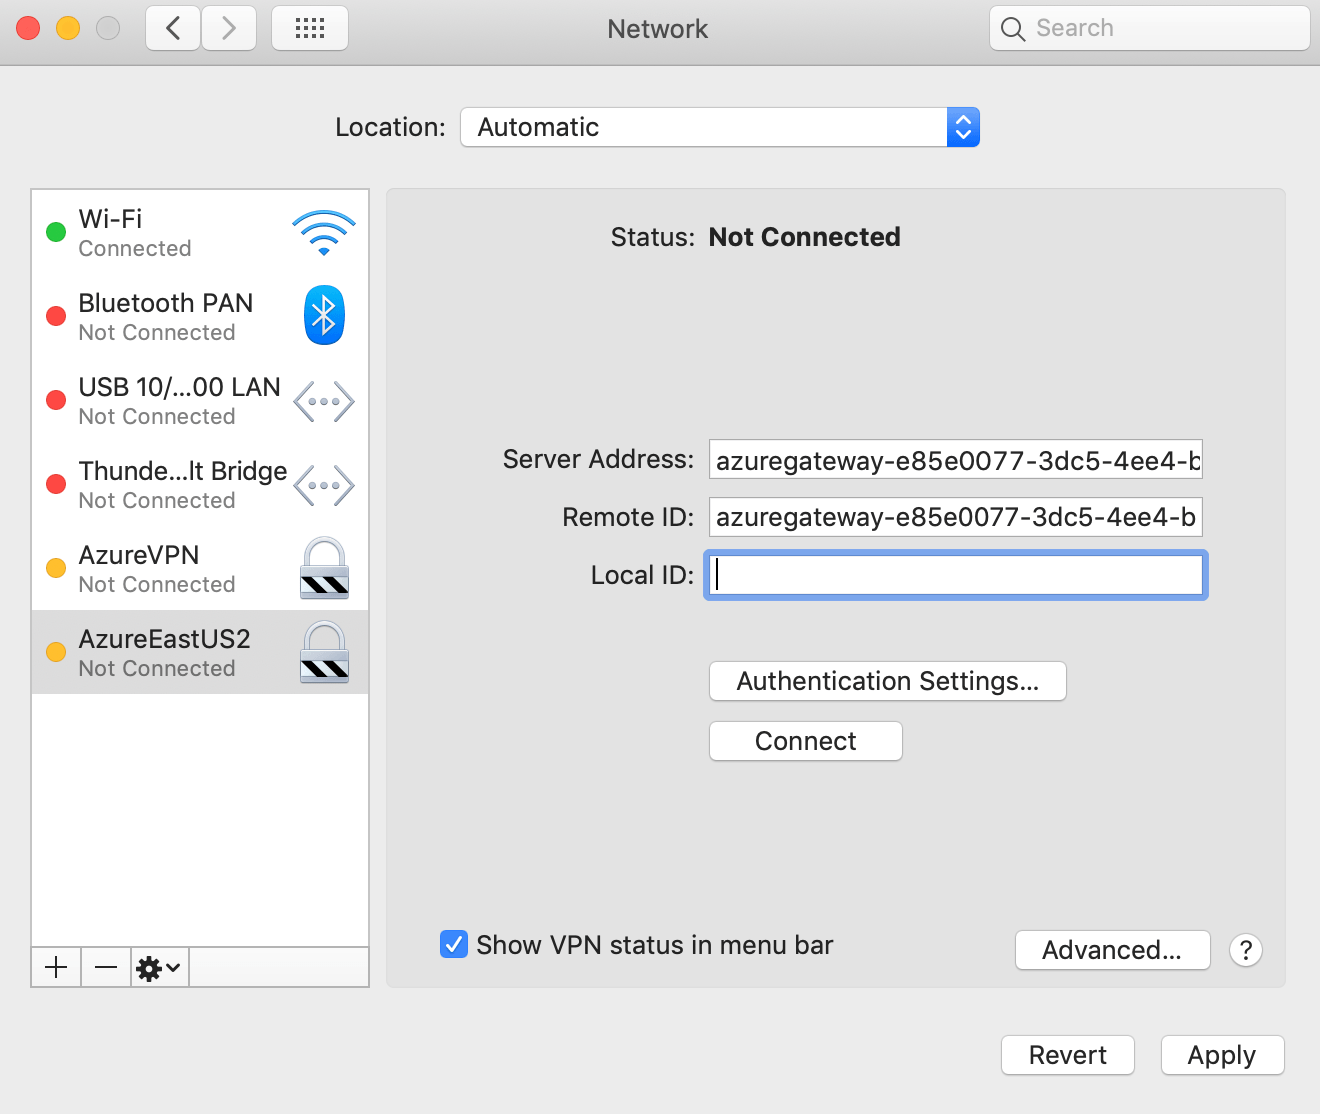
    <?xml version="1.0"?>
    <VpnProfile xmlns:xsd="http://www.w3.org/2001/XMLSchema" xmlns:xsi="http://www.w3.org/2001/XMLSchema-instance">
      <VpnServer>azuregateway-e85e0077-3dc5-4ee4-b904-d8120d1cc42f-f714bdf2950a.vpn.azure.com</VpnServer>
      <VpnType>IkeV2</VpnType>
      <CaCert>MIIDrzCCApegAwIBAgIQCDvgVpBCRrGhdWrJWZHHSjANBgkqhkiG9w0BAQUFADBhMQswCQYDVQQGEwJVUzEVMBMGA1UEChMMRGlnaUNlcnQgSW5jMRkwFwYDVQQLExB3d3cuZGlnaWNlcnQuY29tMSAwHgYDVQQDExdEaWdpQ2VydCBHbG9iYWwgUm9vdCBDQTAeFw0wNjExMTAwMDAwMDBaFw0zMTExMTAwMDAwMDBaMGExCzAJBgNVBAYTAlVTMRUwEwYDVQQKEwxEaWdpQ2VydCBJbmMxGTAXBgNVBAsTEHd3dy5kaWdpY2VydC5jb20xIDAeBgNVBAMTF0RpZ2lDZXJ0IEdsb2JhbCBSb290IENBMIIBIjANBgkqhkiG9w0BAQEFAAOCAQ8AMIIBCgKCAQEA4jvhEXLeqKTTo1eqUKKPC3eQyaKl7hLOllsBCSDMAZOnTjC3U/dDxGkAV53ijSLdhwZAAIEJzs4bg7/fzTtxRuLWZscFs3YnFo97nh6Vfe63SKMI2tavegw5BmV/Sl0fvBf4q77uKNd0f3p4mVmFaG5cIzJLv07A6Fpt43C/dxC//AH2hdmoRBBYMql1GNXRor5H4idq9Joz+EkIYIvUX7Q6hL+hqkpMfT7PT19sdl6gSzeRntwi5m3OFBqOasv+zbMUZBfHWymeMr/y7vrTC0LUq7dBMtoM1O/4gdW7jVg/tRvoSSiicNoxBN33shbyTApOB6jtSj1etX+jkMOvJwIDAQABo2MwYTAOBgNVHQ8BAf8EBAMCAYYwDwYDVR0TAQH/BAUwAwEB/zAdBgNVHQ4EFgQUA95QNVbRTLtm8KPiGxvDl7I90VUwHwYDVR0jBBgwFoAUA95QNVbRTLtm8KPiGxvDl7I90VUwDQYJKoZIhvcNAQEFBQADggEBAMucN6pIExIK+t1EnE9SsPTfrgT1eXkIoyQY/EsrhMAtudXH/vTBH1jLuG2cenTnmCmrEbXjcKChzUyImZOMkXDiqw8cvpOp/2PV5Adg06O/nVsJ8dWO41P0jmP6P6fbtGbfYmbW0W5BjfIttep3Sp+dWOIrWcBAI+0tKIJFPnlUkiaY4IBIqDfv8NZ5YBberOgOzW6sRBc4L0na4UU+Krk2U886UAb3LujEV0lsYSEY1QSteDwsOoBrp+uvFRTp2InBuThs4pFsiv9kuXclVzDAGySj4dzp30d8tbQkCAUw7C29C79Fv1C5qfPrmAESrciIxpg0X40KPMbp1ZWVbd4=</CaCert>
      <Routes>10.0.0.0/24</Routes>
      <Auth>EAPTLS</Auth>
      <VnetName>Strategy-VNet</VnetName>
      <VnetId>e85e0077-3dc5-4ee4-b904-d8120d1cc42f</VnetId>
      <ServerCertRootCn>DigiCert Global Root CA</ServerCertRootCn>
      <ServerCertIssuerCn>DigiCert Global Root CA</ServerCertIssuerCn>
      <VpnClientAddressPool>172.18.0.0/24</VpnClientAddressPool>
      <AadIssuer />
      <AadTenant />
      <AadAudience />
    </VpnProfile

    From this file, look for the value between tags , and enter the value in Server Address, as well as Remote ID.
ka02R000000btd7QAA_0EM2R000001IK7R.jpeg
  • Select the certificate for authentication. Click on Authentication Settings and a dialog box will appear, as shown below.
ka02R000000btd7QAA_0EM2R000001IK7W.jpeg
  • From the Authentication Settings drop-down, select None.
  • Select the Certificate radio button and click Select.
  • Once you are navigated to the root certificate folder in your keychain, select the certificate you added earlier in this step.
ka02R000000btd7QAA_0EM2R000001IK7q.jpeg
  • Select the appropriate certificate and click Continue.
  • In the Authentication Settings dialog, select Ok.
ka02R000000btd7QAA_0EM2R000001IK7v.jpeg
  • Enter the Local ID. This is the name of the certificate you just selected.
  • Click Connect. The VPN is connected and you should be able to access resources in that virtual network. You can connect or disconnect VPN from the menu bar as well.
ka02R000000btd7QAA_0EM2R000001IK85.jpeg

Comment

0 comments

Details

Knowledge Article

Published:

July 30, 2020

Last Updated:

July 31, 2020