EducationSoftwareStrategy.com
StrategyCommunity

Knowledge Base

Product

Community

Knowledge Base

TopicsBrowse ArticlesDeveloper Zone

Product

Download SoftwareProduct DocumentationSecurity Hub

Education

Tutorial VideosSolution GalleryEducation courses

Community

GuidelinesGrandmastersEvents
x_social-icon_white.svglinkedin_social-icon_white.svg
Strategy logoCommunity

© Strategy Inc. All Rights Reserved.

LegalTerms of UsePrivacy Policy
  1. Home
  2. Topics

KB485034: Set up the OneDrive application


Community Admin

• Strategy


This article provides steps for setting up the OneDrive app to deploy as a Community Connector.

Description 


Starting on November 9th, 2020, Microsoft announced that end users are no long able to grant consent to newly registered multi-tenant apps without verified publishers. 
To use the OneDrive connector, you must register an app to support OAuth authentication to Microsoft Azure. 
You are required to complete the following 4 steps for a successful configuration. 
  1. Register an OAuth app with single-tenant and grant permissions. 
  2. Deploy the connector. 
  3. Modify the configuration file of the OneDrive connector to support the single-tenant app. 
  4. Update the configuration file in all cluster nodes to avoid conflicts. 

Register the app

  • Log into Azure. For the Microsoft documentation, click here. 
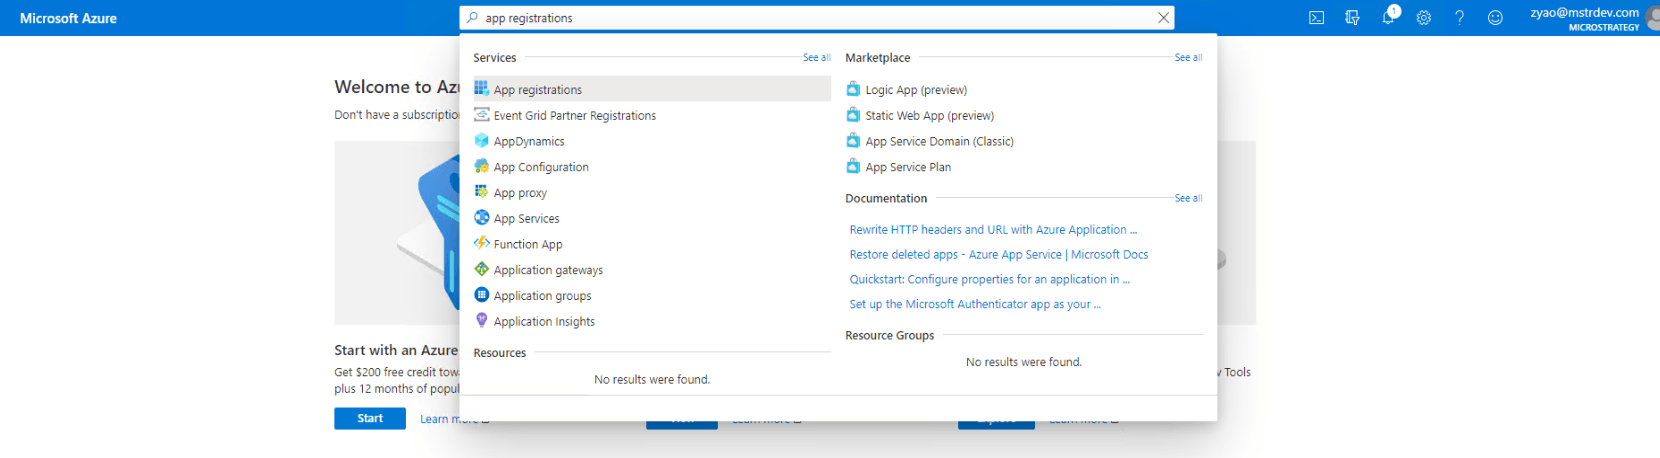
  • Navigate to App Registrations.
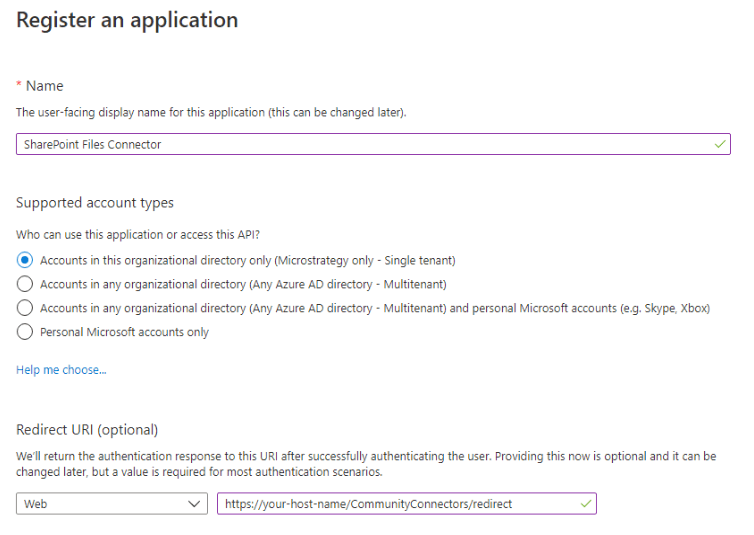
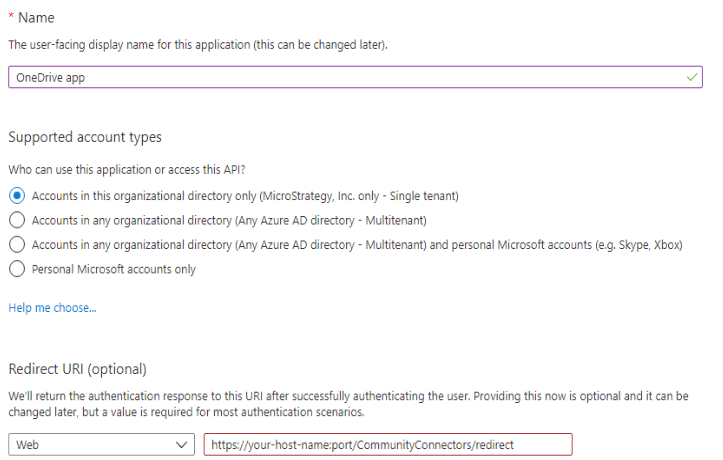
  • Go to New registrations > Single tenant account type.
  • Input the Redirect URI in the following format:
    
    https://your-host-name:port/CommunityConnectors/redirect
    

ka04W000001Iwm5QAC_0EM4W0000029FqE.jpeg
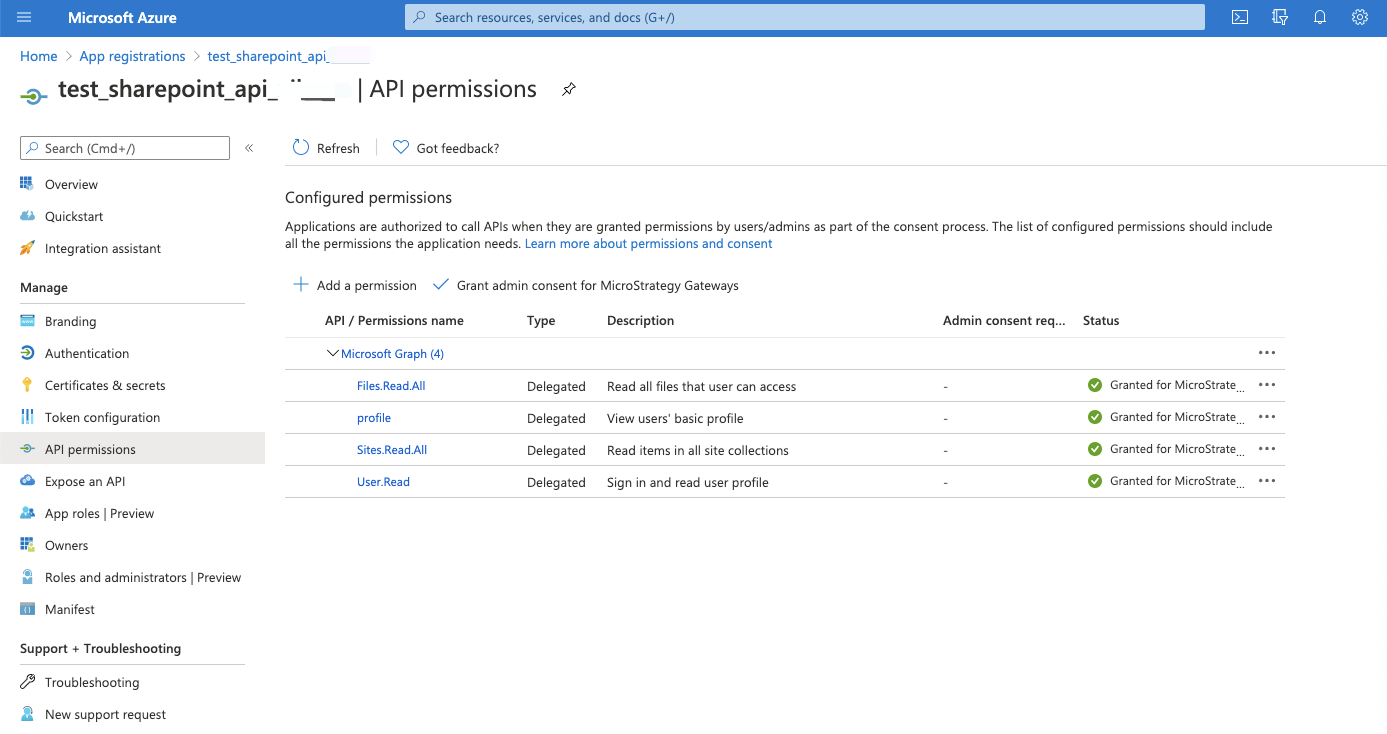
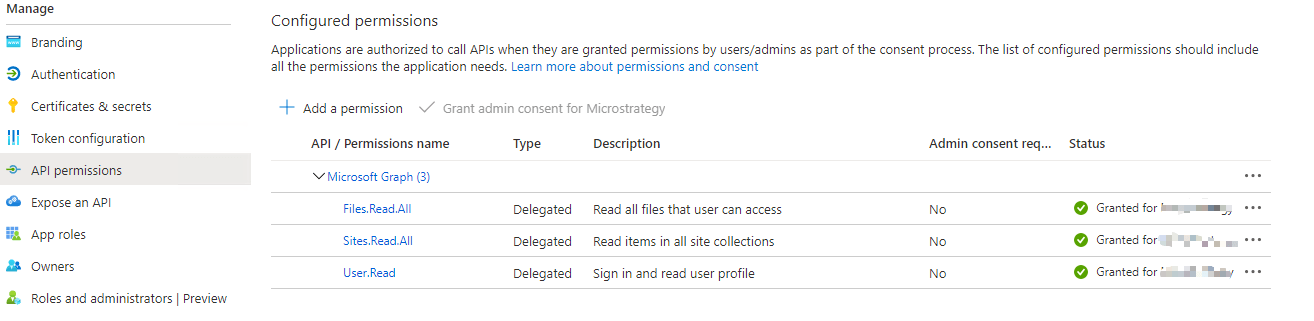
  • Click on the newly registered app and go to API permissions.
  • Add the following permissions in Microsoft Graph.
    
    Files.Read.All
    Sites.Read.All
    User.Read
    

ka04W000001Iwm5QAC_0EM4W00000286XR.jpeg
  • Ensure your Azure Admin grants consent for these permissions.
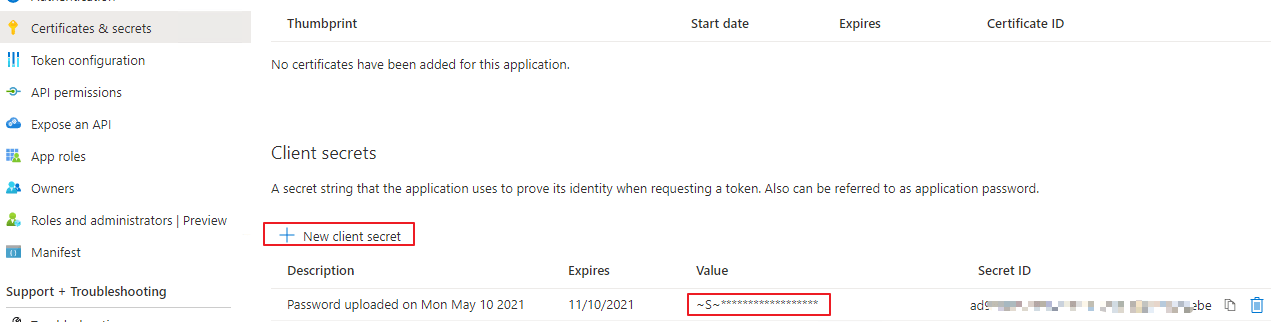
  • Click Certificates & secrets and create a new Client Secret. (Copy and save the value because they will not be displayed once you leave the page.)
ka04W000001Iwm5QAC_0EM4W00000286Xg.jpeg
  • Click Overview.
  • Copy and save the Application (client) ID and Directory (tenant) ID for later use.
ka04W000001Iwm5QAC_0EM4W00000286Xl.jpeg
ka04W000001Iwm5QAC_0EM4W00000286Xv.jpeg
ka04W000001Iwm5QAC_0EM4W00000286Y5.jpeg

Deploy the connector

  • Log into Strategy with the Administrator user.
  • In the user drop-down, open Preferences.
  • On Project Defaults, input the Link to Community Connectors with your Strategy Community Connectors Server URL.
  • Go back to the Home page.
  • Click Add External Data, scroll to the bottom, and click Deploy Community Connectors.
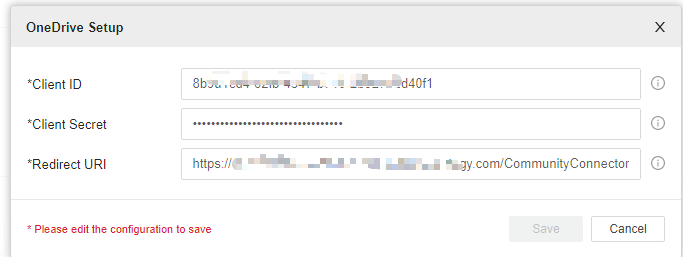
  • One the One Drive configuration, fill in the fields with the values from the Register App section.
ka04W000001Iwm5QAC_0EM4W00000286YF.jpeg

Modify the configuration file to support single tenant

  1. Go to the Community Connectors web server and edit the
    config.json
    file under
    webapps/CommunityConnectors/onedrive-cc/config.json.
  2. Find the properties and replace both of the common substrings with the Directory (tenant) ID you retrieved when registering the app.
    
    "oauth.authorize_uri": {
          "value": "https://login.microsoftonline.com/common/oauth2/v2.0/authorize",
          "editable": false
      },
    "oauth.token_uri": {
        "value": "https://login.microsoftonline.com/common/oauth2/v2.0/token",
        "editable": false
    }
    

Update the configuration file in all cluster nodes


Please refer to KB484387: Configure Community Connectors in a cluster environment.


Comment

0 comments

Details

Knowledge Article

Published:

May 19, 2021

Last Updated:

September 22, 2021