EducationSoftwareStrategy.com
StrategyCommunity

Knowledge Base

Product

Community

Knowledge Base

TopicsBrowse ArticlesDeveloper Zone

Product

Download SoftwareProduct DocumentationSecurity Hub

Education

Tutorial VideosSolution GalleryEducation courses

Community

GuidelinesGrandmastersEvents
x_social-icon_white.svglinkedin_social-icon_white.svg
Strategy logoCommunity

© Strategy Inc. All Rights Reserved.

LegalTerms of UsePrivacy Policy
  1. Home
  2. Topics

KB423699: How to enable WebDAV in Apache Server 2.4.x in Windows for multimedia widget


Tianfeng (Jimmy) Jiang

Quality Engineer, Principal • MicroStrategy


In MicroStrategy 10.x, you can access web folders shared with the WebDAV protocol that are hosted with IIS and Apache HTTP Server. This knowledge base article shows how to enable WebDAV in Apache server in Windows. 

In Strategy 10.x, you can access web folders shared with the WebDAV protocol that are hosted with IIS and Apache HTTP Server. KB45435  shows how to enabled WebDAV in Microsoft IIS and configure multimedia widget in Strategy Mobile 10.x. This technote shows how to enable WebDAV in Apache server in Windows. 
Prerequisite:

  1. Apache HTTP Server 2.4.x is installed and correctly configured in Windows machine. For more details, please visit http://httpd.apache.org.
  2. Strategy 10.x is installed in the same or different machine.  

Configuration Steps:

  • Load WebDav module in Apache Server configuration. 
    WebDAV module is installed with Apache server 2.4.x by default. Backup "%APACHE_PATH%/conf/http.conf" and then edit it, un-comment the following load and include statements to load WebDAV module as shown below:
    
    LoadModule alias_module modules/mod_alias.so
    LoadModule auth_digest_module modules/mod_auth_digest.so
    LoadModule authn_file_module modules/mod_authn_file.so
    LoadModule dav_module modules/mod_dav.so
    LoadModule dav_fs_module modules/mod_dav_fs.so
    LoadModule dav_lock_module modules/mod_dav_lock.so
    LoadModule setenvif_module modules/mod_setenvif.so
    
    # Distributed authoring and versioning (WebDAV)
    Include conf/extra/httpd-dav.conf

  • Create User & Password for WebDAV.
    For WebDAV authentication access, execute command below in CMD:
    
    htdigest -c "C:\Users\Administrator\Downloads\jimmy\Apache24\user.passwd" DAV-upload admin
    

    Sample output is as shown below:
    
    C:\Users\Administrator\Downloads\jimmy\Apache24\bin>htdigest -c "C:\Users\Administrator\Downloads\jimmy\Apache24\user.passwd" DAV-upload admin
    Adding password for admin in realm DAV-upload.
    New password: ********
    Re-type new password: ********

    This is to create a user "admin" with password "********" and stored it in file "%APACHE_INSTALLED_PATH%/user.passwd", under realm "DAV-uploa".
     
  • Configure WebDAV folder
    Created a “sites” folder under “%APACHE_PATH%/sites“. Edit “%APACHE_PATH%/extra/httpd-dav.conf”, add following content :
    
    Alias /sites "C:\Users\Administrator\Downloads\jimmy\Apache24\sites"
    
    <Directory "C:\Users\Administrator\Downloads\jimmy\Apache24\sites">
      
        Require all granted
        Dav On
    
        AuthType Digest
        AuthName DAV-upload
    
        Options Indexes
    
        AuthUserFile "C:\Users\Administrator\Downloads\jimmy\Apache24\user.passwd"
        AuthDigestProvider file
    
        # Allow universal read-access, but writes are restricted
        # to the admin user.
        <LimitExcept GET OPTIONS>
            require user admin
        </LimitExcept>
    </Directory>

    This is to enable the WebDAV access for “sites” folder, and use “user.passwd” file for authentication, under realm “DAV-upload” as well (AuthName DAV-upload).
     
  • Restart Apache Server
    Restart Apache server service. Now, WebDAV service is enabled in your server’s “sites” folder. 
     
  • Visit URL of sites folder in Web browser to validate if the configuration is correct. The URL should be like "http://[IP of Server]:[Port]/sites". For example, "http://127.0.0.1:8000/sites" as shown below:
ka04W000001EuA4QAK_0EM440000002JY2.png
  • Follow same steps as KB45435 > 3. Configure an XQuery database instance to retrieve web folder contents to create XQuery report and multimedia document.

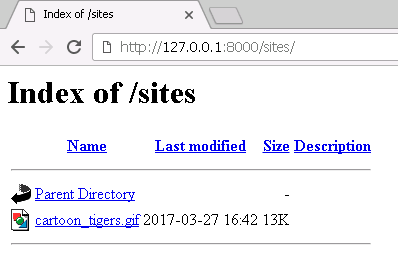
Note: refer to https://www.mkyong.com/apache/how-to-enable-webdav-in-apache-server-2-2-x-windows/ for more details.


Comment

0 comments

Details

Knowledge Article

Published:

May 11, 2017

Last Updated:

May 11, 2017